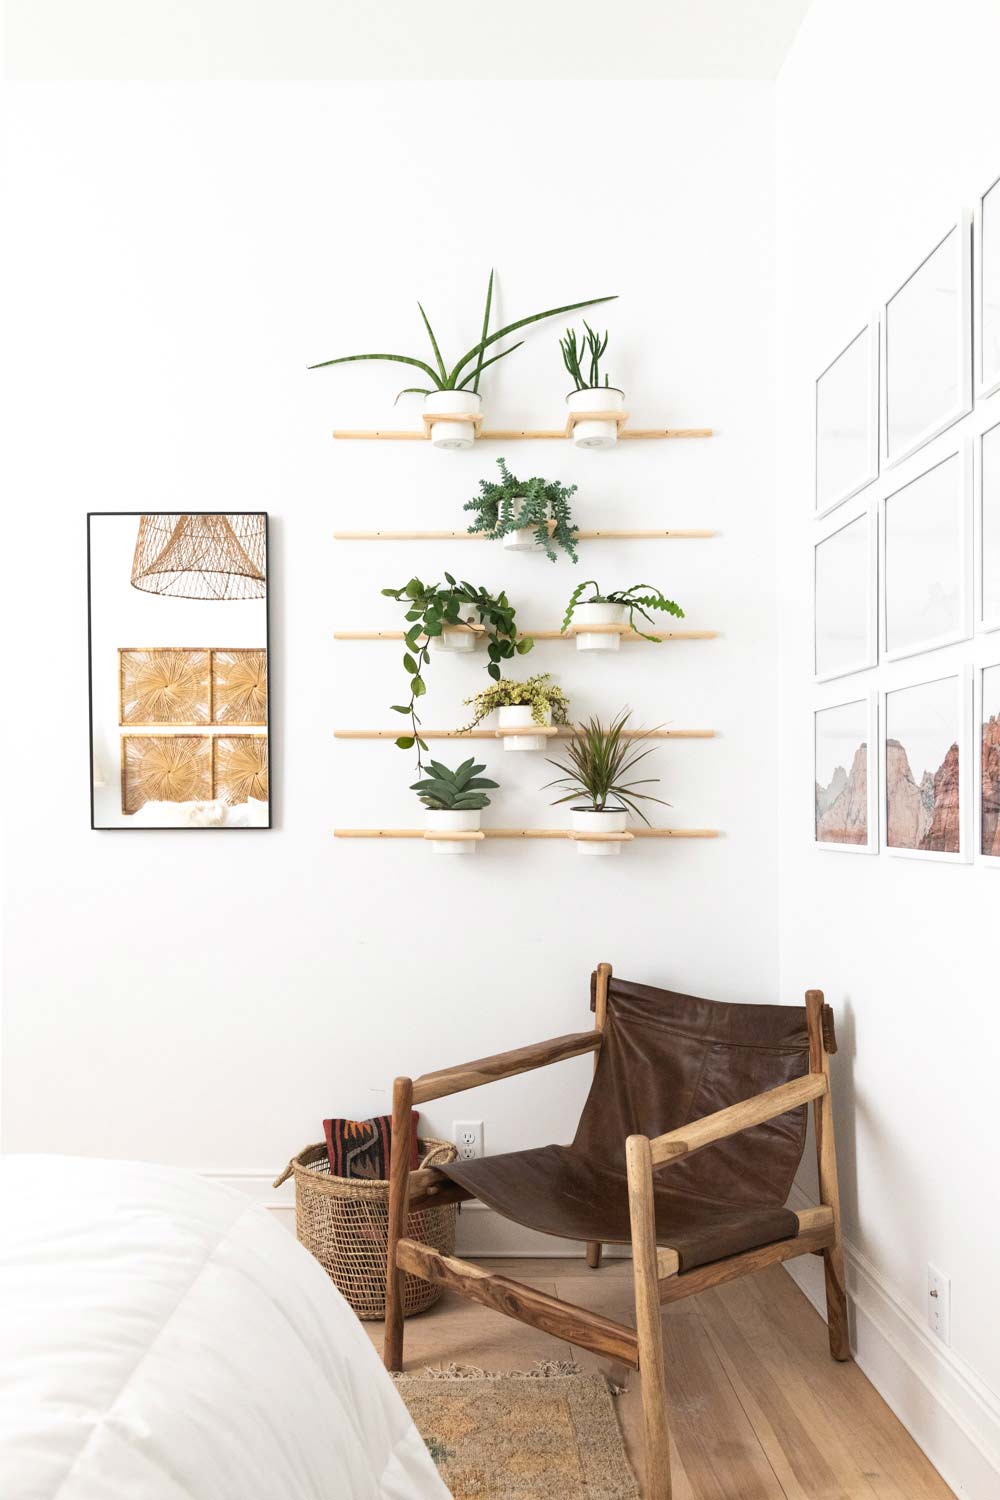
Are you guys ready for an easy statement wall DIY?! I love the impact of a living wall. Bringing plants into your house give it a life and energy that only living things can. If you’re a plant hoarder like myself, this project is a great way to bring a lot of plants into a small space and on a tiny budget.
This project was sort of inspired by a Netflix binge a few months ago. There was an episode with a guy name Tom Raffield, who does the MOST AMAZING wood steam bending. (It’s season 17 episode 3) Once it was in my brain, I just couldnt get it out. But, obviously not having steam bending experience, I had to improvise. I think that is the best part of creativity, just figuring stuff out. I knew that I wanted the design to be flush against the wall and then turn out to hold a planter and then turn back into the wall. And I wanted it to be impactful. I still love the trellis wall that I did in our old house (every time I see it my heart gets a little gushy) and a great way to bring small plants into your home is to find ways to use lots of them. Hence the repeating. That being said, how cute would just one of the rows be by the side of your bed, or on a small wall in your entryway? This cute project will work anywhere!!
It seems like you should be able to walk into a store and all of the wood is perfectly straight. Well friends, that only happens at the Home Depot in heaven. Unfortunately that means for us mere mortals. we need to check our wood before we buy it. Dowels are one of the easiest types to check. All you have to do is lay them on the ground and give them a slight nudge. You’ll be able to tell really quickly the ones that roll correctly (those are the straight ones!) and the ones that cant complete a full rotation (those are the bent ones!) For a project like this where we are using multiple lines that need to line up and be level, a crooked dowel will stand out like a sore thumb! Here is your measurements and angles:
The trickiest part of this project is cutting the angles in the dowels so that when they are joined together the whole piece is straight and level. This isnt a hard thing when you are building something out of square or rectangular pieces, but round dowels are a whole different story. Because you are cutting the angles on both ends of the pieces, if it’s off then the shape gets wonky. But never fear my friends, after multiple failures and attempts at cutting them right, I figured out the easiest hack!! How To Easily and Correctly Cut Angles in a Round DowelThe first thing that you want to do is set a jig up on your miter saw. A jig is a piece of wood that is clamped in place so that when you put your piece to be cut, it sits against the clamped wood. This makes it so that every cut is the same. It also makes things go quicker because you dont have to measure and mark each individual piece. Life changing info here folks. Cutting your first 45 degree angle is easy, you just put the dowel against the fence of your saw (the back part) and cut. Cutting the second angle is trickier, so let me show you the hack! Take one of your off cuts and place it, long side, against your jig. That way, when the tip of your dowel (where the first cut is) touches the jig, this scrap piece meets up with it and forms a 90 degree angle.
This does 2 things. It makes it so the dowel is straight so that the second cut is made correctly. It also keeps the point from your first cut from being mashed into the jig, or wiggling around.
Cool right!?
Determining the right size space for your planterThere are a world of different planters that you can use in this project. I love the IKEA Citronsyra for this project because they looks so great with their curvy shape, but if you have other planters that you love, it’s really easy to make them work as well. Just make sure they arent straight up and down because they’ll just slip through the hole. Measure the diameter of the opening on your planter and subtract 3/4″. This is the size you want the space for your planter to sit. I HIGHLY recommend building one of the holders and making sure that the planter sits the way you like before building all of them. To join my dowels together I used wood glue (I love Titebond III) and pin nails. The pin nails do a great job of holding everything in place while the glue dries.
To hang the planters start by predrilling the screw holes that will hold it onto the wall. I LOVE the look of having the screws visible for this project. Because of the way that the dowels will line up on your wall, you will want to make sure that they are drilled the same on all of the planters.
Once you’ve got your holes predrilled, hold the planter up to the wall and level it. Make sure that it is leveled side to side, and front to back. Drill through the hole in the dowel into the wall. This is where you need to place your anchor if you didnt hit a stud. We have tried SO MANY different types of anchors, our favorite are Hillman (they’re the ones with the grey rubber on them.) Set your anchor following the instructions of the box and then screw through the front of the dowel into the anchor.
When you are setting your other rows, use a large level on the edge of the dowels to make sure that they all line up!
Plant your pots with your favorites and stick em in! I love how easy it is to change where they are placed, you can swap them around until you get the perfect layout. (I recommend putting the tall guys at the top and the spilly ones in the center!)
Want more planter ideas? I’ve got a bunch!! You can check them all out here! Pssst, this Trellis Wall is my favorite! Any questions? Leave them below!!
The post DIY Living Wall | Wooden Dowel Plant Holders appeared first on Vintage Revivals. Via https://vintagerevivals.com/diy-living-wall-wooden-dowel-plant-holders/
0 Comments
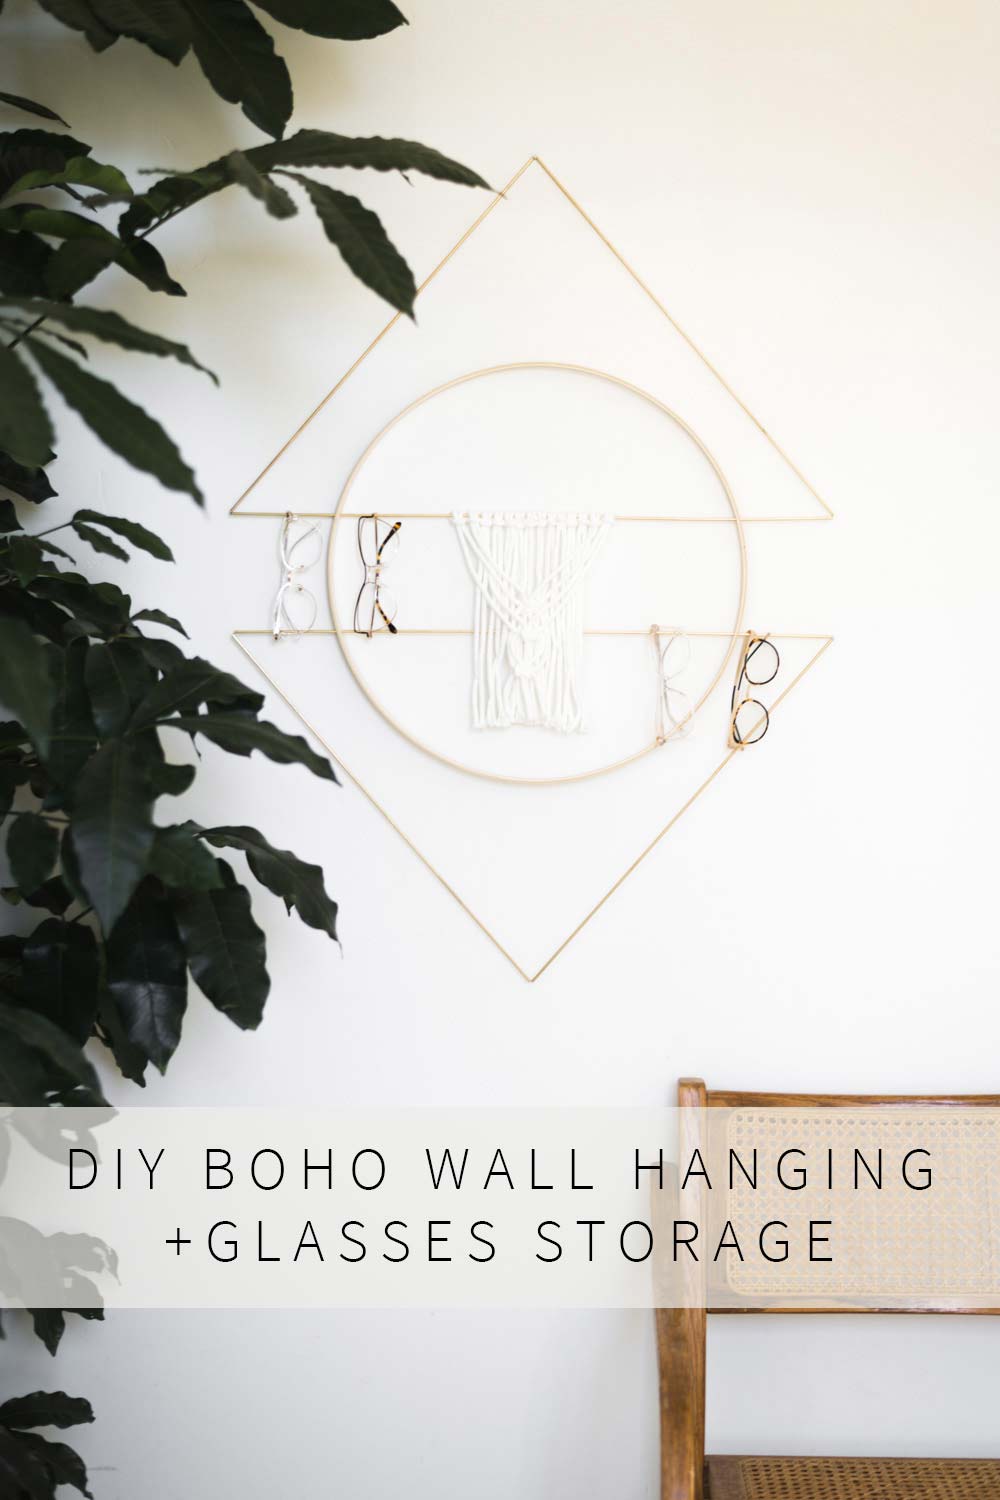
This cute boho inspired DIY macrame, wood, and brass wall decor has a secret! It doubles as storage for your glasses!! In this post I’m going to show you step by step how to make your own in less than 15 minutes!
Hey hey!! I am so excited to share today’s project! I feel like the last 2 years we’ve been in the thick of renovations and doing big/structural/forever projects, and while that is fun, there is seriously no better feeling than doing a quick DIY that looks like a million bucks! My partners for this project Zenni (you’ve heard of Zenni right? Killer prescription glasses at insanely low prices? Like $10 low What I ultimately came up with is something that looks like art, but can double as storage. We are checking allll the form + function boxes today friend! Supplies You’ll Need:18″ Quilting Hoop (You will only be using the interior hoop for this project!)
Tools You’ll Need:Pipe Cutter Step 1: Cut your pipeUsing your pipe cutter, or a metal cut off blade on your saw, cut your brass pipe to the following lengths (2) 24″ and (4) 20″ . If you use a saw blade, you’ll probably need to clean up the rough edges a little. Be aware that they can have little burrs on them that are sharp! Step 2: Drill Through Your HoopWe want to create 2 parallel lines with our ” brass pipe through the hoop. The easiest way to do this is to mark and drill one side of the hoop.
Then slide your tube through to the other side and using the level mark where the second hole needs to be drilled. Our pipe is 1/8″ so that is the size of the drill bit that you will want to use!
To mark your second set of holes, measure up from the first hole 6″ and mark. Then repeat the first step where you drill the hole, use the level, mark and drill the second hole. The distance should be the same between the sets of holes.
Step 3: Make the Brass TrianglesIn step 3 you are going to use the remaining pieces of brass to create triangles. Thread your wire through all 3 pieces, twist them together and push the wire tails back into the pipe. This is a really important step, if you just trim them they wont have enough strength to hold the weight and shape of our piece, especially when it’s loaded up with all of the cute glasses from Zenni!
Step 4: Cut the RopeCut the rope for your macrame into 18″ pieces Step 5: Add the RopeAdding the rope for macrame is SO EASY! Fold your rope in half, place the folded section over the top of the brass tube (from the front, folding over the back)
Pull the rope through the loop that was created when you folded it and tighten it against the brass pipe! Ta Da!!! You’re basically a macrame maven!
Repeat 9 times. *Optional* Cut the 4 outside pieces 24″ long and tie some basic knots to add more detail to the front of your piece! Step 6: Hang!When you are hanging your piece, you’ll want to hang it from the top triangle, and also add a nail just under the horizontal brass piece that is holding the rope to keep it from sagging a little.
You can add up to 16 pairs of glasses to your piece and believe me when you see all of the awesome frames that Zenni has you’re going to die. When you see that you can order 10 pairs for the price you would spend on a single pair elsewhere you miiiiight go a little overboard like I did. They just released a bunch of new styles, and if you are on the hunt for some fun tortoise shell frames, they have got SO MANY GOOD ONES! Happy making! xo, The post Boho Macrame Wall Hanging + Secret Storage!! appeared first on Vintage Revivals. Via https://vintagerevivals.com/boho-macrame-wall-hanging-secret-storage/ Hey friend, want to have a heart to heart? The most important part of Vintage Revivals, surprisingly isnt the Merc, or my post on how to paint furniture. It’s my Real Life Story. It’s been a while since I’ve updated it and while I wasn’t initially intending this post to be part of it, I feel like it needs to be. Cause struggling and being human is way easier when someone else says “Hey girl, me too.” I dont know what your last year has been like, but if I had a word for 2018 it would be STRESS. Like that, in all caps, screaming in your face. Over the last few years I’ve felt it compounding, but this last year it was overwhelming. I found myself paralyzed in anxiety, brimming with anger, and disconnected, jealous, and negative. (Which is very unlike my rose colored glasses way of living.) I had a few irrational outbursts, I had stress induced psoriasis patches all over my body, I very intensely thought about driving my car into a wall one night. The crazy and most frustrating part is that I tried everything that I could think of to find relief. Hormone therapy, actual therapy, change in diet, sticking to a schedule, meditation, exercise, podcasts, books, if it was suggested to me I tried it. And nothing made it better. Every time I cut my hair my sisters were worried I was going to buzz it Britney circa 2007 style. Have you ever been in a place like this? Where you’ve pulled your boot straps up so high that you’re wearing them like suspenders and yet, you are still there, in the garbage? GAH! It is the worst feeling like you’re letting everything and everyone around you down. Man, if you have my heart goes out to you. Maybe we should start a suspenders club? For me, I’ve learned, is that it wasnt about the circumstances that were going on (maybe we’ll talk about those soon). What really was happening is that sometime along the way I shifted my spirituality into neutral. Spoiler alert! It seems to be when you put something in neutral, it eventually coasts to a stop and that is what happened. I had stalled out. For those that don’t know, I’m a member of the Church of Jesus Christ of Latter Day Saints. My faith is what has rescued me from the seemingly unreachable darkness. Understand the Atonement of Jesus Christ and the power that it has to bring grace and purpose to my life changed everything. After experiencing all of the miracles that we have over the years, you would think that I would be set on the right path and have all of the energy in the world to endure whatever ups and downs life throws at me, but man it just is not that way. I was still going to church, Court and I are still missionaries for the 12 Step Program, and still doing the “things” but trying to restart some spiritual momentum out of sheer self loathing is just not the way that it works. In October I went to a hypnotherapy session that changed everything. It was probably the most sacred and spiritual experience that I’ve ever had. I can’t share all of it, but during the session, I had this huge weight of darkness descend on me. As I focused on it I could feel it, like a thick black mist, intertwining itself around every part of my body. My therapist had me project the feeling outside of my body and asked me what shape it took on. It was like I was staring at a mirror image of myself, but instead of skin and clothing it was a faceless shadow of tumbling black smoke staring back at me. As I faced it, those familiar feelings of dread, stress, hatred, anger, jealousy, self-will, pride, resentments, and sadness intensified and the smoke grew larger and larger until it was no longer the shape of me, but just a huge swirling black mass of despair. My therapist had me directly ask why it was there, and with a laugh and an energy that I recognized as Satan it replied “because you allow me to be”. That son of a #&*%$ Slowly, almost undetectably I had let all of these garbage thoughts and feelings take seed in my life and they grew and grew and grew until I found myself in this horrible place. Never has the term enemy of my soul meant more to me. I dont know if you know this, but when I started my blog I had never DIYed a thing in my life. I had very little confidence in anything, especially myself, and what little I did have was sucked into the dark hole of Court’s addiction. I was an absolute shell of a person. When I stumbled one day upon the world of DIY blogs, it changed everything! These wonderful, relatable, awesome women shared their knowledge with me and made me feel like I could do something scary. It unlocked a talent that had been completely undiscovered and quite literally altered the course of my life. A few months into the blog I knew that I needed to share our struggle with addiction. At that point Court had only been sober for a few months, but he was so different than any other time he had been clean, that I didn’t hesitate to believe that this time really was different. From the moment of being willing to be vulnerable things changed for me. I learned who I was, and how God speaks to me. I knew without a shadow of a doubt that the reason that I had this gift was to bring people to the blog so that I could share with them hope, and confidence, and happiness. Maybe in a thrifted dresser, maybe in a relationship, maybe in God. But always that change is real and everything can be made better. That purpose unlocked my heart. But over the years, that perspective shifted. If you ask me point blank, that is still the answer you’ll get, but in my heart it changed. It became about me, not about you. I dont know if the content really changed all that much, but the energy and reason behind it did. I would be interested to know for those long time readers, if you’d noticed. So for the last little while, I’ve focused on finding my Savior and my peace and my perspective again. It has become my number one priority. It never ceases to amaze me that He is always there. ALWAYS! Even when I turn away from him, even when I struggle and try to do things on my own and make a mess out of the path that he set my life on, he is still there! Through this journey I’ve dedicated more time to going to the temple and reading the Book of Mormon. I’ve cut out everything in my life that doesn’t fill me with hope and happiness (I’m looking at you Netflix) and my heart has been changed. One of my favorite quotes by President Benson says “When we put God first, all other things fall into their proper place or drop out of our lives. Our love of the Lord will govern the claims for our affection, the demands on our time, the interests we pursue, and the order of our priorities.” It’s quite miraculous how that happens. I feel like I know what my Heavenly Father wants from me and as I am willing to trust him and move forward in faith that he will work the miracle for me to become whatever he intends. And as for the enemy of my soul, whenever I am feeling frustrated or defeated I read from the Book of Mormon, 2 Nephi 4:18-35 18 I am encompassed about, because of the temptations and the sins which do so easily beset me. 19 And when I desire to rejoice, my heart groaneth because of my sins; nevertheless, I know in whom I have trusted. 20 My God hath been my support; he hath led me through mine afflictions in the wilderness; and he hath preserved me upon the waters of the great deep. 26 O then, if I have seen so great things, if the Lord in his condescension unto the children of men hath visited men in so much mercy, why should my heart weep and my soul linger in the valley of sorrow, and my flesh waste away, and my strength slacken, because of mine afflictions? 27 And why should I yield to sin, because of my flesh? Yea, why should I give way to temptations, that the evil one have place in my heart to destroy my peace and afflict my soul? Why am I angry because of mine enemy? 28 Awake, my soul! No longer droop in sin. Rejoice, O my heart, and give place no more for the enemy of my soul. 30 Rejoice, O my heart, and cry unto the Lord, and say: O Lord, I will praise thee forever; yea, my soul will rejoice in thee, my God, and the rock of my salvation. So what does all of this mean!? Hahaha man I have no idea. But I do know that Vintage Revivals always going to be about projects and paint and trips to Home Depot. But if I’m creating that content with love, awareness, and perspective-I believe that it can create a deeper connection and that is what the whole point behind all of this is. To know that none of us are alone in our bad bathroom tile, or in our imperfect lives. If you’ve made it this far you get 10 Vintage Revivals points and a huge heartfelt thank youuuuu! Thank you for letting me share about where I’ve been cause man, what a lonely and crappy place that is. And thank you for letting me figure this whole thing out. You are wonderful!! If you would like to learn more about the LDS 12 Step Addiction Recovery meetings, you can get more info for meetings in your area here. If you’re interested in receiving a free copy of the Book of Mormon, I would love to send you one! Shoot me an email at [email protected]! Love your guts guys!!
The post Real Life Story Update 2018 Edition appeared first on Vintage Revivals. Via https://vintagerevivals.com/real-life-story-update-2018-edition/ |


 !) challenged me to create a storage solution for 10 pairs of their cute glasses and man it felt great to get the creative juices flowing again! So glasses storage, what does that look like?! We obviously were not going to go the optician office route. My first thought was to do some sort of box, but that seemed kind of meh. The next idea was to do a mini version of my
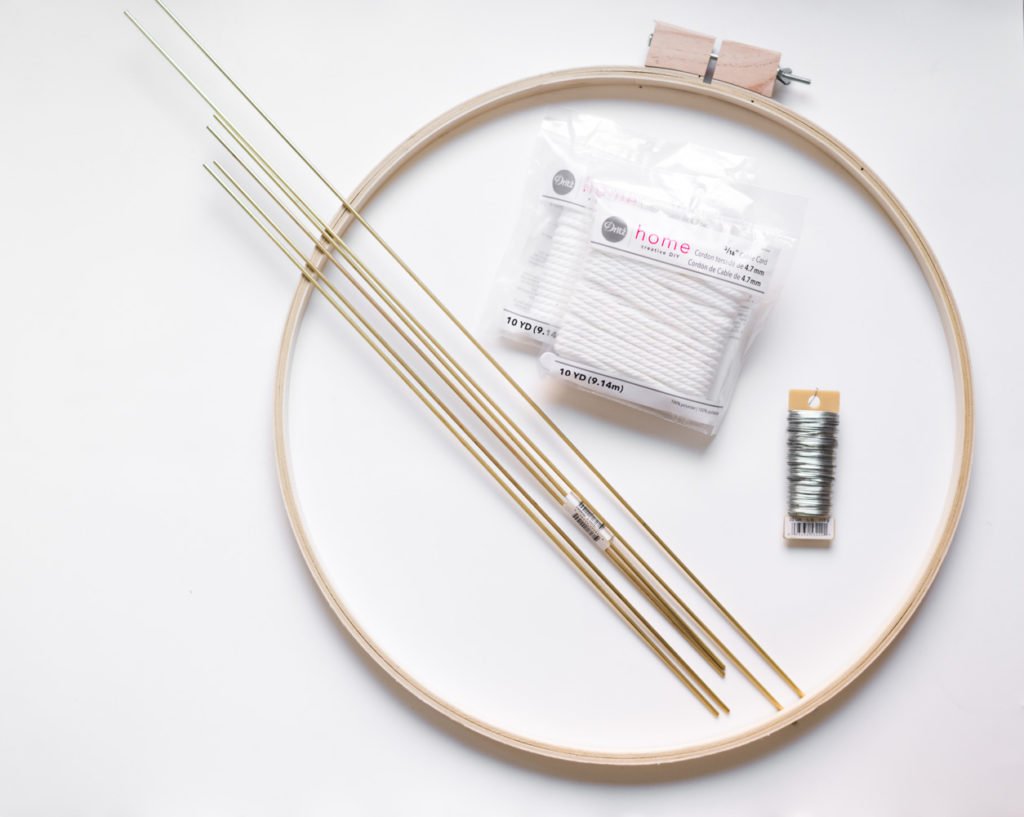
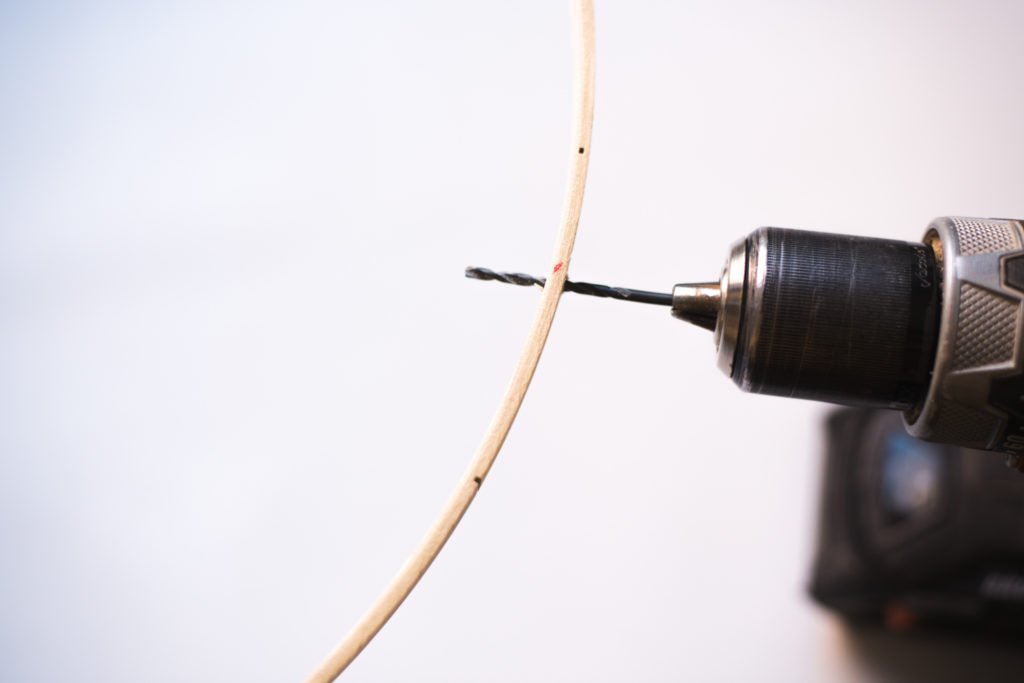
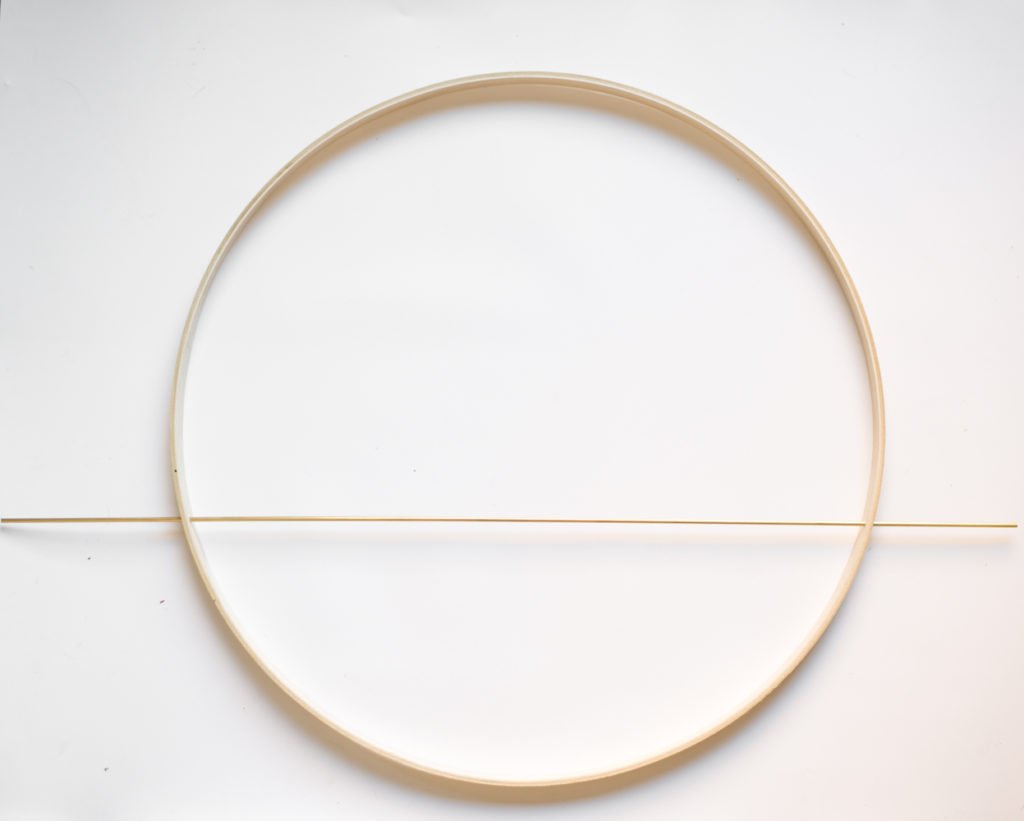
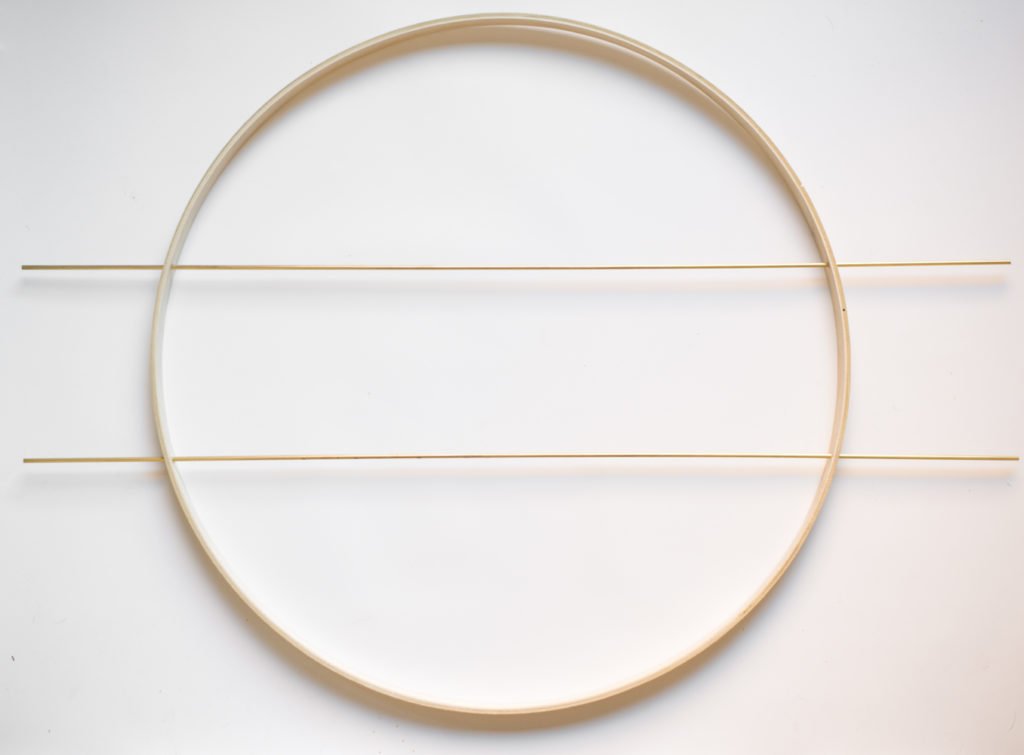
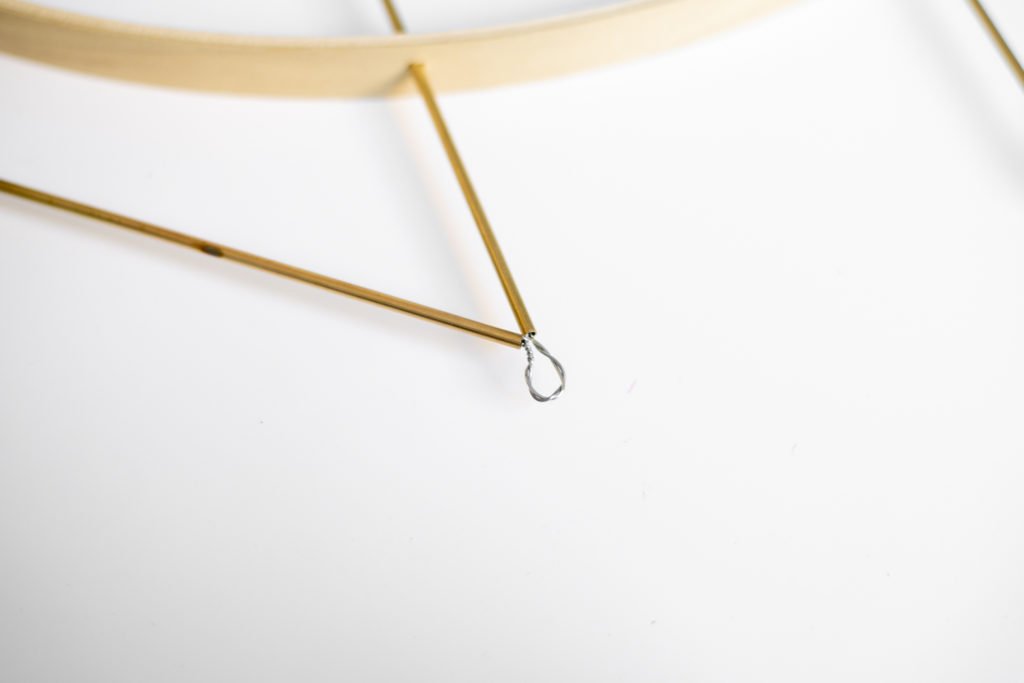

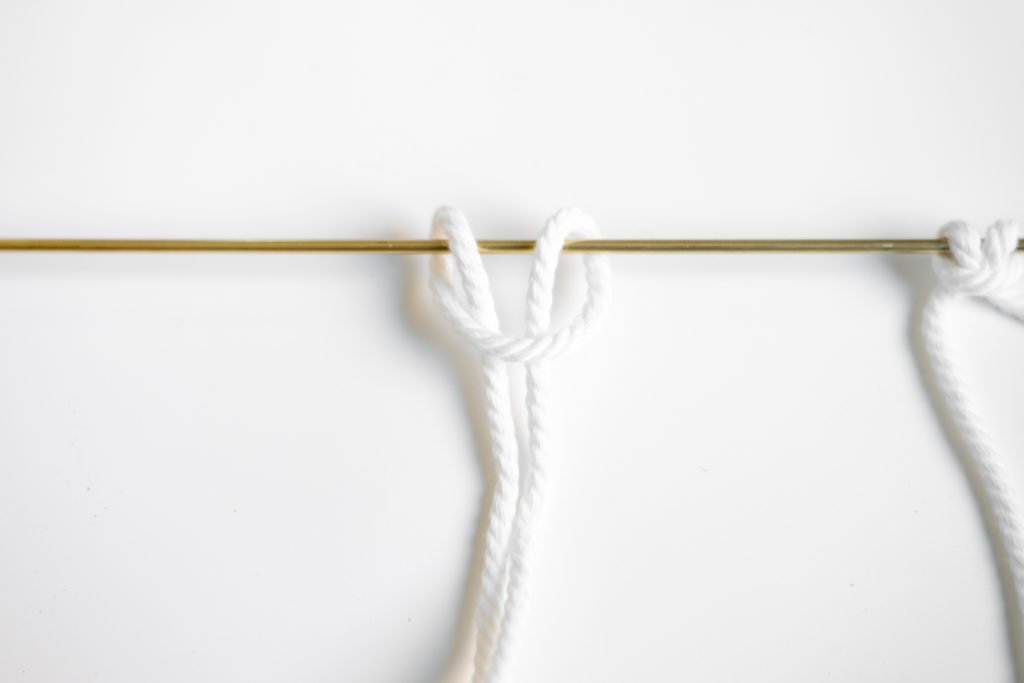
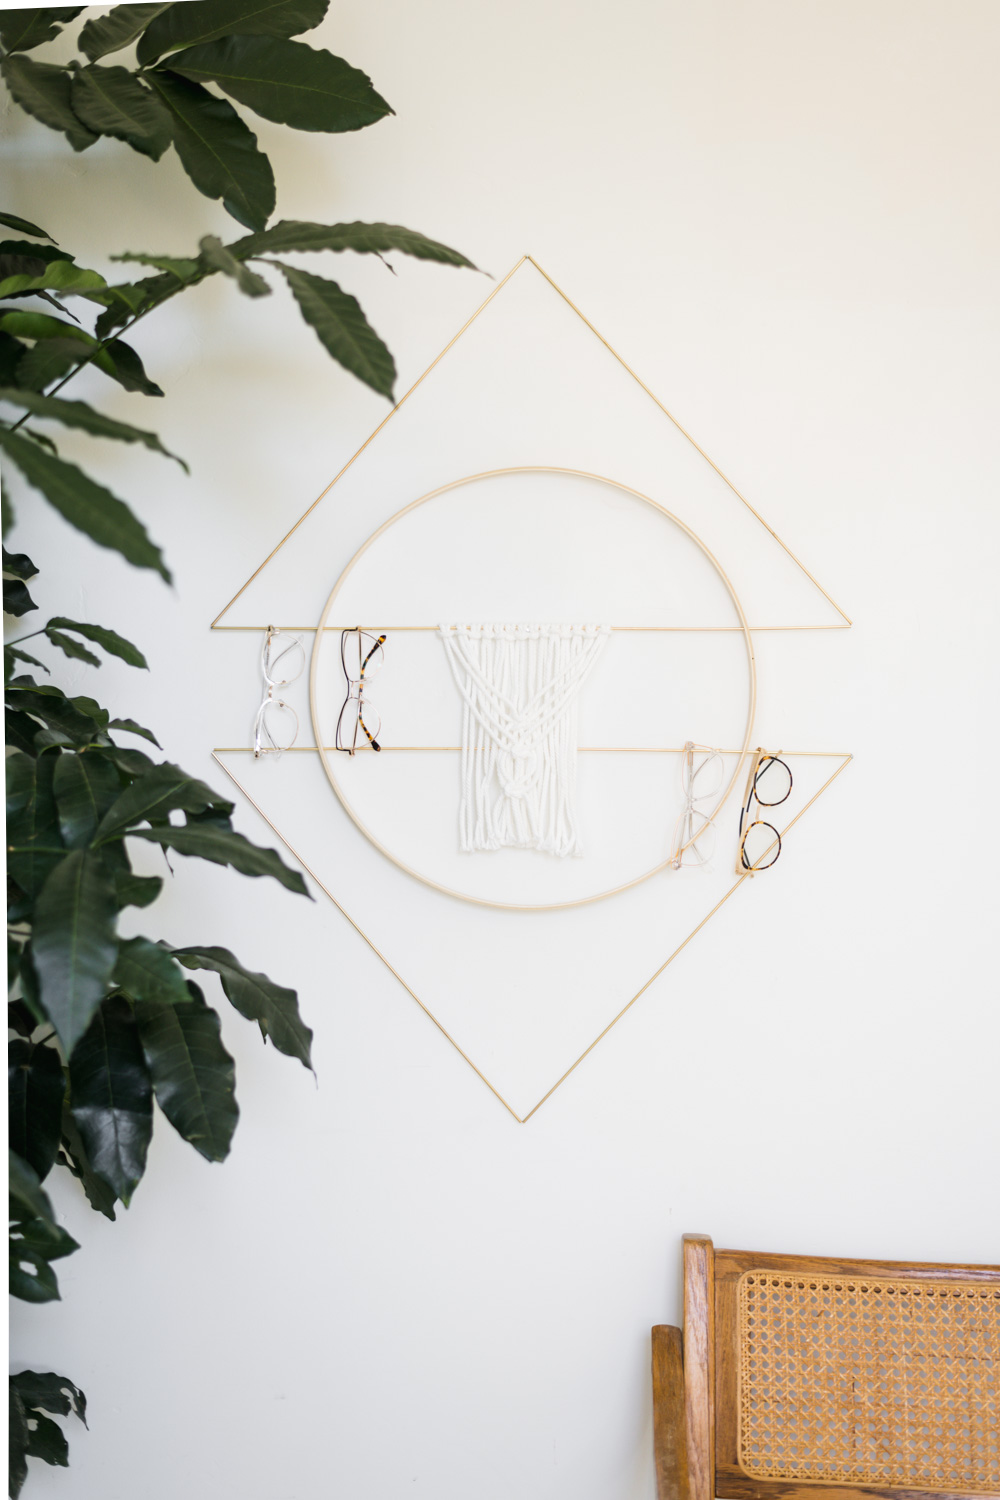
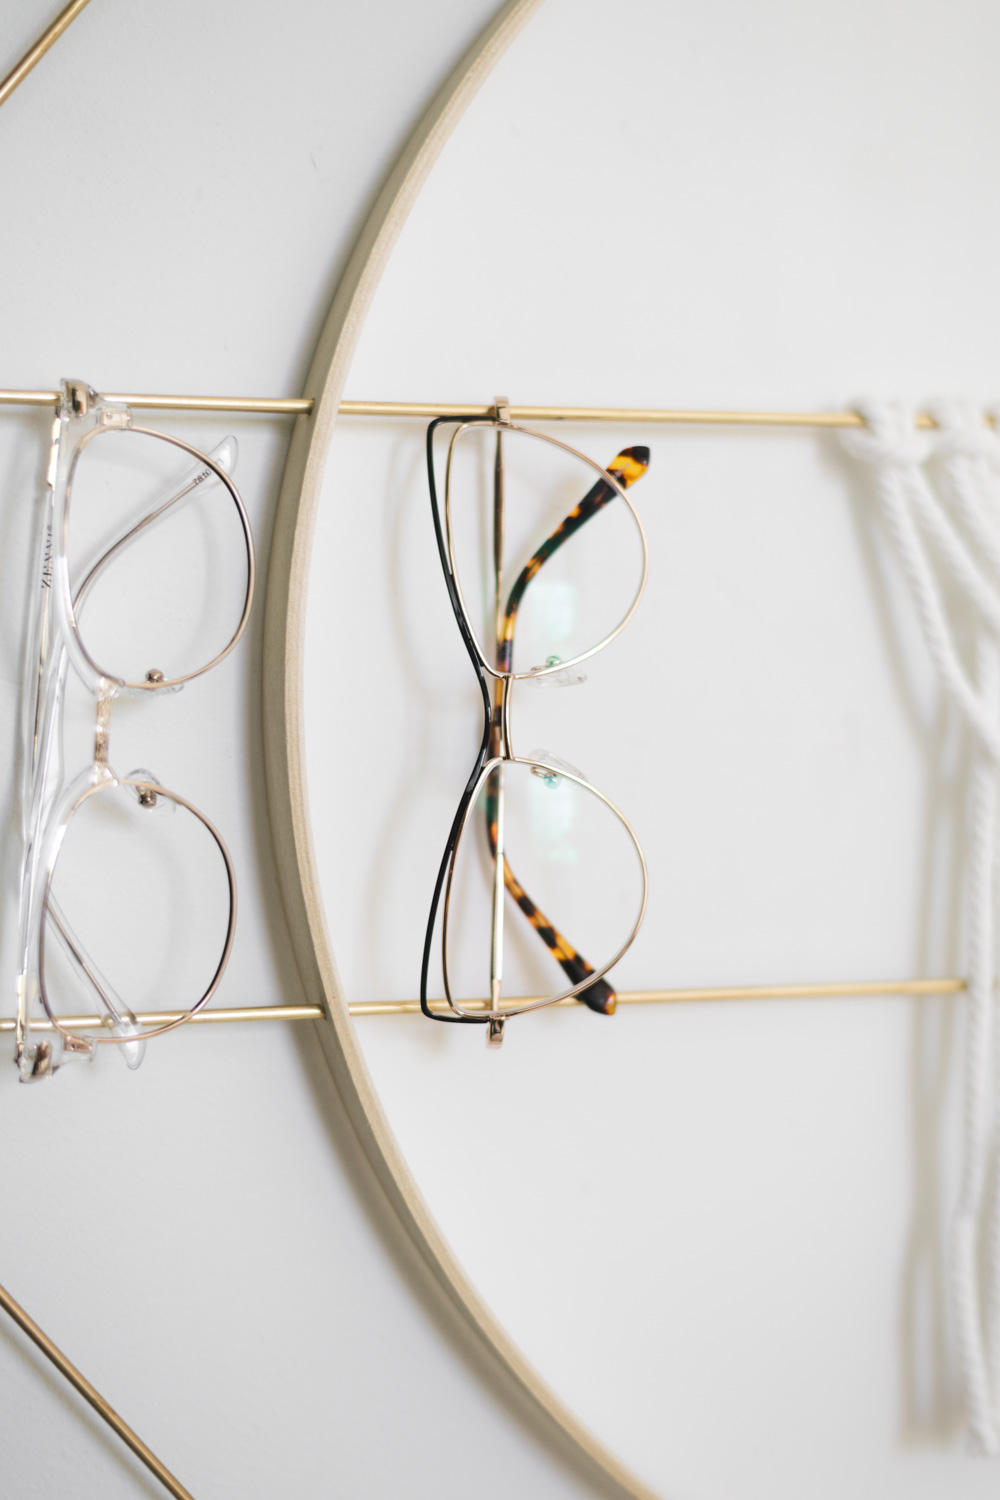
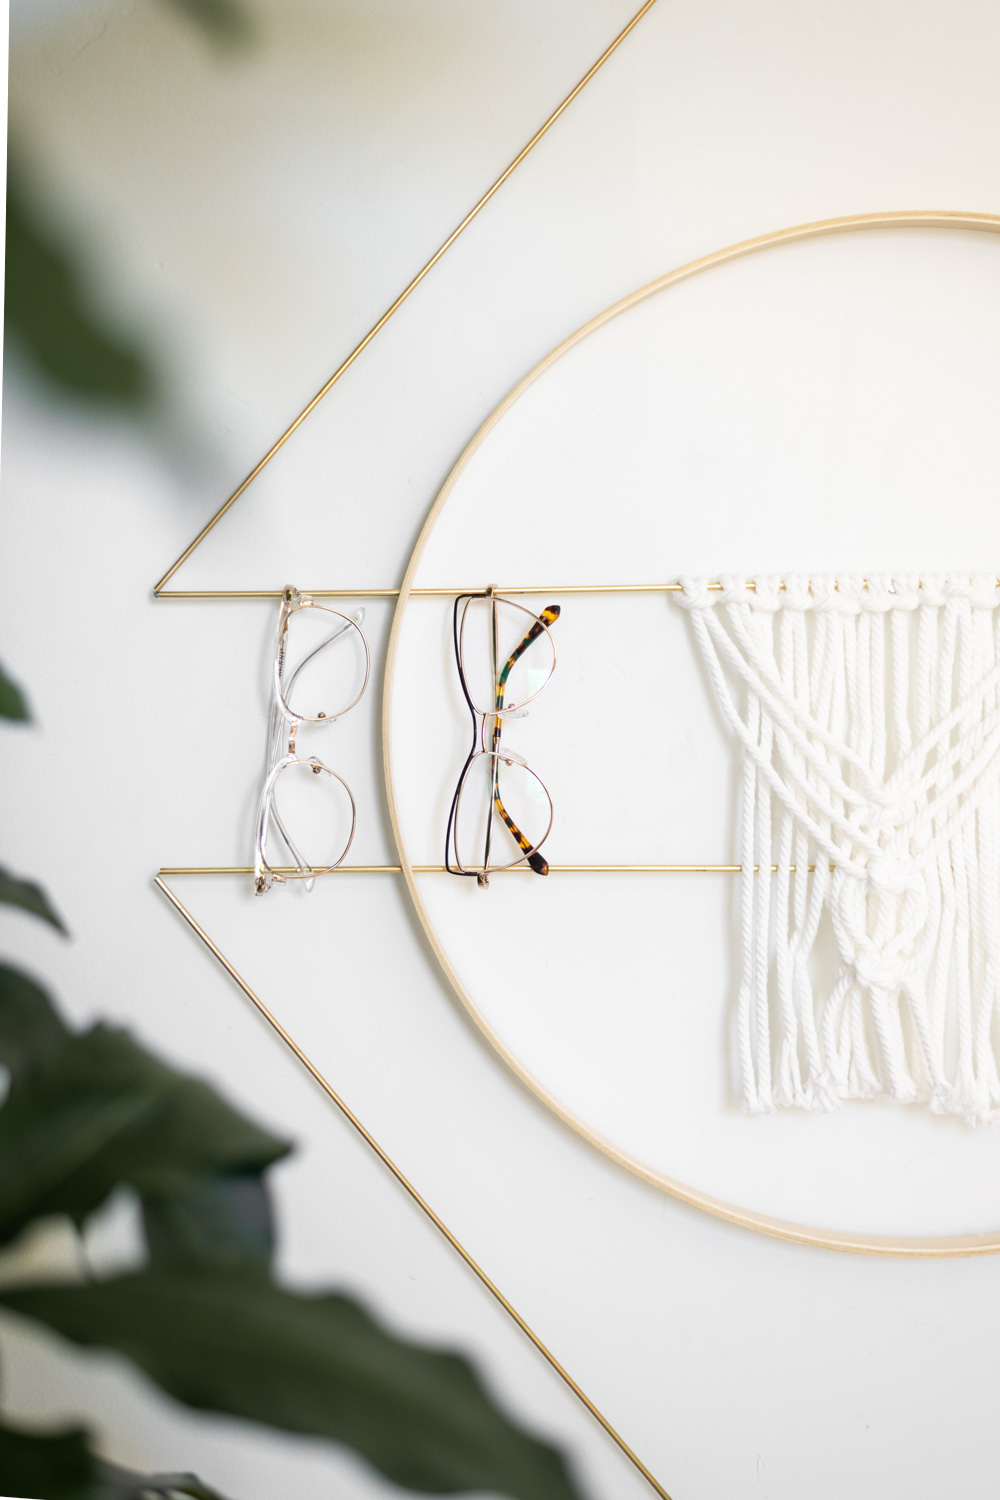
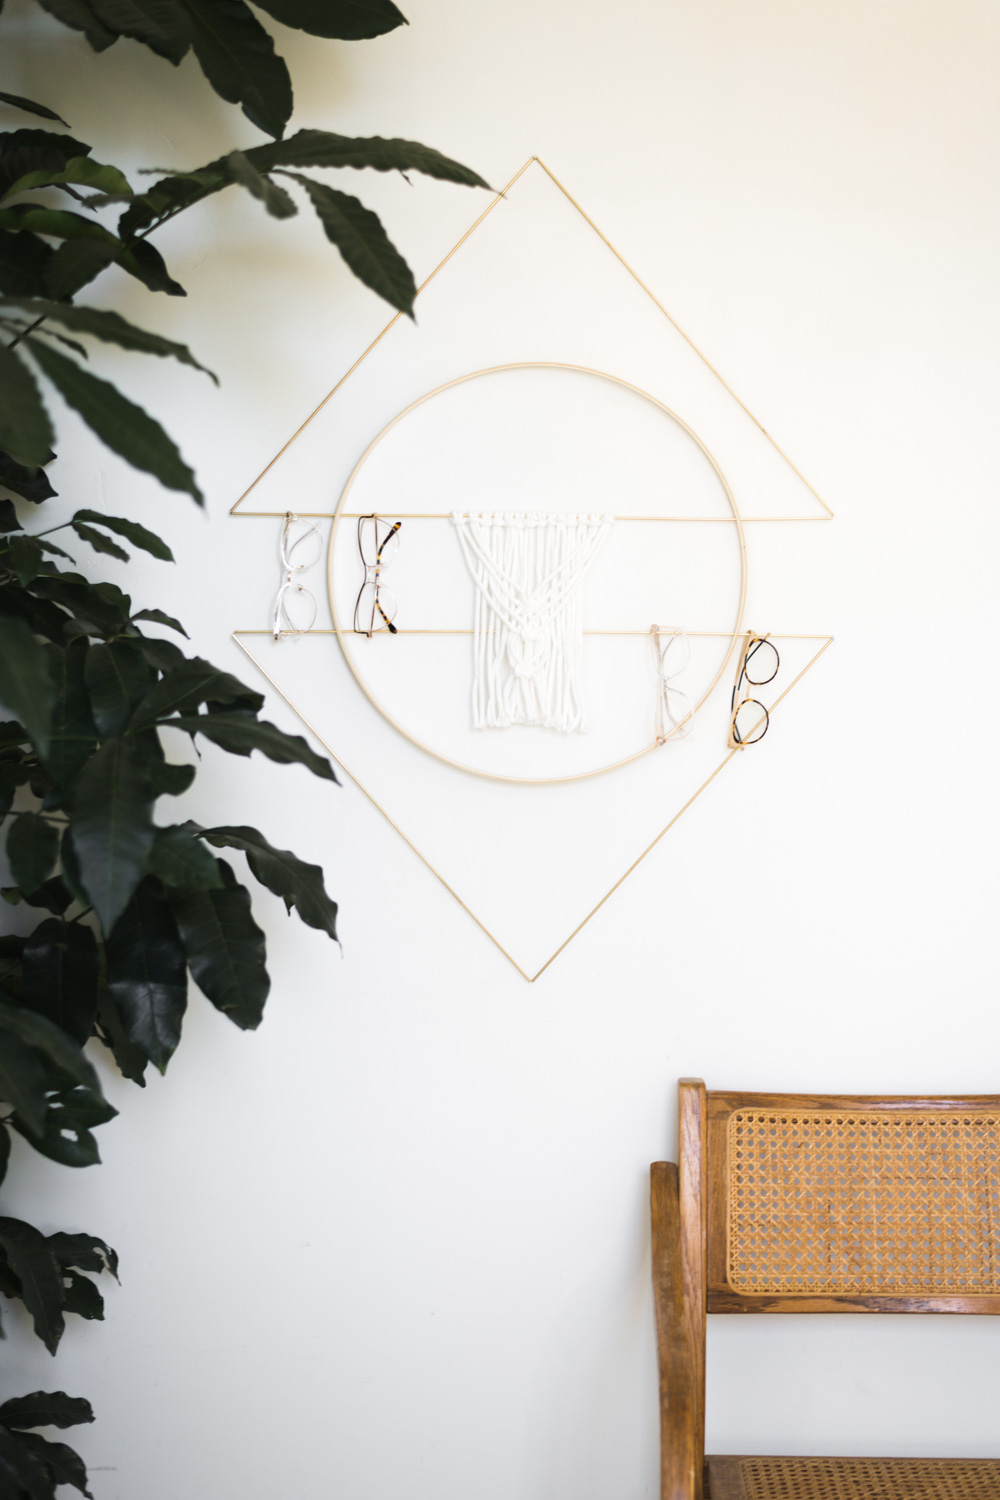
Photo used under Creative Commons from amy.gizienski
