|
Selecting the right flame retardant fabric for your upholstery couldn’t be easier. The availability of a wide range of materials makes it challenging to choose the suitable fabric. Moreover, quality standards differ from one manufacturer to another hence the need to be keen when selecting. Does choosing flame retardant fabric for your upholstery give you a headache? Read on to find out a few things to consider. To begin with, check if the fabric meets the environmental health standard which is represented by OEKOTEX100 certification. Next, you will need to check the national fire retardant standard. However, it is important to note that the standards of USA differ from those of Europe and by extension, other countries. Additionally, upon exportation, the fabric is expected to meet new rules of the destination country. From the above considerations, your manufacturer of choice should meet the required standards.
FR-One has over ten years in the fabric production industry and scientific engineering and testing. All products meet OEKOTEX100 certification requirements. FR-One fabrics meet all world standards including the most demanding ones. Approved by the US coastguard, FR-One fabrics are the only ones certified as module E under the Maritime Equipment Directive. So why not choose FR-One for your flame retardant fabrics?
0 Comments
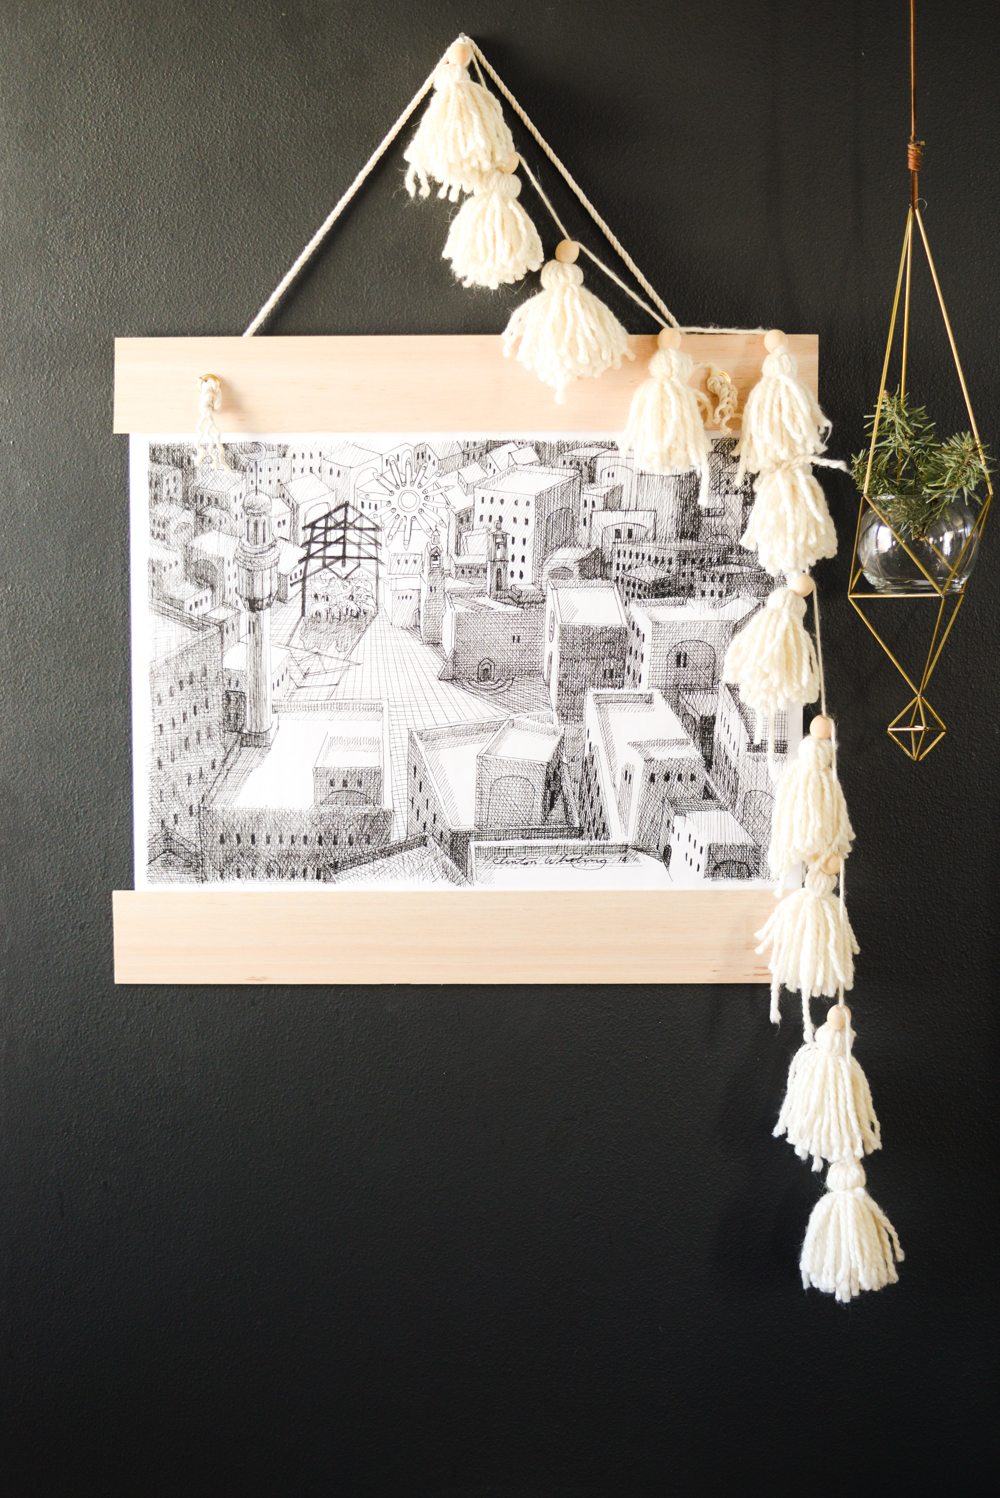
I am on a serious Nativity kick this year (remember my post last week?)
In all of my hunting I found a really great piece from Clinton Whiting. It wasn’t available for sale on his site and I was super bummed. So I decided to go our on a limb and email him and see if he had it available for sale off his site. He didn’t (SAD!) so I did what any good blogger would do, I asked him if he would let me list it in my shop for a limited run. I was OVER THE MOON when he agreed (you can download the limited edition print for just $12 here!) and couldn’t wait to get it up in our sad decor-less house (remember we’re living at the inlaws old house while we renovate the Merc and all of their stuff is gone and all of our stuff is in storage so….) The other dilem was that I had no tools. Heavens I don’t even think we have a pair of scissors. So I had to get creative and go back to the early days of Vintage Revivals DIY for which I can vouch were both horrendous and sort of ingenious. If you don’t have tools, but can wield a fierce glue gun this project is right up your alley! To make this project you’ll need:(2) 4″x36″ Pieces of Balsa Wood (snag this at Joann or Michaels, it’s WAY cheaper than buying it online!) To save some cash I had this printed as a large format print (where it’s basically printed on normal paper, just really big normal paper) Large format prints run around $2.00 so they are a great money saving option! The problem is that the paper is very flimsy and needs some stability. I wrapped mine around a piece of poster board and it worked great, but if you want you can have it *printed on higher quality paper and it will kill 2 birds with one stone. I printed mine out at 20×30″, you can have it printed almost any size you want though! I started by wrapping the print around the posterboard and gluing it in place.
Measure and cut the balsa wood so that it hangs over 1″ past the edge of your print.
Glue the balsa wood to the front of your print (make sure its centered!!) on the top and bottom.
Measure 4″ from the edge of the balsa wood and mark. Then measure the center point on your wood (mine was 2″ because the wood is 4″ thick). Repeat on the other side
Firmly press the face of the grommet into the balsa wood. The wood is soft enough that it will push all the way through! Not a tool in sight!!
The balsa wood holds the grommet in place. I chose not to set it (by putting the back on) because I didn’t want to dent the front of the wood. Feed your rope through the grommets and knot them.
Hang and enjoy!!
How easy was that?!! Guys, let me just tell you how great it felt actually completing a project, I was on cloud 9 the rest of the day!! Man alive I can’t wait until we’re in the Merc! Snag your print here before they’re gone!! SaveSave The post Modern Black and White Nativity Print + 5 Minute NO TOOL Picture Frame! appeared first on Vintage Revivals. Via https://vintagerevivals.com/downloadable-modern-nativity-print-5-minute-no-tool-picture-frame/ 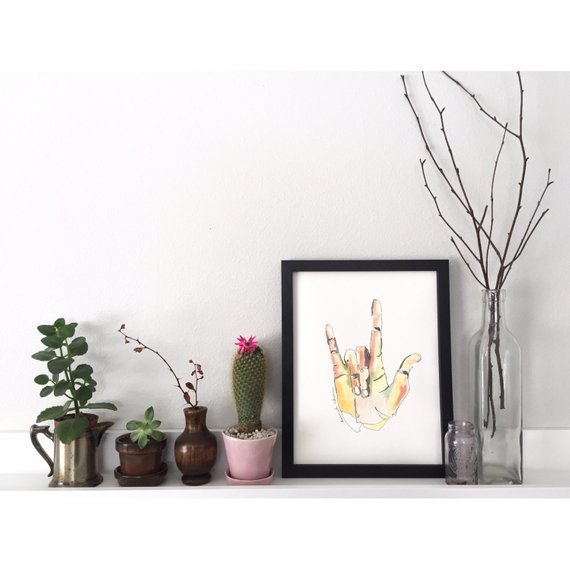
Hope you had a great Thanksgiving!! I’m not going to lie, this time of year makes me a little itchy. I mean, there is nothing like opening your inbox and seeing an email from every company you’ve ever bought something from shouting at you to HURRY AND BUY SOMETHING RIGHT NOW!
It might be the rebel in me that just wants to buck the system, but today instead of sharing the same Black Friday deals that everyone else is, I thought it would be a little more meaningful to share some of my favorite small shops. Shops run by people just like you and me that are doing it. Taking care of their families, letting their creativity rule, and making my life a little happier. I can’t wait for you to meet them!!
Art
To say that I am obsessed with Hannah Ward is sort of an understatement. I’m pretty sure I have packages arriving weekly from her cute face. My favorite painting is The Healers Hand.
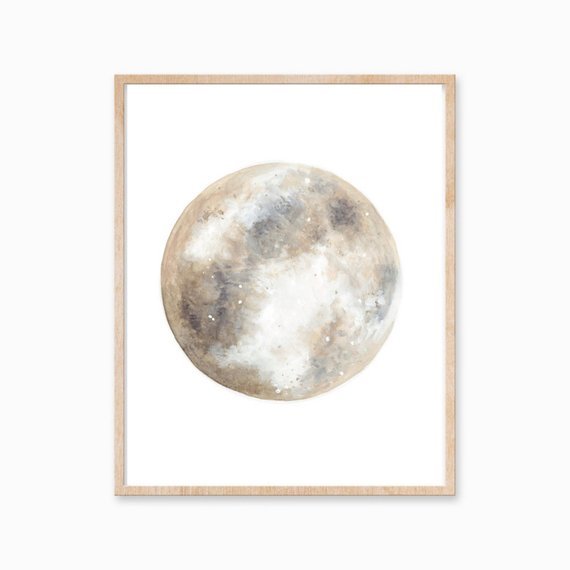
Katy from BirchBliss is so talented, if you love muted colors and nature, she’s your girl. My favorite print in her shop right now is the Neutral Moon Print.
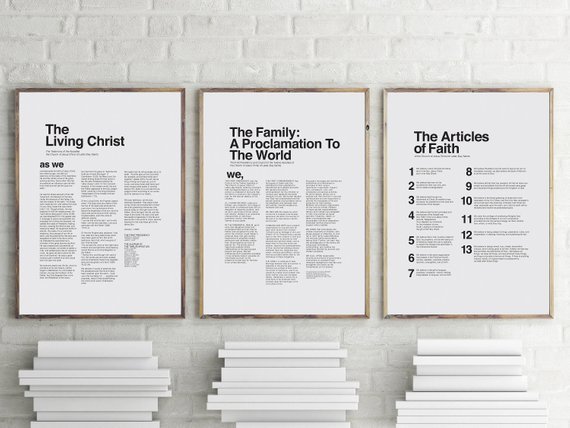
Mandi from Pretty Ink Designs is one of my favorite minimalist graphic designers. She creates prints of LDS documents that you actually want to hang in your house. I love the 3 pack of The Living Christ, The Family Proclamation and The Articles of Faith. I also just bought the Plan of Salvation print that I am DYING to get hung in the Merc!
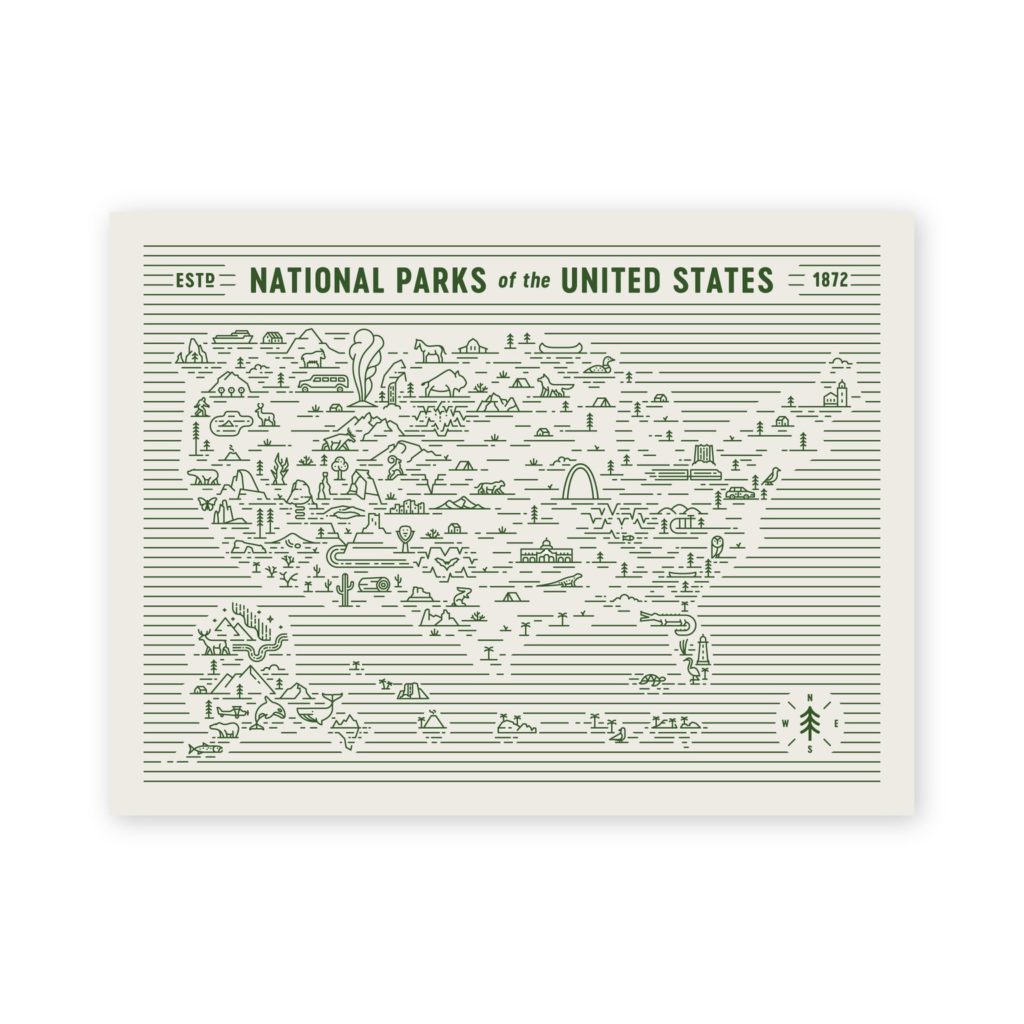
Made by Fell is rockstar level amazing. They do really simple line art, but it’s graphic and so inspired. Their National Parks Map is just SO FREAKING GOOD. I bought their Nativity Print last year and I can’t wait to pull it out again this year!! They are running a 25% off sale through Monday use the code SITEWIDE25
Now its time for my girl Suzy. She is one of my absolute favorites and runs a studio called Wink Wink. I’m even lucky enough to have one of her originals in Dylan’s room.
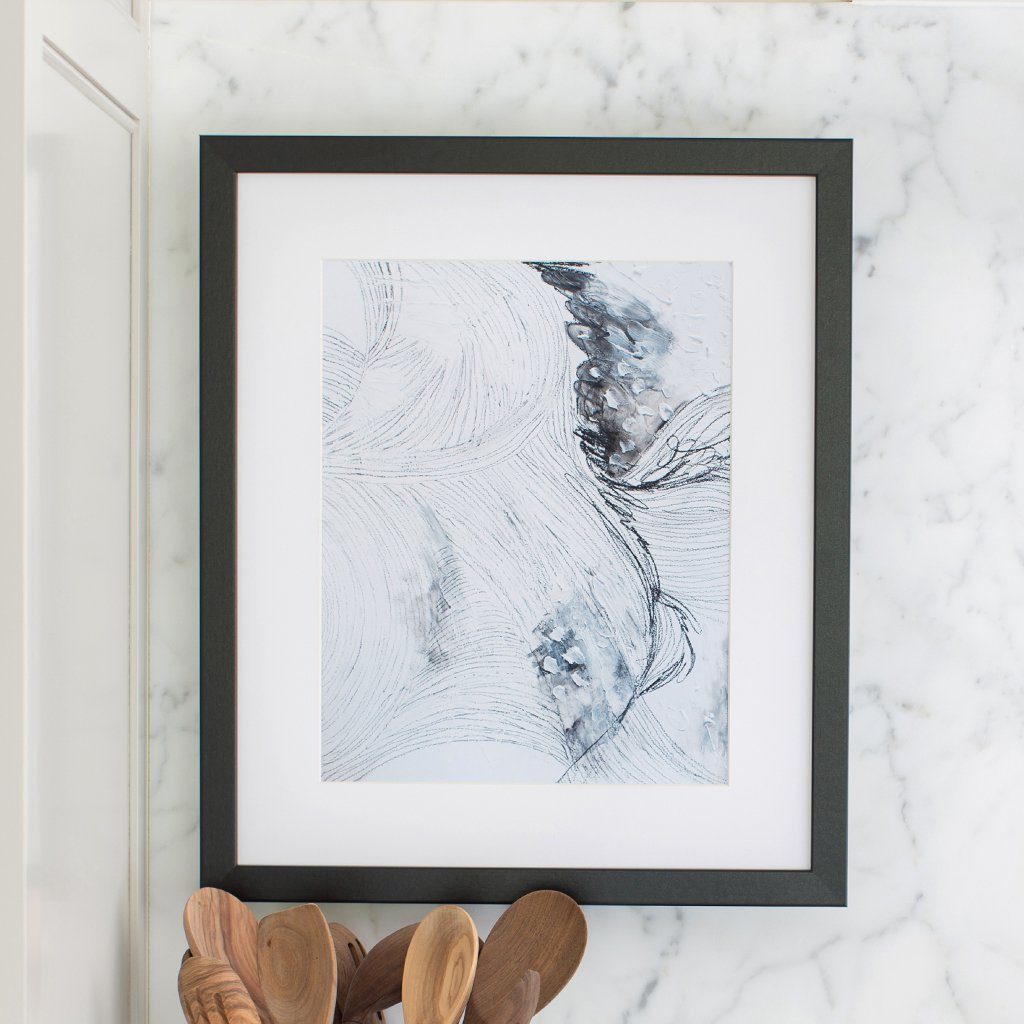
Lindsay is one of the most inspiring artists and business owners in this space. She is like the OG handletterer and recently closed her old shop and opened The Art Bar. You need to run and check it out. She is also a very awesome human. She kills the abstracts and of course her handlettering is iconic. She is running a 20% off Everything Deal use code YAY20. Decor
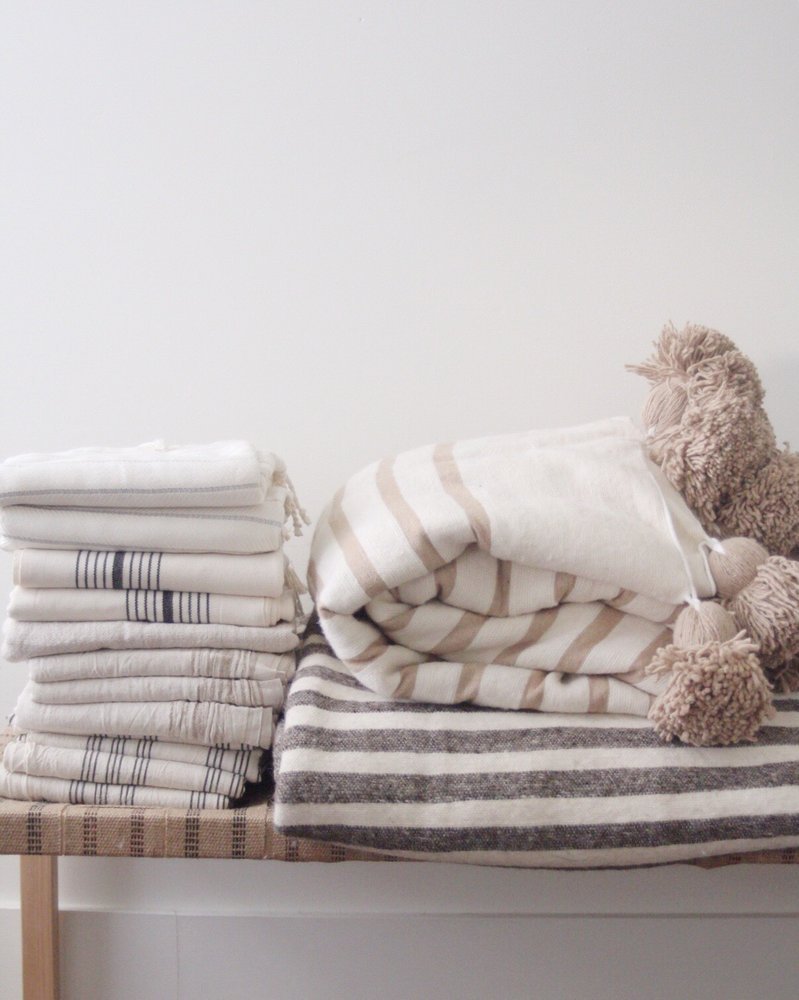
Every time I visit Thimble and Cloth I want to wipe all color and synthetic materials out of my life. Lindy is the master at creating products that are simple and gorgeous. My current fave is the Moroccan Wool Blanket. 15% off
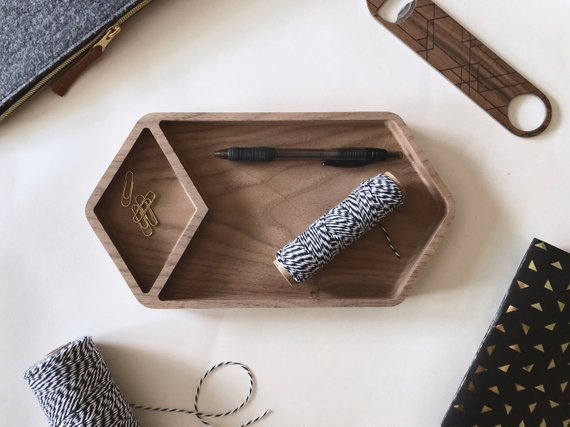
A new to me shop is Tramake. If you love geometric (which helllllo have we met?!) you will die over these simple household items. My favorite is the Facets catchall tray. This is a great place to shop for the guys in your life. 20% off Select Items
Everyone needs a little bit of Hello Maypole in their life. Aubrey is as wonderful and colorful in real life as her assortment of felt balls. Her colorways are the stuff of dreams! If you’re looking for inspo for a room makeover, I would recommend checking her out, she is a master at color combos. 25% Off
My girls Mal and Sav from Classy Clutter are not only amazing DIYers, but they recently launched their own home decor line! It’s so good!! They are running some crazy deals too! Plant Hammock makes simple macrame planters that are beautiful, but my favorite items that they sell are their hooks. Everyone in my life is getting one of these for Christmas!! If you are a vintage lover, you MUST check out Left Coast Revivals. I’ve scored some of my favorite pillows and pottery from them. They have everything from Baskets, to Textiles, to Jewelry. It is like every good thing to ever hit the thrift store in one place. 50% off Select Items Through Monday! For The Kids
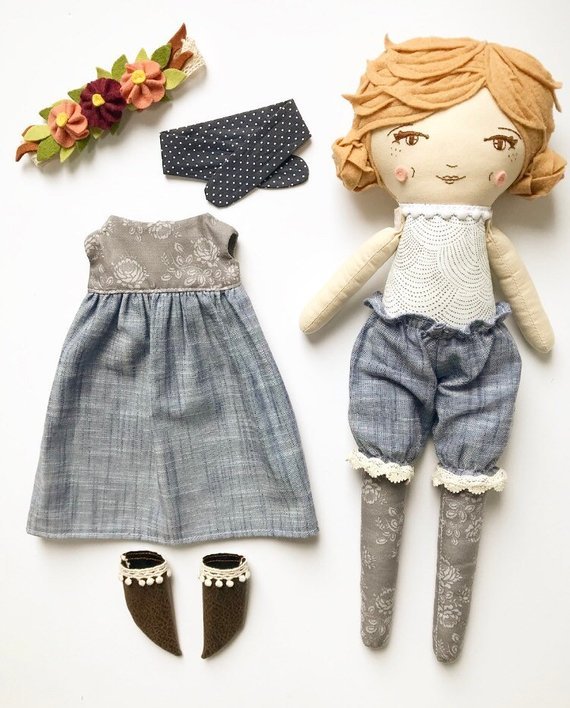
Anna from Classy Colors makes the SWEETEST heirloom cloth dolls. The Mama and Baby doll makes my heart explode.
If you’ve got a creative little, you have got to get them a Hoop-a-loop! My friend Becca’s 3 young daughters run this shop where they design, pattern make, and run their own business. It is absolutely adorable and my daughter Dylan is getting the hedgehog pattern for Christmas. Love creative kids!! Cyber Monday 15% off use code THANKFUL
Jewelry
Lilly and Grey makes adorable hand stamped jewelry. My favorite is the Hammered Half Moon necklace. So cute to stack with other necklaces!! 15-20% off
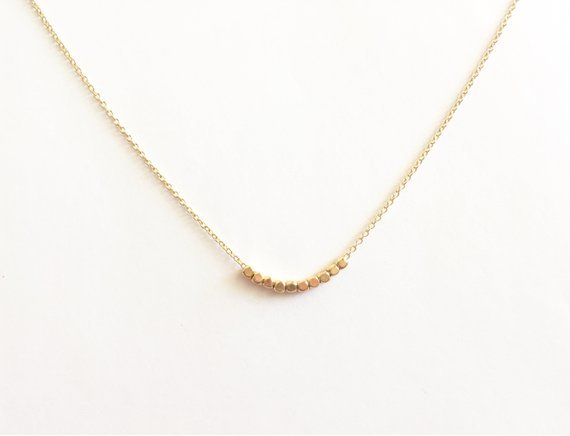
I kiiiiind of want everything from Elm Avenue. The Mini Gold Bead Necklace and the Minimalist Gold Dot are so freaking good and both are only $13!! 20% off use code VINTAGE20
Suzy Bobby Pin has some seriously fun statement earrings and lots of great layering necklaces!
My favorite local/online clothing shop Scout and Cloth is running some great deals! Serenity picks the cutest clothes, and anything that I wear that people actually want info on is from Scout and Cloth.
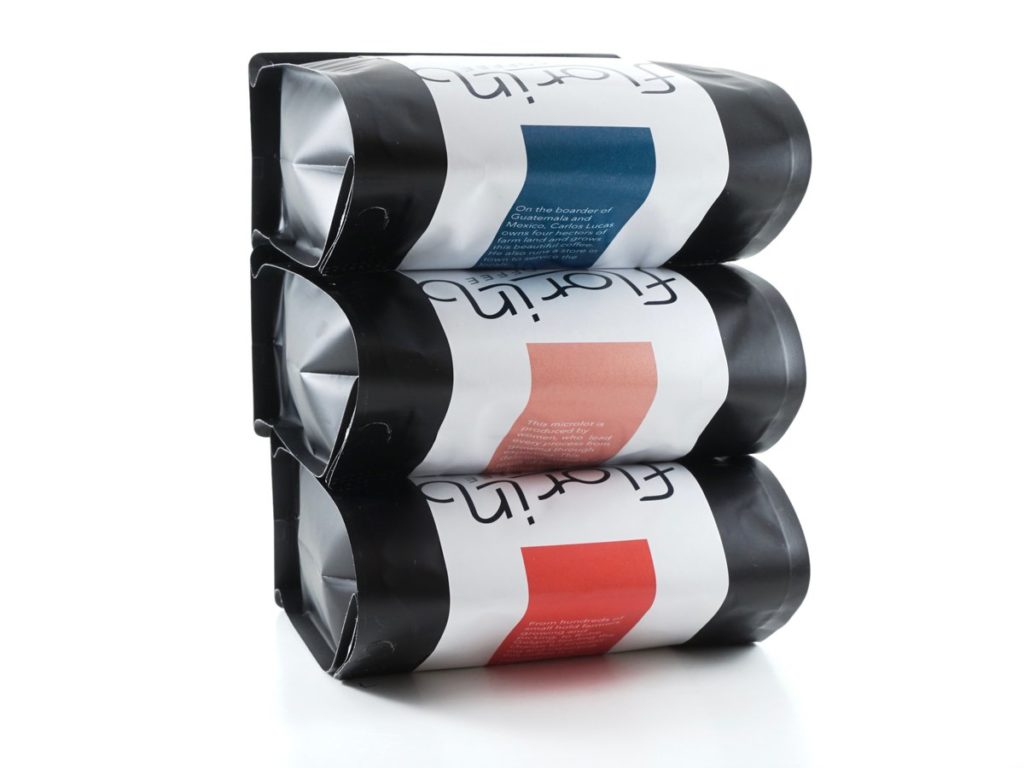
I am not a coffee drinker, but I am SUCH a sucker for great branding, Which means, if I was a coffee drinker you can bet that I would be buying Florin Coffee. They also have a subscription, what a great gift idea!! As someone who considers myself a small business owner, let me go ahead and thank you from the bottom of our collective hearts for supporting these artists and makers. I’ve got some really fun gift guides happening this week, so stay tuned! The post Some of My Fave Small Shops + Deals! appeared first on Vintage Revivals. Via https://vintagerevivals.com/some-of-my-fave-small-shops-deals/ 
I am absolutely in love with this DIY Geometric Wreath. It’s a tutorial that I pull out every time the holidays come around because it works with any style of decor! You can hang this wreath on your wall or on your front door. It is a quick and fun project that you can do in under an hour!
You know when you are so inspired by something it is all you can think about!? I want to Himmeli everything. What is Himmeli?Lets back up. You are probably saying “Himmeli?” Lets. discuss. Himmeli is a traditional Scandinavian art. They typically make them at Christmas time and they are the most gorgeous mobiles that you have ever seen (Google it!!) The wreath and how to make something similar lived in my every thought for days. After trying my hand at making simple Himmeli ornaments, I felt like I understood the design process a lot better. Looking at a 3 dimensional object 2 dimensionally is enough to give you an aneurism. After trying a few techniques I feel like I came up with an extremely easy technique to make a geometric wreath. (And when I say easy, I mean my 10 year old can do it. So you can totally do it too!) Tutorials for this type of project are notoriously confusing and make you want to give up on life completely. I am doing everything I can to combat that problem. Please don’t give up on life. How To VideoI even made a video because, lets face it, sometimes it is just easier to learn things in person. But of course I had to do a regular tutorial too. So lets get to it! Himmeli Wreath Supply ListYou can also purchase a brass wreath kit from the Vintage Revivals shop! Start by cutting your straws down to right length. To make a wreath that is 19 inches at its widest point I cut the straws to 4 1/2 inches. The fastest and most efficient way to cut 105 straws is to use a rotary cutter and a guide.
Before you get started I have a few tips:
Now is the fun part. Making your wreath sectionsStep 1: Measure out 2 1/2 arms length of wire.
Step 2: Thread 4 straws on the wire
Step 3: Twist the wire together to form a diamond with the straws
Step 4: Add 2 more straws to the wire
Step 5: Twist and attach the wire at the opposite end of the diamond
Step 6: Continue adding 2 straws and twisting them until you have a shape with 5 sections.
Step 7: Feed the wire back through one of the straw sections so that it is coming out of the elbow
Step 8: Add one section of straw to the wire
Step 9: Connect the wire to the elbow of the next section
Step 10: Repeat until 4 or the 5 sections are connected and you have a shape similar to Pacman
You are done with your first piece!! Now you just need to make 7 of these PacMan/Pentagon shapes. After you have done that, this is where you pick up the tutorial. Step 11: Connect the open space to the side of the next space by threading the wire through the straw in the second piece.
Step 12: Secure the wire to the corner of the first piece.
Step 13: Connect all 7 shapes together to make a circle.
Step 14: Add 2 Arms Length (approx. 10 feet) of wire to the center point on the face of one pentagon. Thread a piece of straw on the wire and connect it to the center of the next pentagon.
Step 15: Connect all the center points together
Clip your wires and you are done! One little tip, if you are planning on spray painting your wreath string a small piece of wire from one of the outer points so you have something to hold while you are painting! (I used this gold to paint mine!)
Just an FYI the center wreath in this picture is a different design. The 2 wreaths on the outsides are from this tutorial. You can find the tutorial for the middle one here!
And because I am obsessed I have one hanging in my kitchen too…
So what do you think? Is this a project that you are going to try? Get the brass kit here!
The post DIY Geometric Himmeli Wreath Tutorial appeared first on Vintage Revivals. Via https://vintagerevivals.com/diy-geometric-wreath-tutorial/ 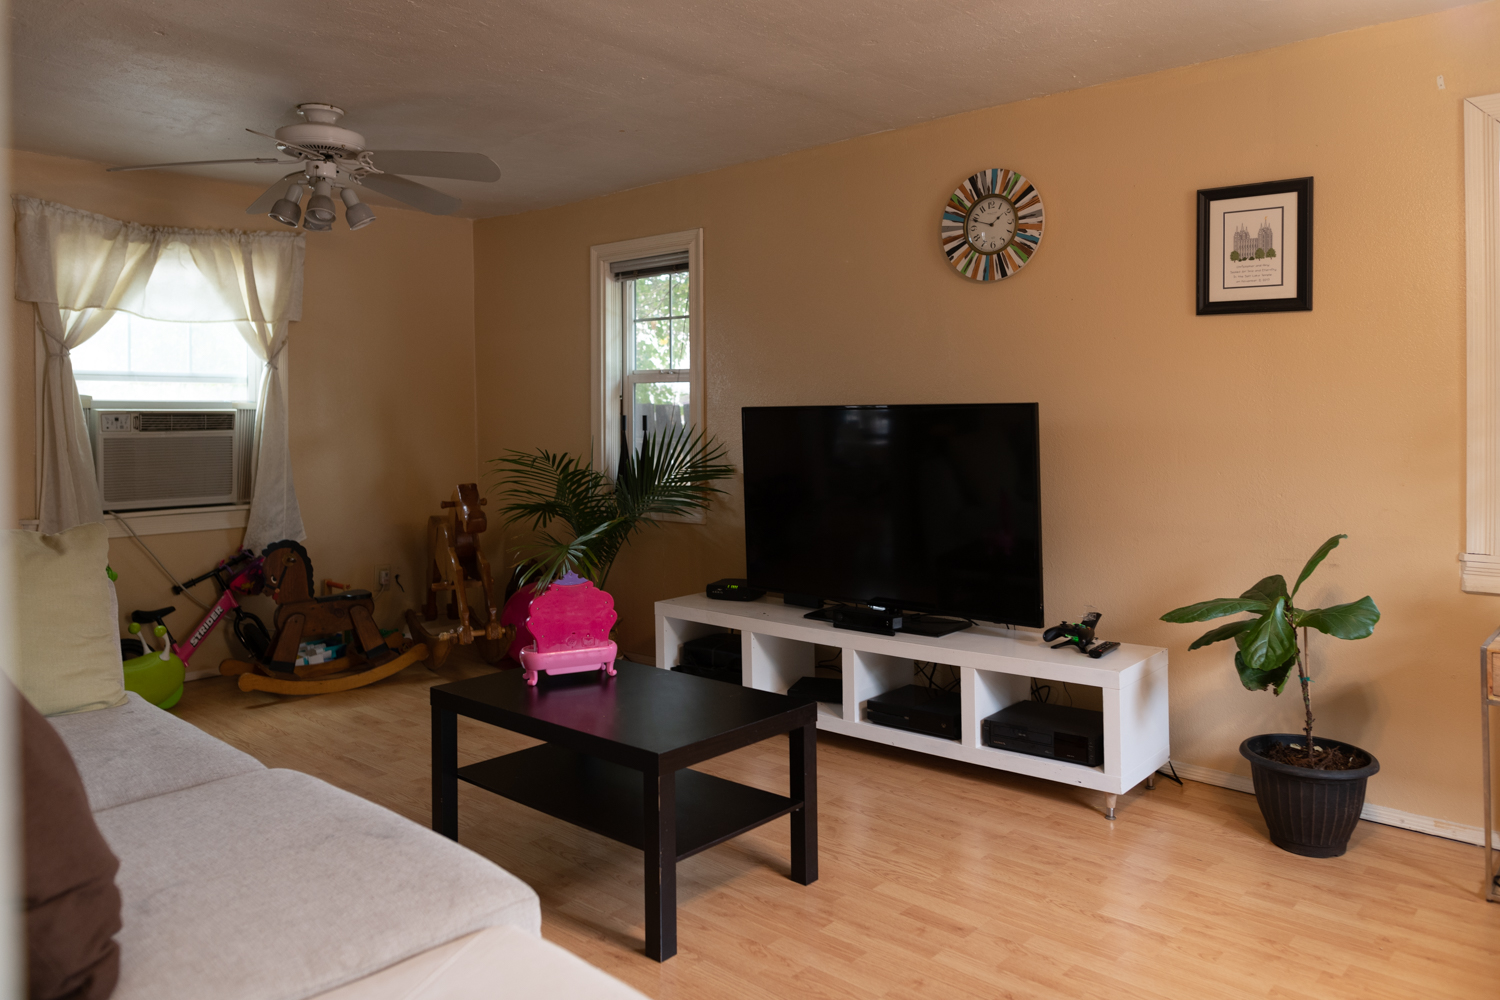
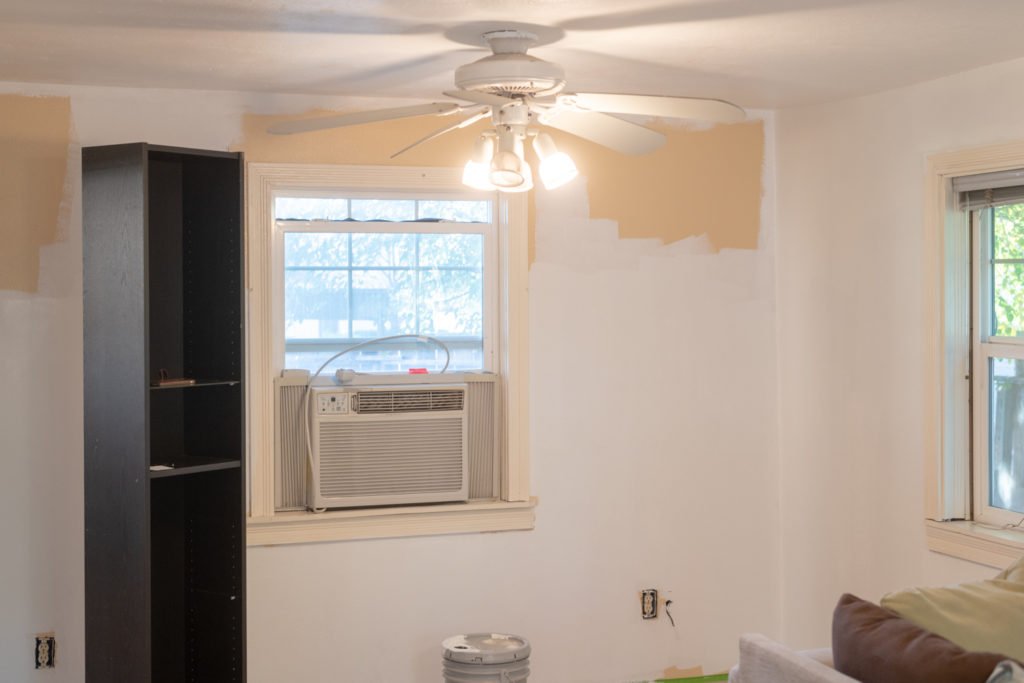
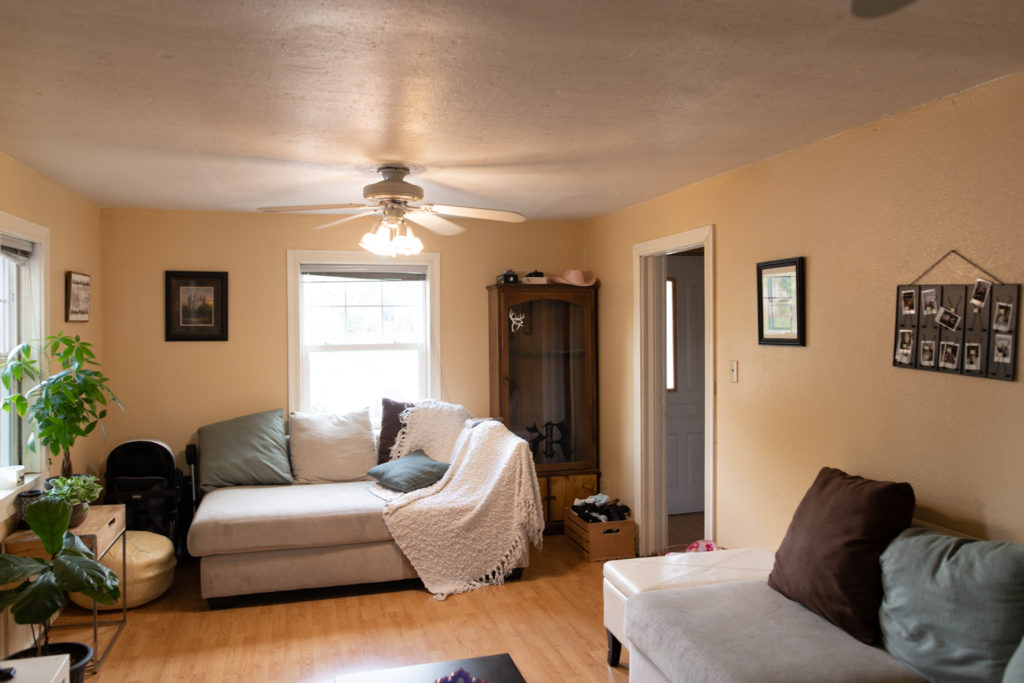
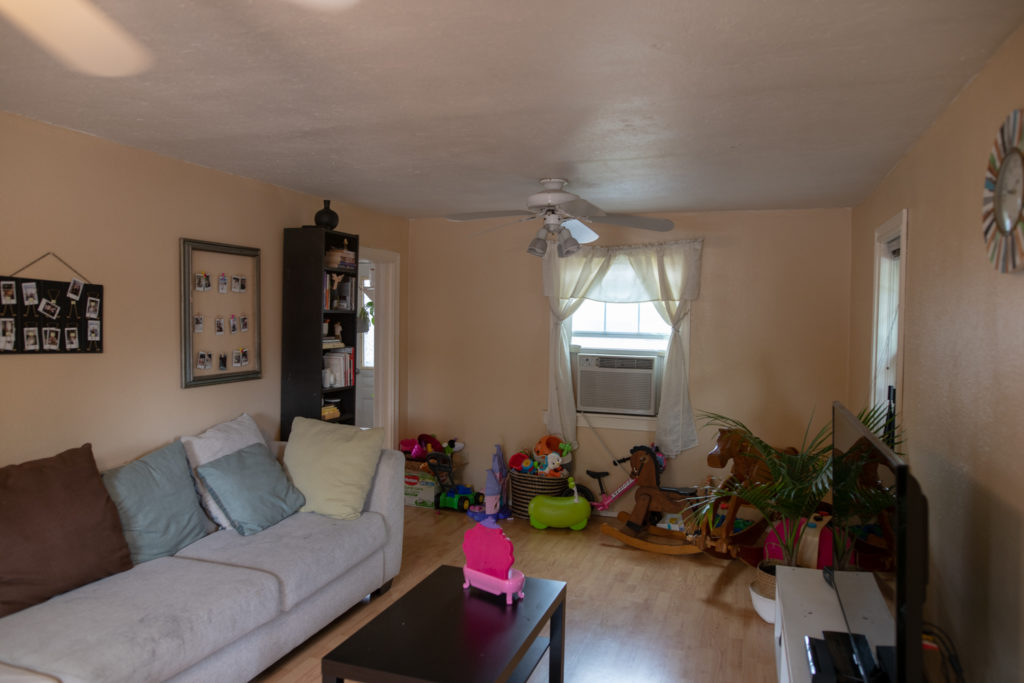
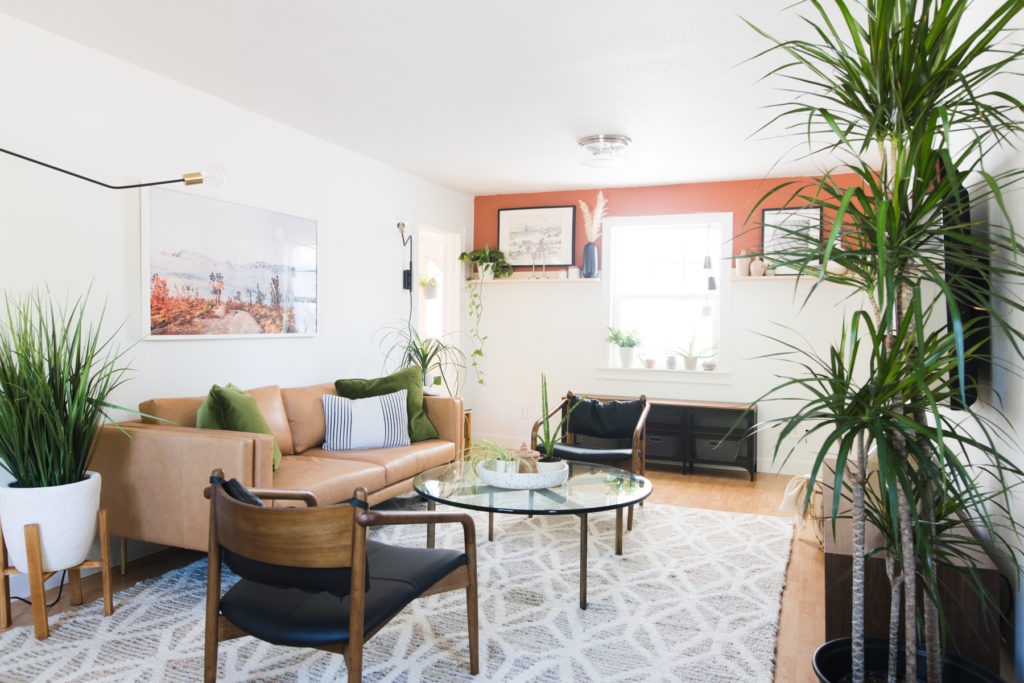
If you are a VR lifer, you may remember back in the early days when I did a few room makeover giveaways. It was SO MUCH FUN and also so much work. Since then, I’ve been waiting for the opportunity to present itself again and a few months ago it did!! I teamed up with Sherwin-Williams® as my sponsor to give a room makeover to one lucky reader! Let The Giveaway Begin!Sherwin-Williams challenged me to find someone who could use some help with making their dream space happen. You guys saw my call for submissions on Instagram and after pouring over all of the #SWSAVEME submissions I chose the sweetest girl named Amy. Her situation is the same that so many of us find ourselves in. We buy our first house with all of the best intentions bubbling at the surface. When we move in and find that there is more work than we anticipated, it’s more expensive than we thought, and unlike everything you see on a room makeover show, it doesn’t happen in 27 minutes. Can anyone relate? When they moved into their 1937 house, things like updating bathrooms and dealing with the quirks of an old house took precedence (as they should). Things like repainting a functional albeit boring living room were wayyyy down on the project list. And I could not wait to get my hands on it!
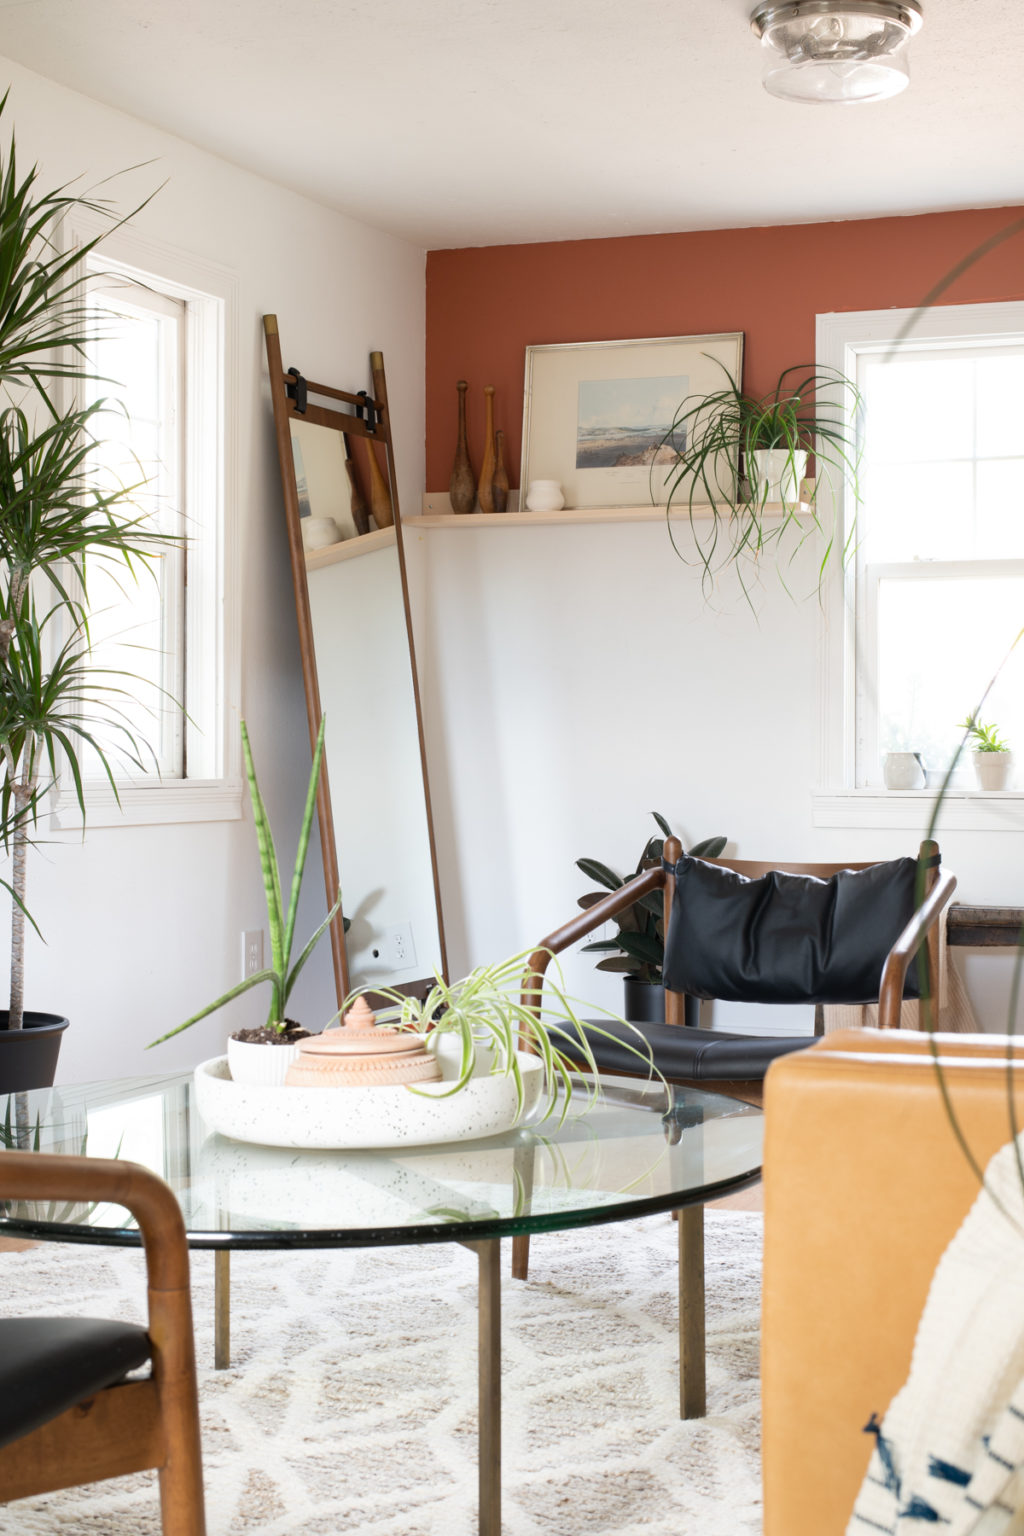
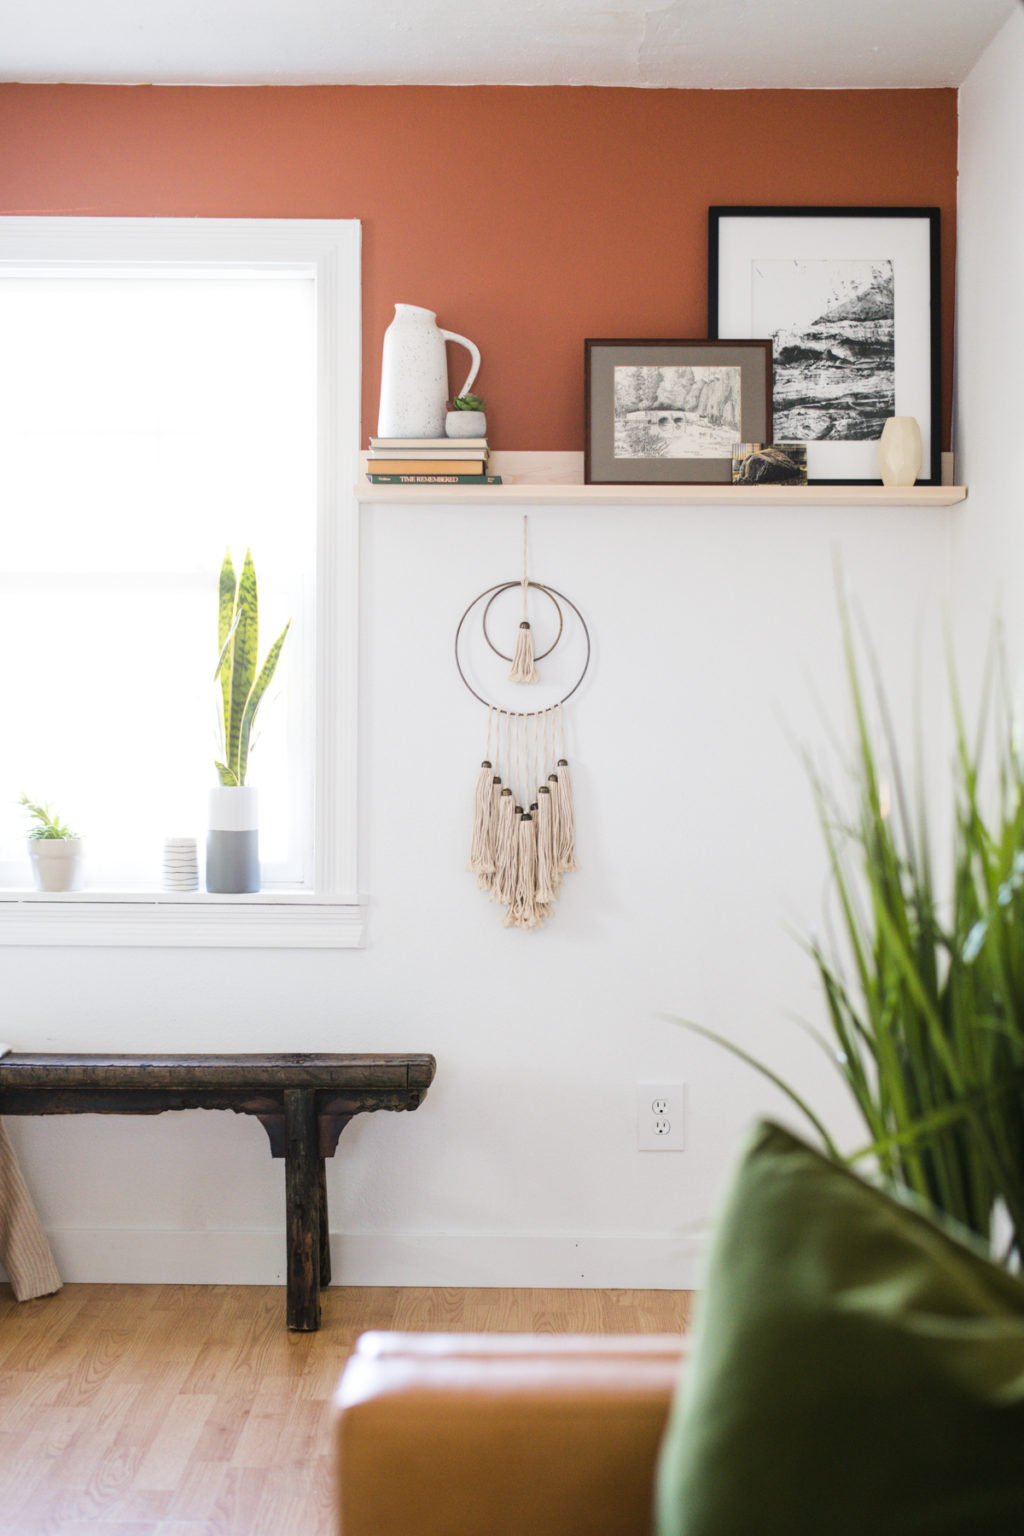
The vibe that we went for is Modern Desert. My obsession with the Sherwin-Williams 2019 Color of the Year Cavern Clay SW 7701 is verging on unhealthy. They absolutely nailed it. So, after stalking Amy’s Pinterest boards and catching her style, I was over the moon to find that this modern desert dweller vibe I had my heart set on would be perfect.
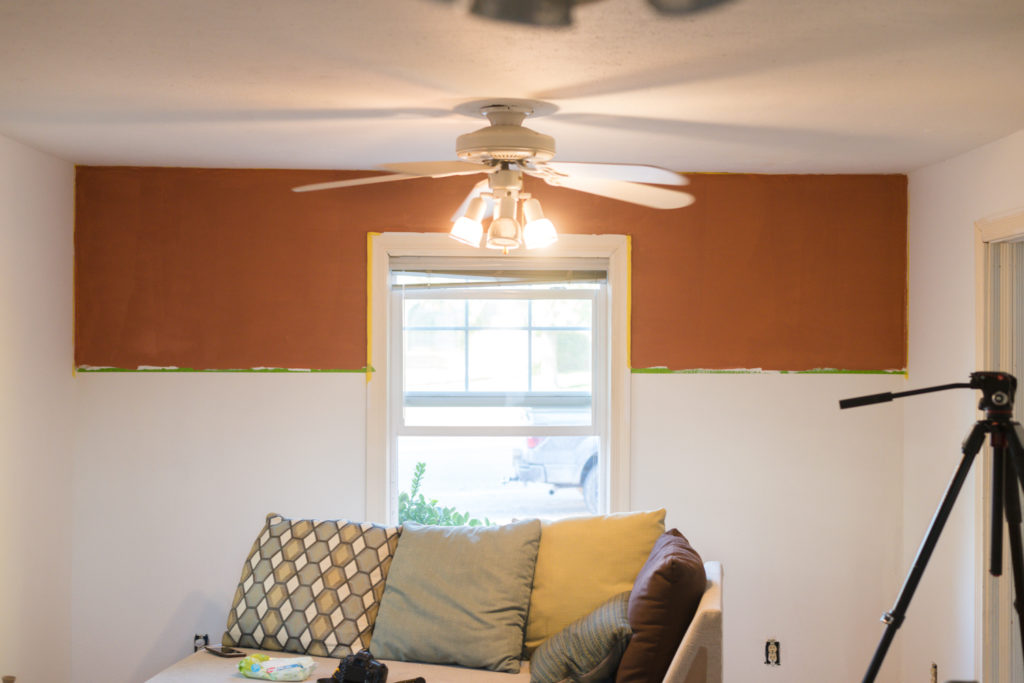
The entire room got a coat of the best white paint color in the world (you can find the formula here; it’s a custom color I have mixed at Sherwin-Williams) and the ends of the room are rocking a statement-making accent color. Cavern Clay it’s seriously bold, instead of overwhelming this small living room with it, I decided that a quick color blocking would be perfect and I love how it turned out. Color Blocking 101The great thing about this type of accent wall is that it is entirely customizable. I used white and orange, but you can you any combo of colors in the world. Before painting, clean all surfaces with a bucket of soapy water and sponge to remove dirt and oils. Step 1: Paint Your Base ColorDon’t worry about painting the entire wall, just make sure that you cover enough of the area so that you have an overlap with the second color; that way you can save yourself frustrating touchups. In my case, I painted most of the wall with that perfect white color I mentioned earlier.
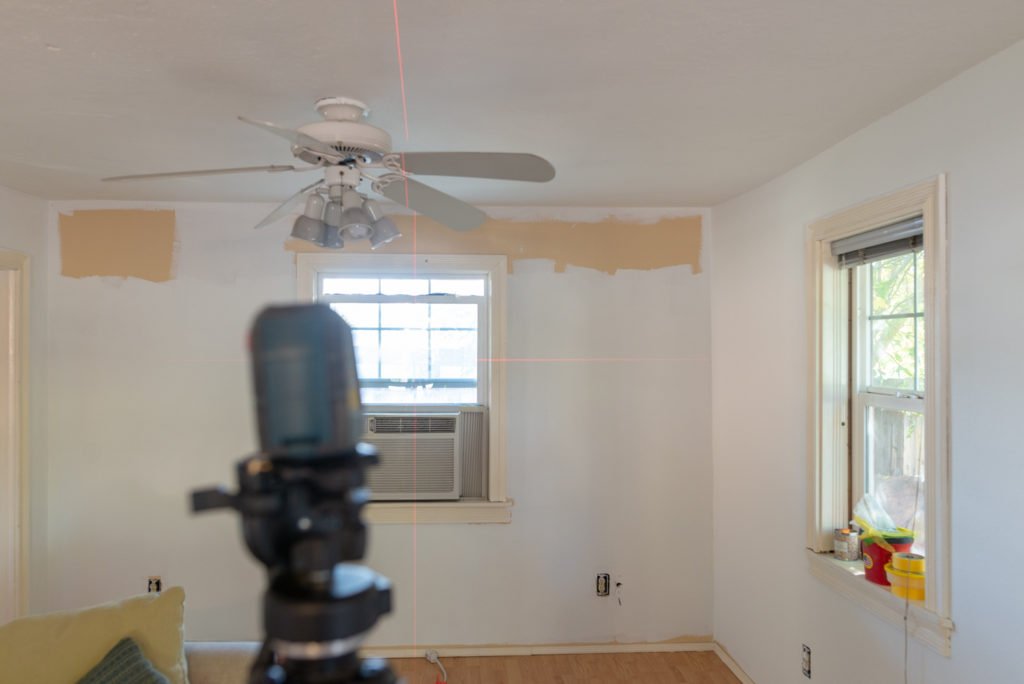
Step 2: Set Your LineTo make sure that my line was exactly the same on both sides of the room, I used our trusty laser level. It takes all of the guesswork out of measuring and can be especially helpful on older homes that might have uneven floors or ceilings. You know that your line is level, even if the floor isn’t.
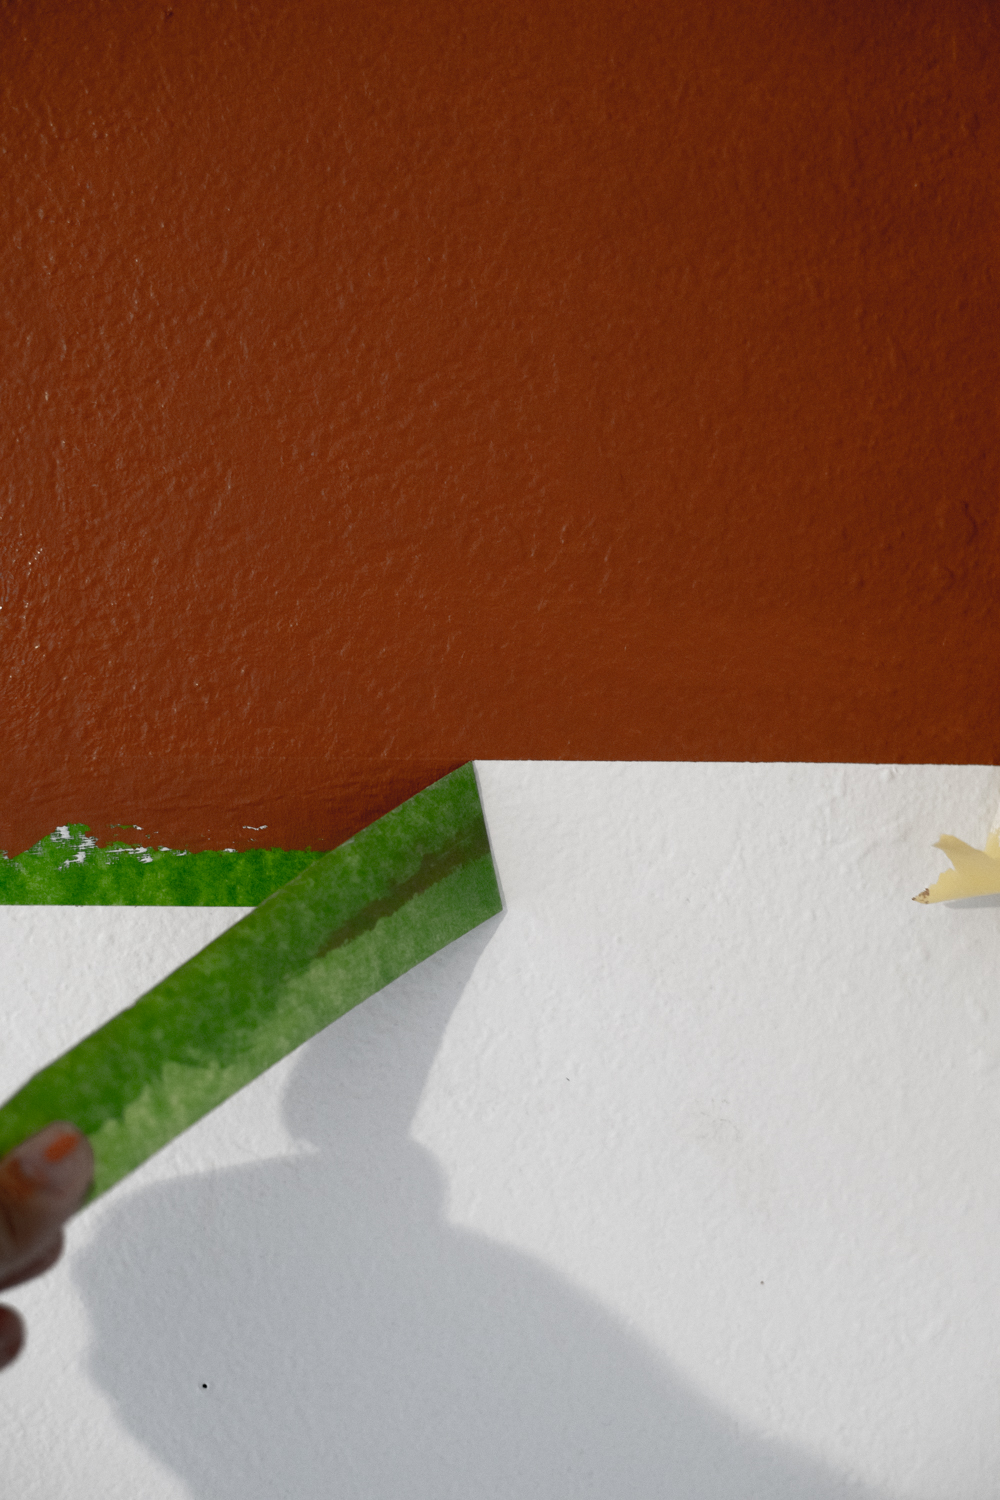
Step 3: Tape off Your LineYou can get a perfectly straight paint line, even if you have textured walls like Amy. It’s all in the technique, which I’ll talk about next.
Step 4: Paint Your Base Color On The TapeThis might seem a little weird, but if you hear nothing else in this post, hear this. IF YOU WANT A PERFECT PAINT LINE YOU HAVE TO DO THIS. Painter’s tape is not all equal, but even the best painter’s tape can’t perfectly fill every gap and dip in wall texture. This is where painting your base color comes in. If the paint is going to bleed, don’t you want it to bleed the color that makes it invisible? By using the base color (in my case Mandi White) and painting over the edge of the tape, it seals all of those gaps and dips. That way when you go back through with the accent color, all of those problem areas are taken care of! Step 5: Paint Your Accent ColorOne important tip when you are painting a wall and using painter’s tape is to remember to remove your tape while your paint is still wet. Obviously, you don’t want to remove it after each coat, but once your last coat is on, it’s go time! Taking the tape off before it dries means that the paint won’t seal itself to the tape and peel your fresh paint off of the walls.
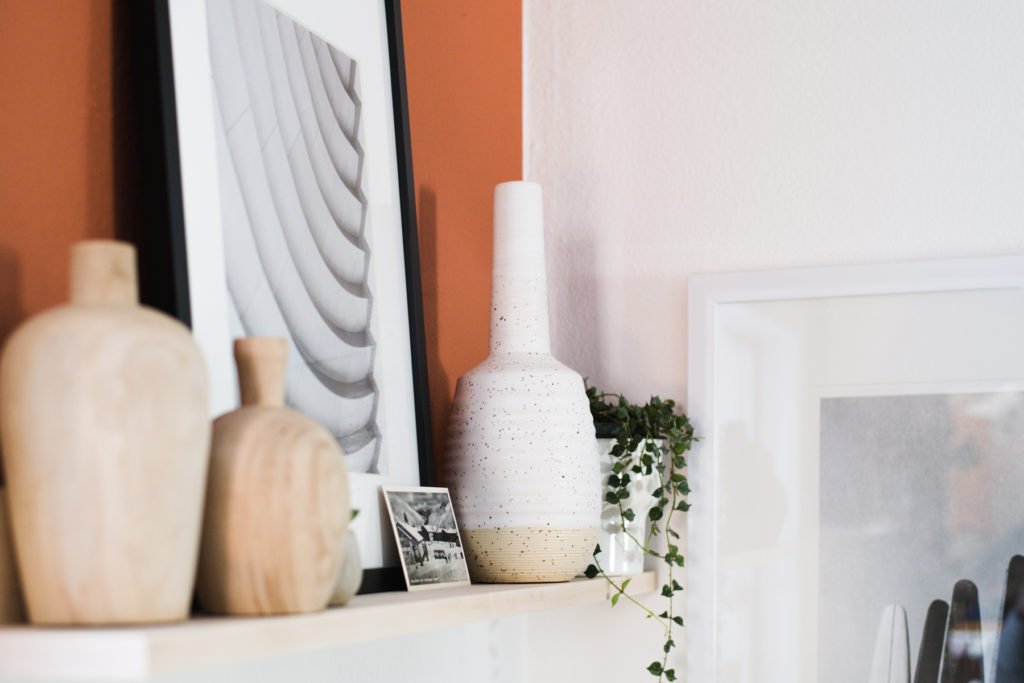
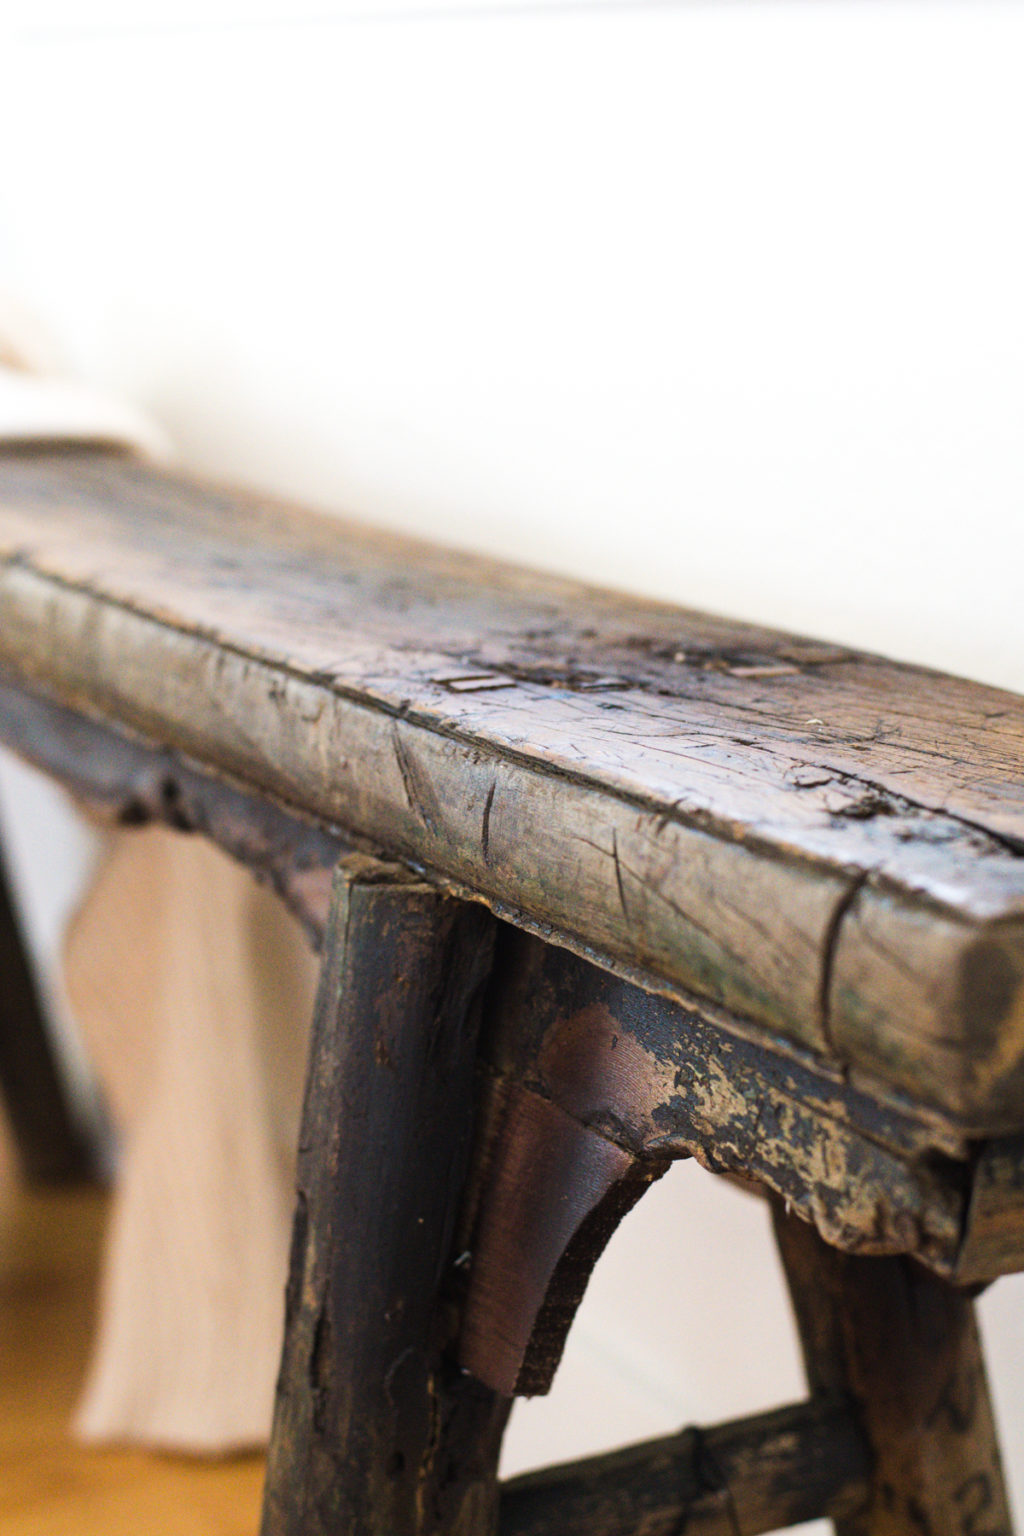
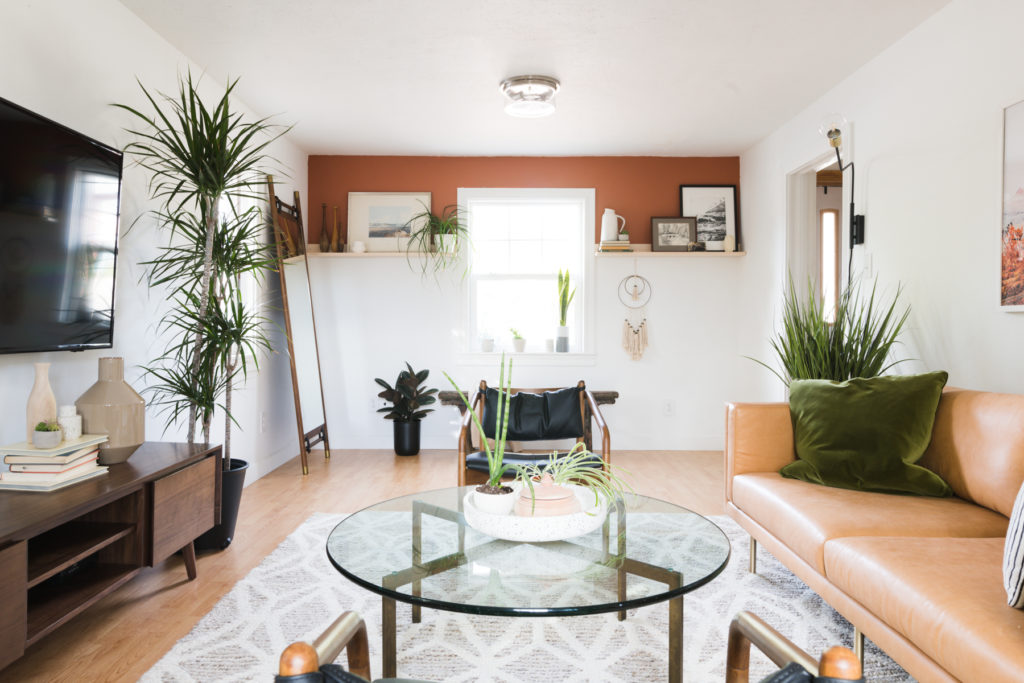
To break up our color blocking even more, I made quick ledge shelves out of maple (you can see the tutorial here!)
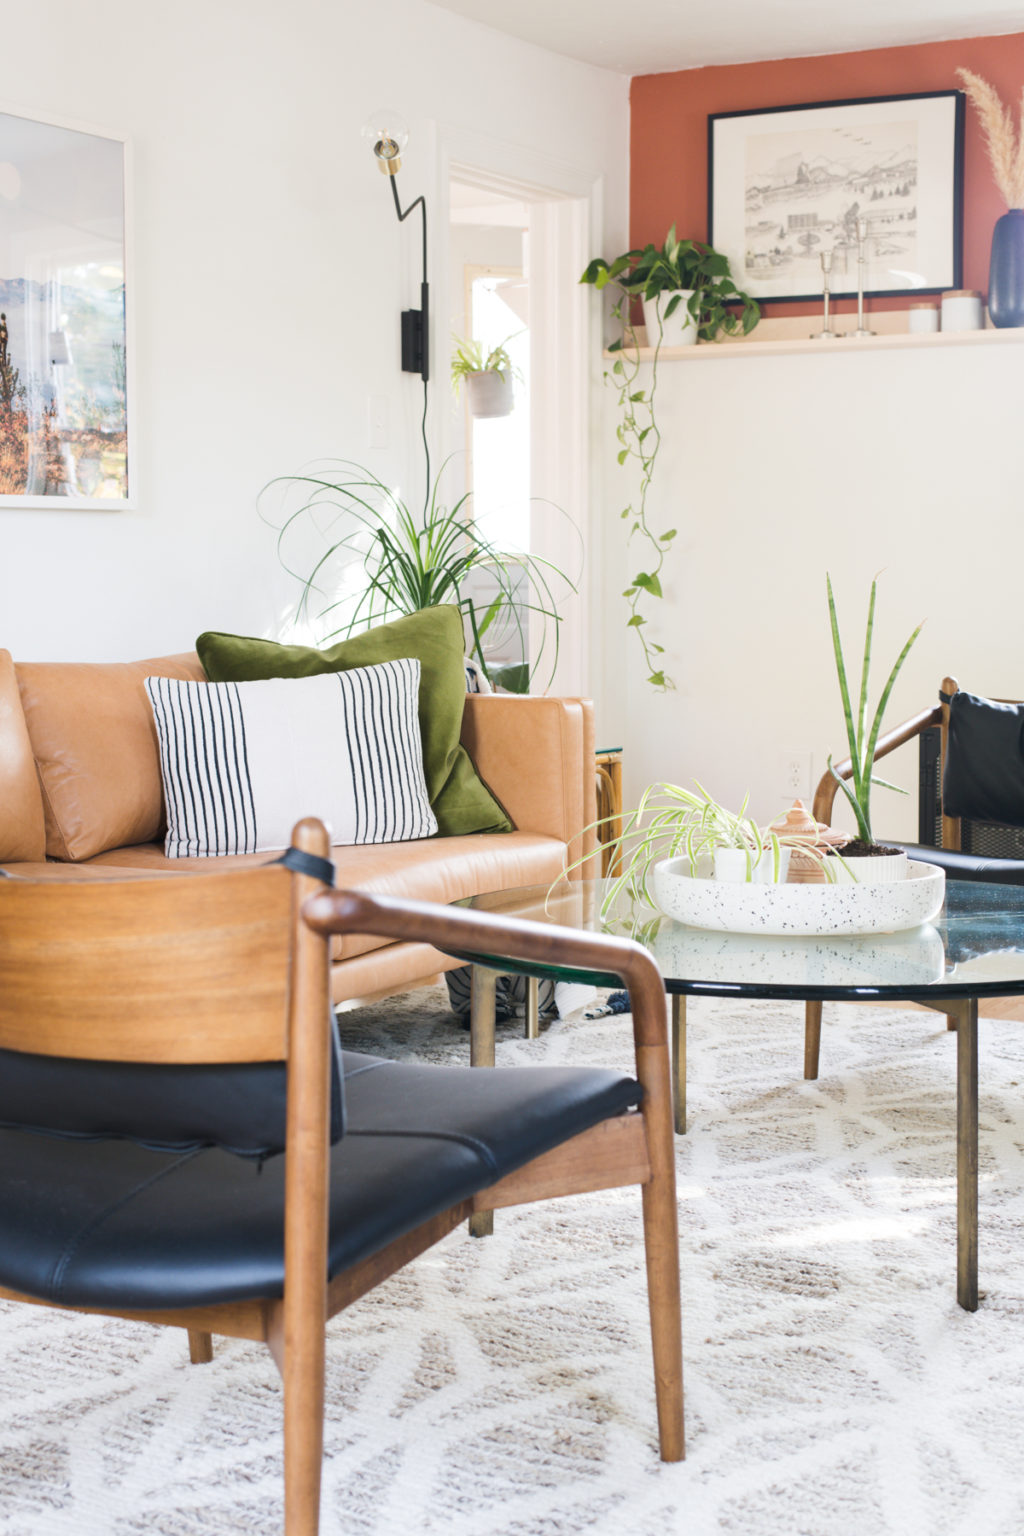
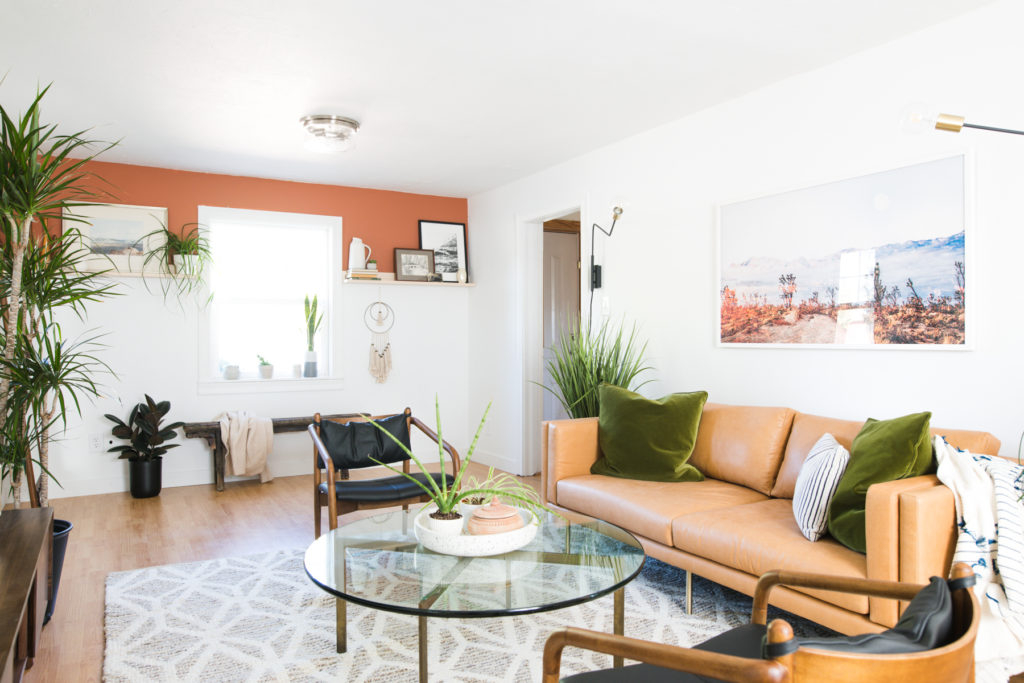
What a difference a new coat of paint makes!! Let’s talk about the furniture! Almost all of it came from Article. Article is my favorite place for amazing quality, design driven pieces. This is the 3rd time that I’ve been lucky enough to use their pieces in a room (you can see Aspyn’s living room here, and my Mother In Law’s living room here) and every single time I am blown away by them.
The couch I chose is their Belez sofa in Yuma Tan. The color of the leather is so cool, it’s less orange than regular camel leather. I love the spun metal legs too. This sofa is structured and comfy and I love the large cushions on the bottom. It was so funny, when we opened the couch Amy’s husband kept saying “wow, this is like real leather!”
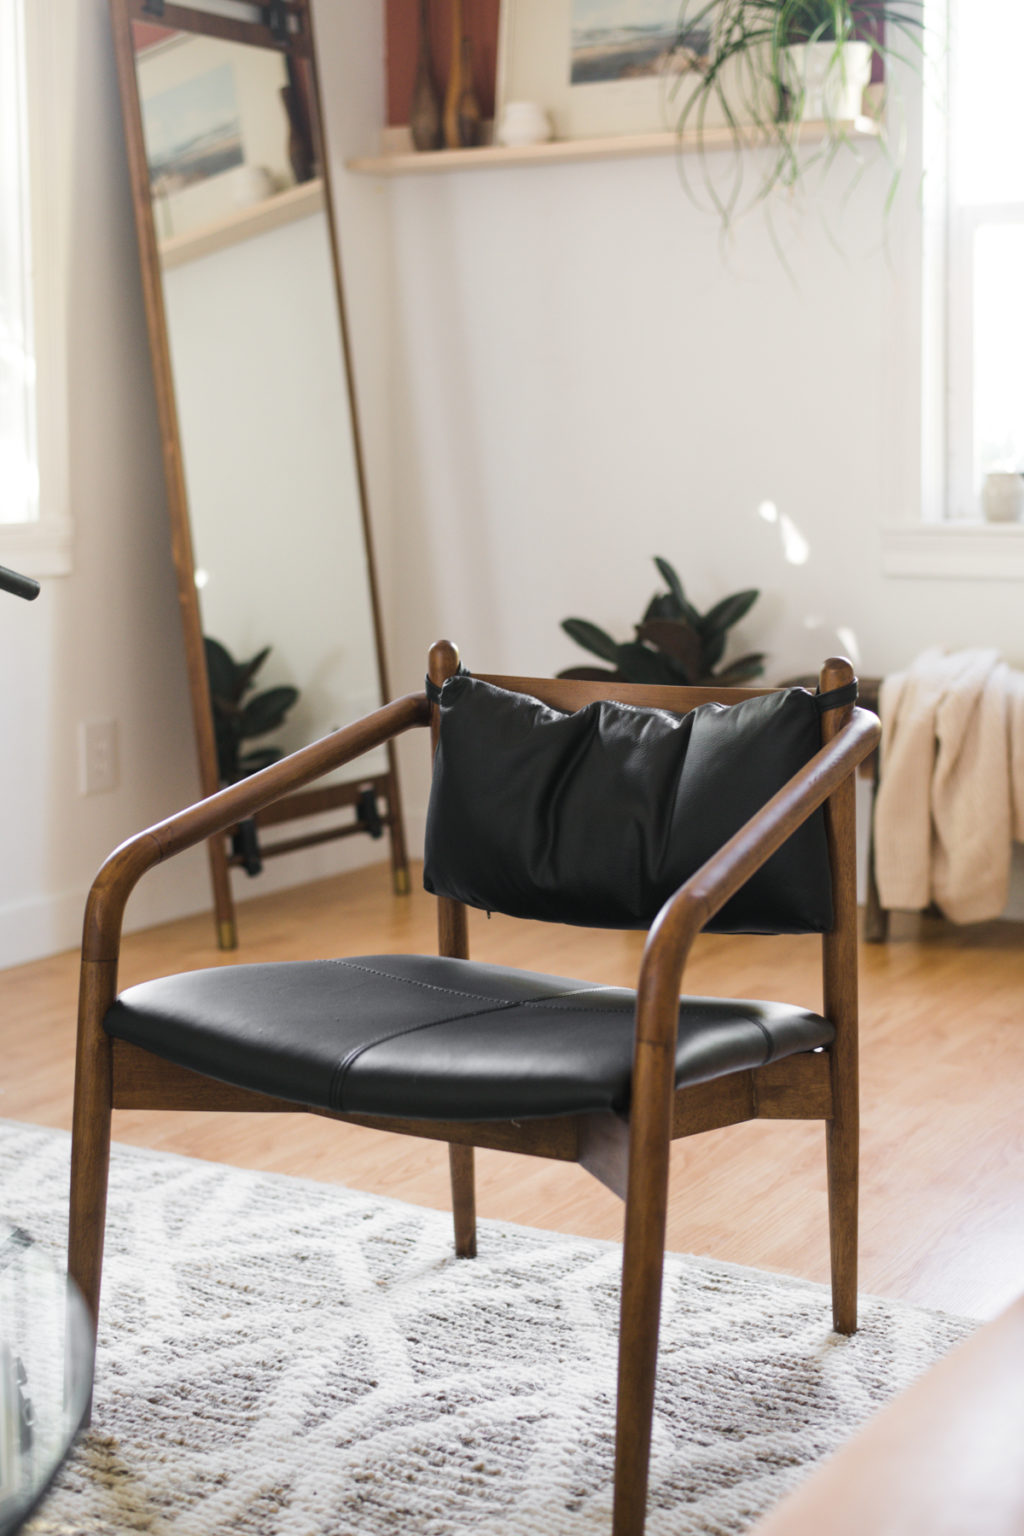
I have been wanting to use the Lento chairs FOREVER. I think that every room needs some black to ground it and these chairs are the perfect way. They are small enough that they work well in multiples, but large enough that you can spend hours hanging out in one. I love the detail of the removable back cushion.
For the media console I chose the Seno in Walnut. It’s a great height for rooms like Amy’s that have lower ceilings. The rich walnut color is so gorgeous!
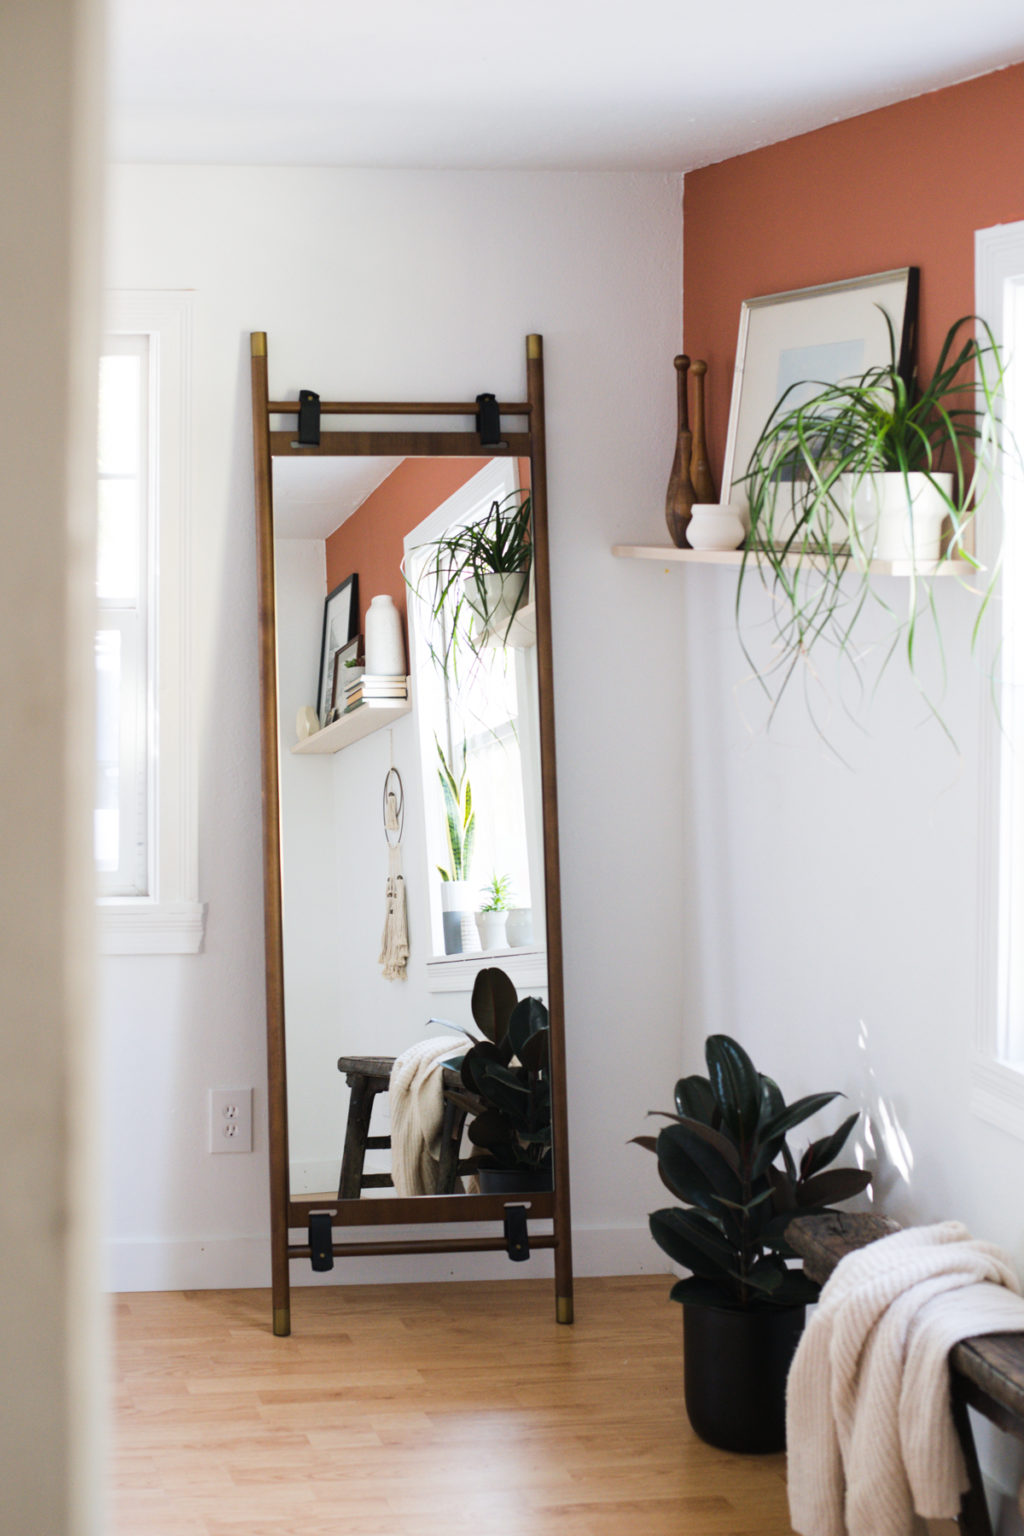
Can we talk about this mirror for a minute. I have never in my life seen a mirror that I love more than this one. The walnut wood, black leather tabs and brass caps are like every good thing ever rolled into one. The best part, the Beau mirror is only $249!! Do you know how much oversized mirrors are at regular retailers? Like 3x that amount!!
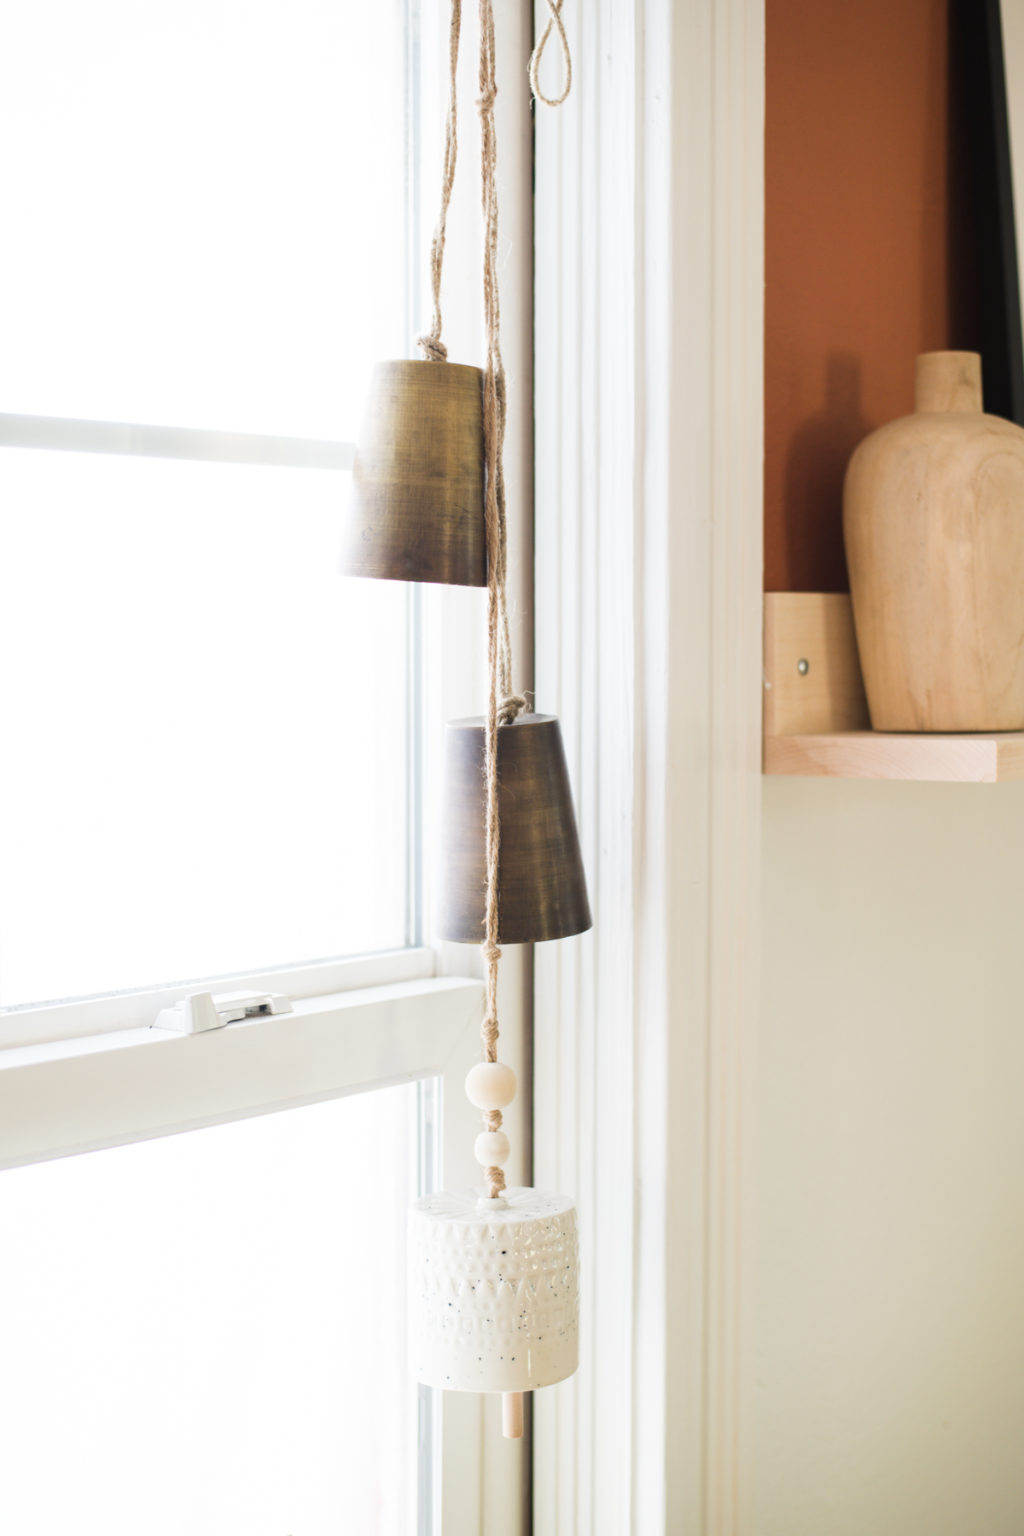
I had so much fun digging around in my storage unit and at my favorite secondhand haunts for all of the accessories.
I would just like to give the most massive thank you to Sherwin-Williams for allowing this magic to happen, and of course to Amy for letting us completely invade her life for a week! I love projects like this when I am lucky enough to get to connect with one of you in real life and share some of the DIY love. You guys mean the world to me and I am grateful for you!!
The post Modern Desert Living Room Reveal appeared first on Vintage Revivals. Via https://vintagerevivals.com/modern-desert-living-room/ 
If you’re into modern, simplistic, and minimalist decor this project is for you!! This easy DIY wooden dowel Christmas tree is a little bit of Christmas decor for those that maybe don’t want their house to look like the North Pole 2.0. All of the supplies can be purchased at your local hardware store and it can be put together in just a few hours!
To get started you’ll need:Dowels:(1) 1in x 48in (for trunk) Wood:3⁄4in plywood or MDF – 9in x 9in piece Tools:miter box Supplies:Painters Tape Here’s your cut list:
Step 1:Use the 1″ Spade bit to drill hole into your tree base.
Step 2:Print off the pattern template found here. Wrap it around your 1″ dowel and secure it with painters tape. This template is going to show you exactly where you need to drill and what size drill bit you need to use. You’ll need 3 drill bits that will correspond with the size of your dowel branches. 3/8, 5/16, 1/4. The trick to getting all of the branches pointing upward at the same angle is to use an adjustable T Bevel ($10 at Home Depot) You set it to the angle that you want and then use it as a guide while your drilling!
AssemblyOnce everything is drilled, its time to assemble! Start by putting the larger longer branches in the lower parts of your dowel and build up!
Once you’ve done your dry run, with all of the dowels in place, you might want to go back and add glue. Just a small drop inside each of the holes on on the trunk will be plenty. If you’re like me and want to be able to take it down once the holiday is over I recommend color coordinating the dowels. Use different colored markers and mark inside the hole on the trunk and on the edge of the dowel. This will make reassembly so easy!
So adorable right?!! Now its time to decorate!! You can use any type of twinkle light/ornament combo. I opted for bright and colorful, but how great would this be with white twinkle lights and wooden ball garland?!
I think that this might need to be recreated in a real tree size, how cool would that be?! The post Modern DIY Christmas Tree (Wooden Dowels) appeared first on Vintage Revivals. Via https://vintagerevivals.com/diy-wooden-dowel-christmas-tree/ |


 Another tip is to start drilling straight into your dowel, after you have the tip of the drill bit inside, then start on your angle. This will keep your drill bit from skipping around and give you a nice clean entry point.


Photo used under Creative Commons from amy.gizienski
