|
It’s been a long while since I’ve been in the thrifting game (obviously when you’re eyeball deep in renovations you’ve got other priorities. Like not eating at McDonalds again.) I was cruising Craigslist last night and feeling like every good thing ever was gone. Man this world of instant gratification! So instead of feeling sorry for the lack of cool vintage leather and the overabundance of microfiber, I took a trip down memory lane at all of the great things that I’ve scored and I thought it would be fun to look back over the years at my favorite secondhand finds.
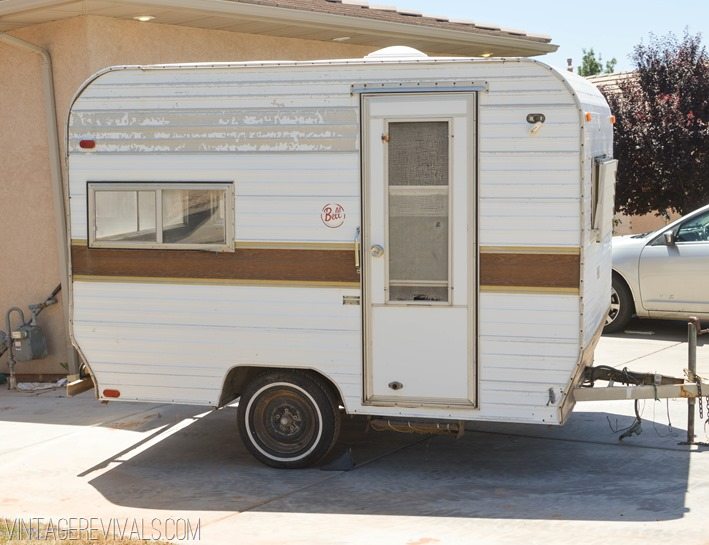
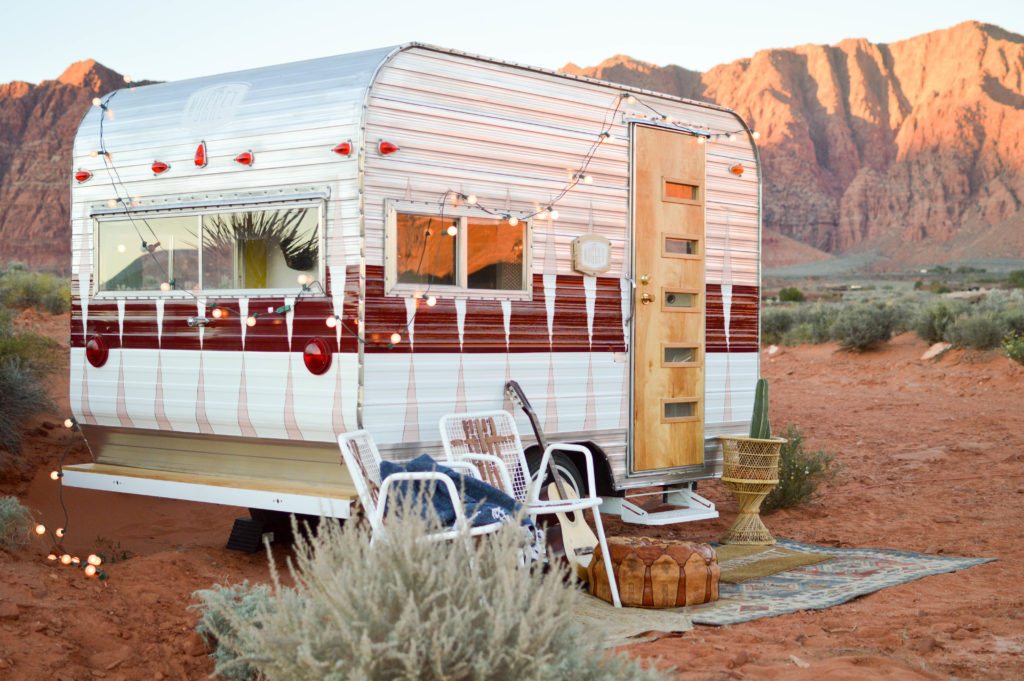
My ultimate #1 favorite thing ever was the card catalog that I found on Craigslist. This thing was in rough shape. You can read all about how I saved it and see the original ad here! The previous owners used the little pullout shelf to spray paint on. Just typing that feels like someone stabbed me in the gut with a shiv. But after some serious TLC it is to this day my best score. It’s hanging out at my SIL’s until I’ve got a spot for it at the Merc. And honestly it makes me throw up in my mouth a little when I think of how I almost sold it. More in this post! #2 on the list has to be The Nugget. What started as a knee jerk craigslist search on my birthday turned into one of my favorite DIY adventures. This cute vintage trailer came home with me for $1000 and after 4 months of hardcore renovation was completely unrecognizable! You can fall into the world of The Nugget here!
The next thing on the list is one that might make you green with envy. The pair of green leather chesterfield sofas that I found for $400. I somehow convinced Court to drive to the middle of nowhere Nevada to pick them up. They still need a heavy cleaning but I’m feeling pretty great that I’ll be able to find a home for them in the Merc.
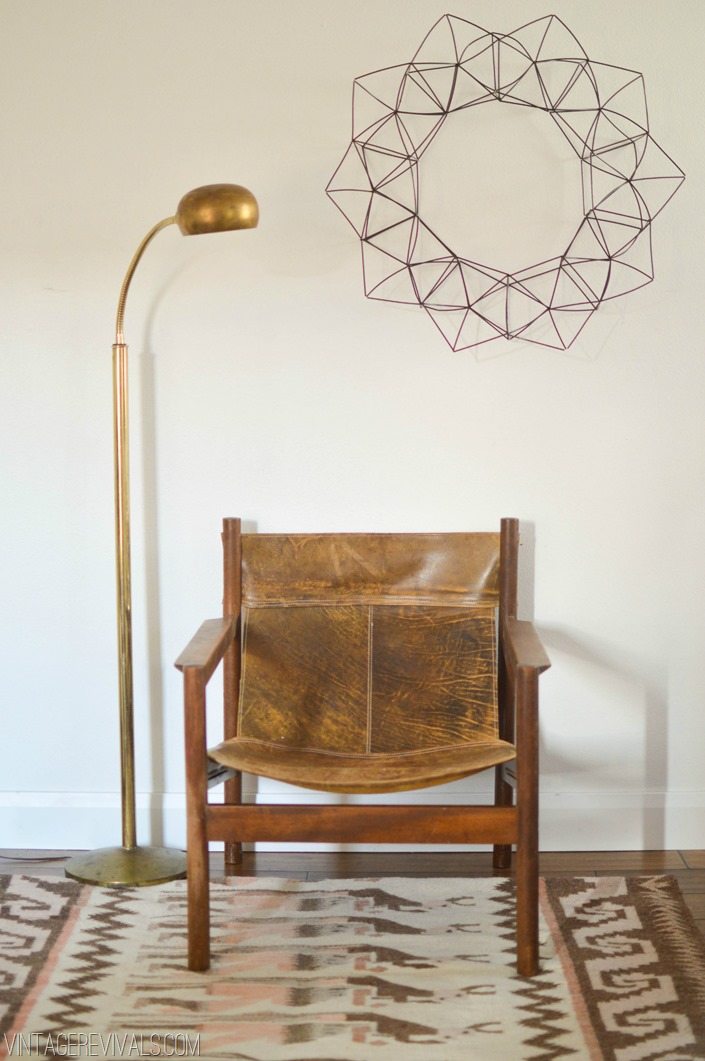
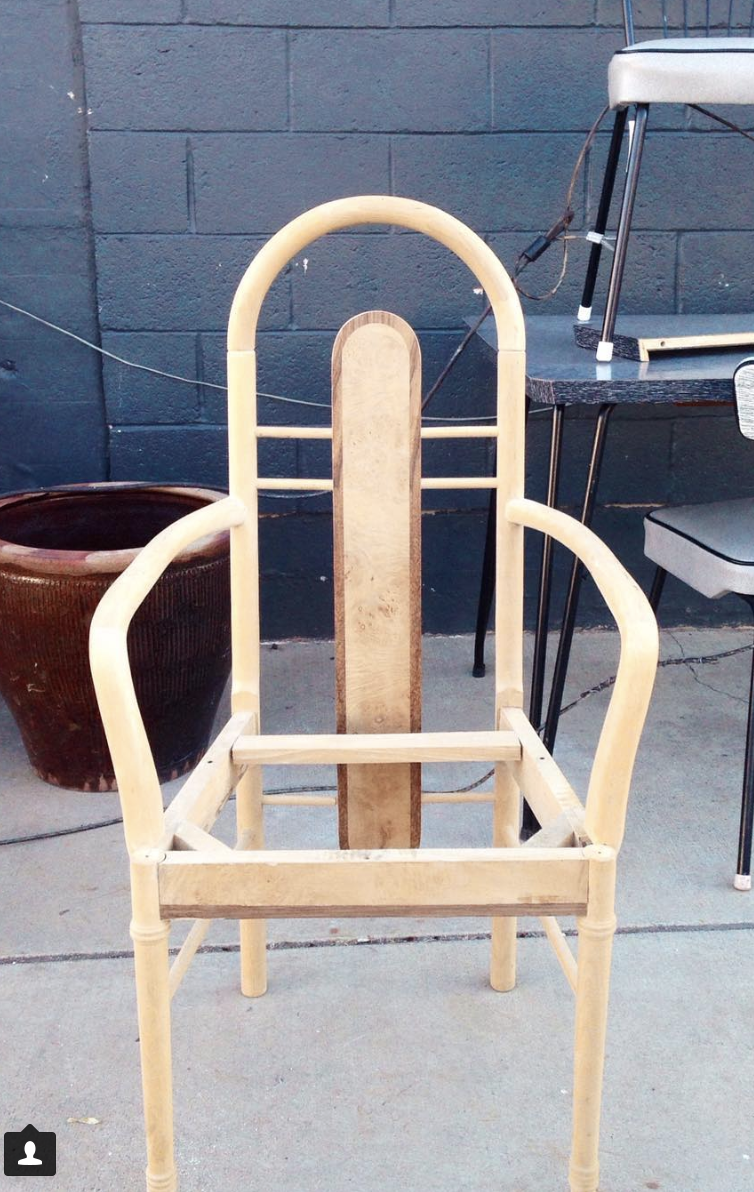
#4 on the list is the vintage Michael Arnoult sling chair. Oh how I love this chair. Unfortunately with the leather being almost 60 years old its starting to tear. It’s one of those look but don’t sit chairs.
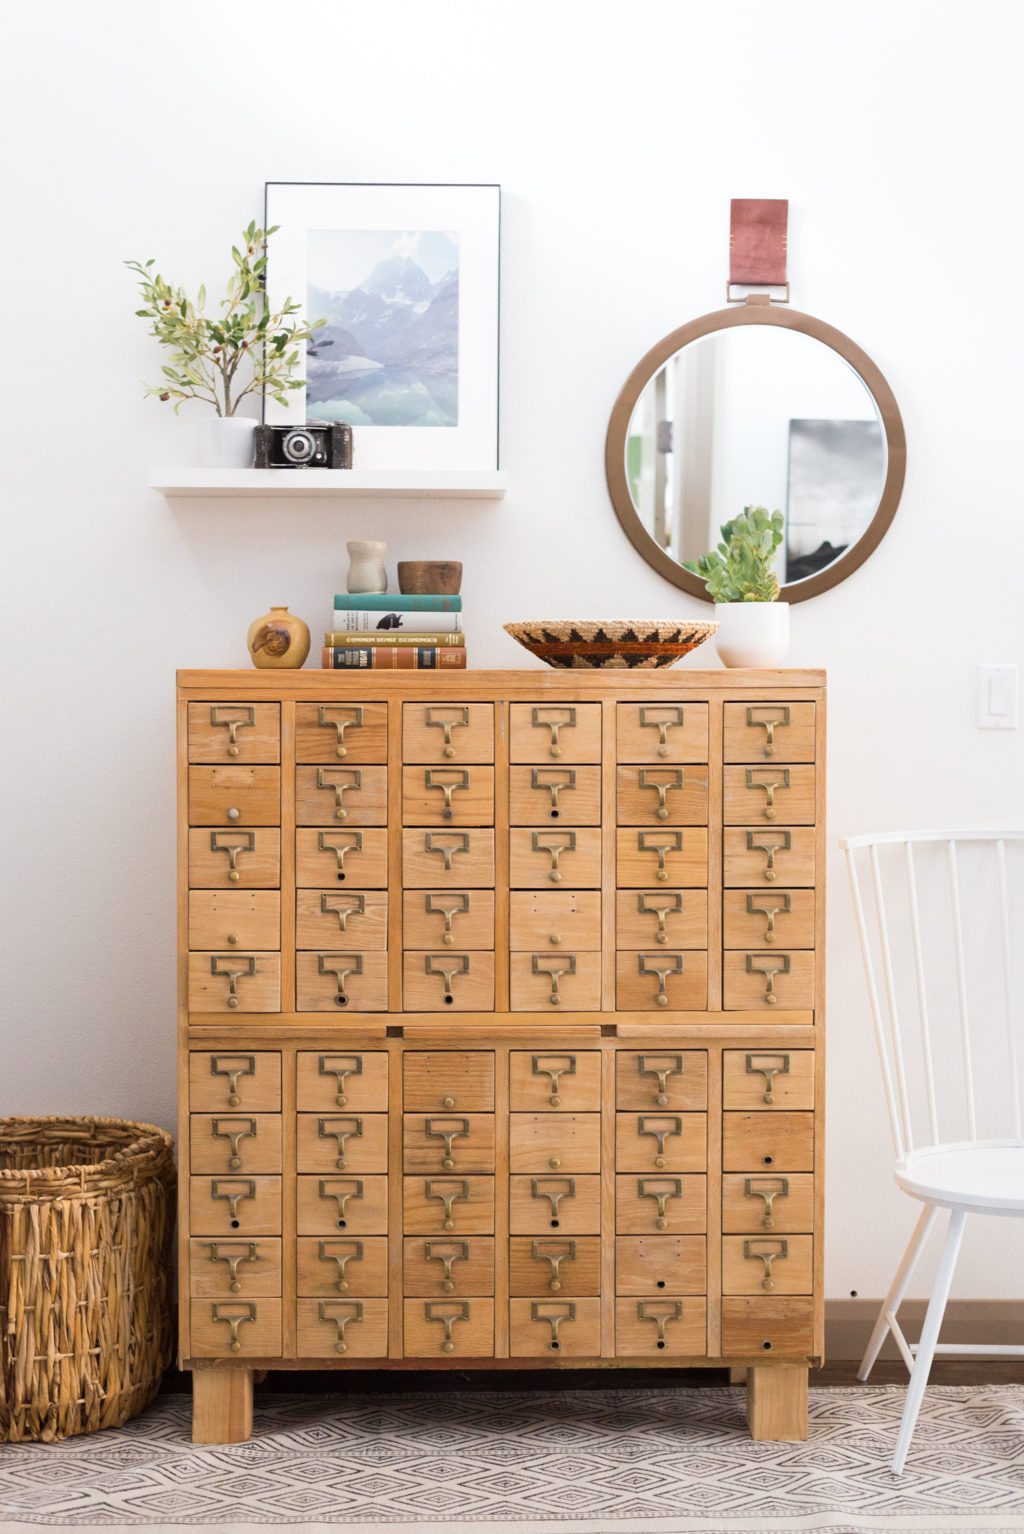
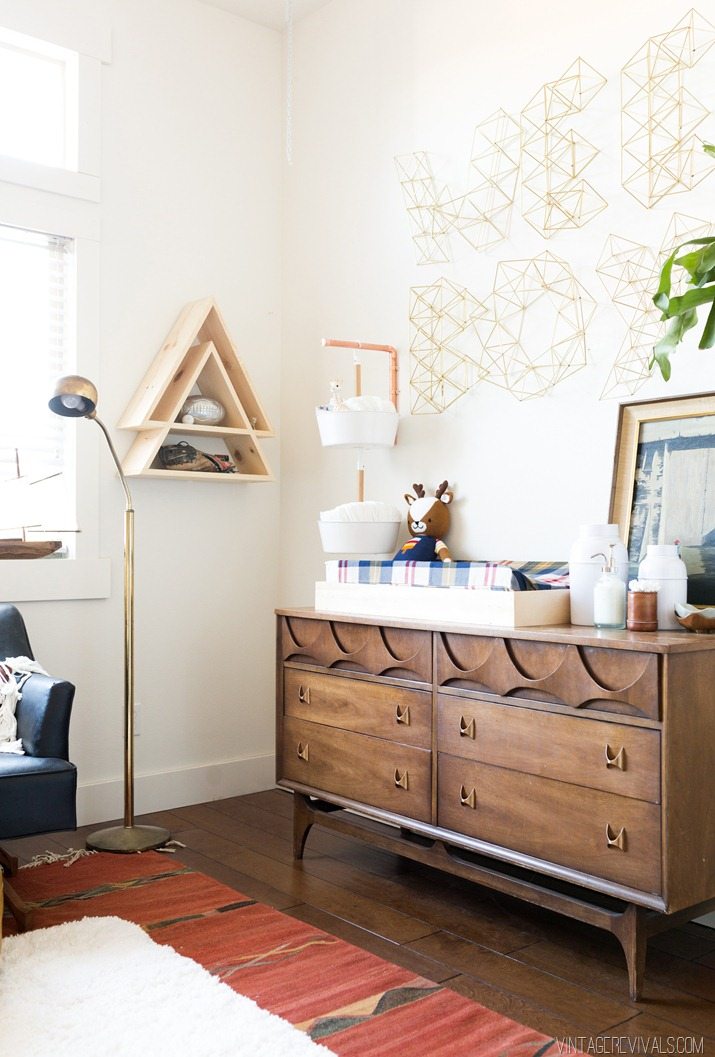
#5 is a basic midcentury staple that I just can’t quit. The vintage Brasilia dresser that I thrifted for $65 way back in 2013. It is just the most perfect simple guy that looks good in any space. I loved it in Brem’s Nursery!
Last but not least is a set of 6 chairs that I’ve never shown, aside from one instagram back in 2016. I am DYING to get phase 2 done in the Merc so that I can get them upholstered and moved in!
What is the best thing that you’ve ever thirifted?!! The post My Favorite Secondhand Scores EVER! appeared first on Vintage Revivals. Via https://vintagerevivals.com/my-favorite-secondhand-scores-ever/
0 Comments
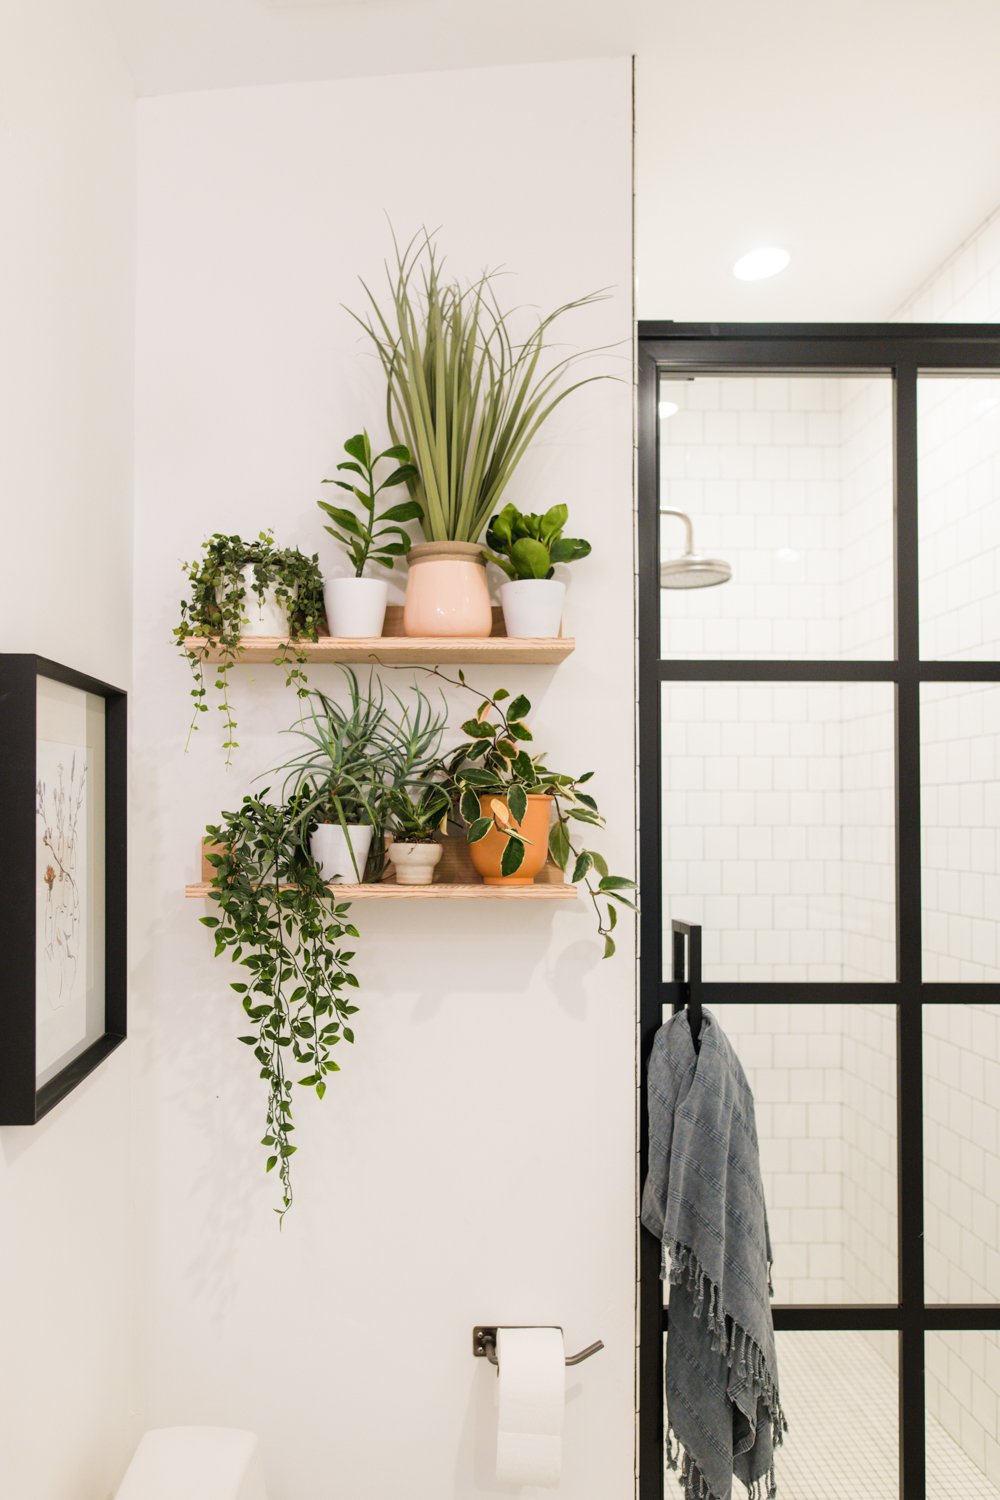
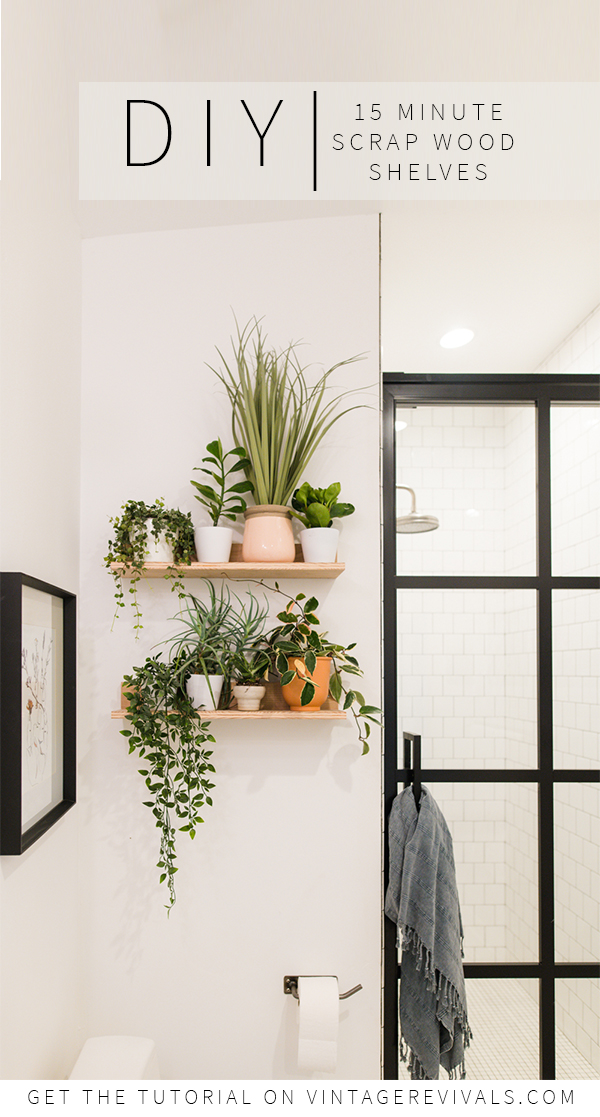
Anyone and everyone knows that you’re not supposed to throw away scrap wood. But like, what are you supposed to do with it?! THIS PROJECT IS THE ONE YOU’VE BEEN WAITING FOR! These cute DIY wood shelves are easy peasy and throw off a cool modern vibe and if you’ve got some scrap wood floating around will cost you zero dollars!
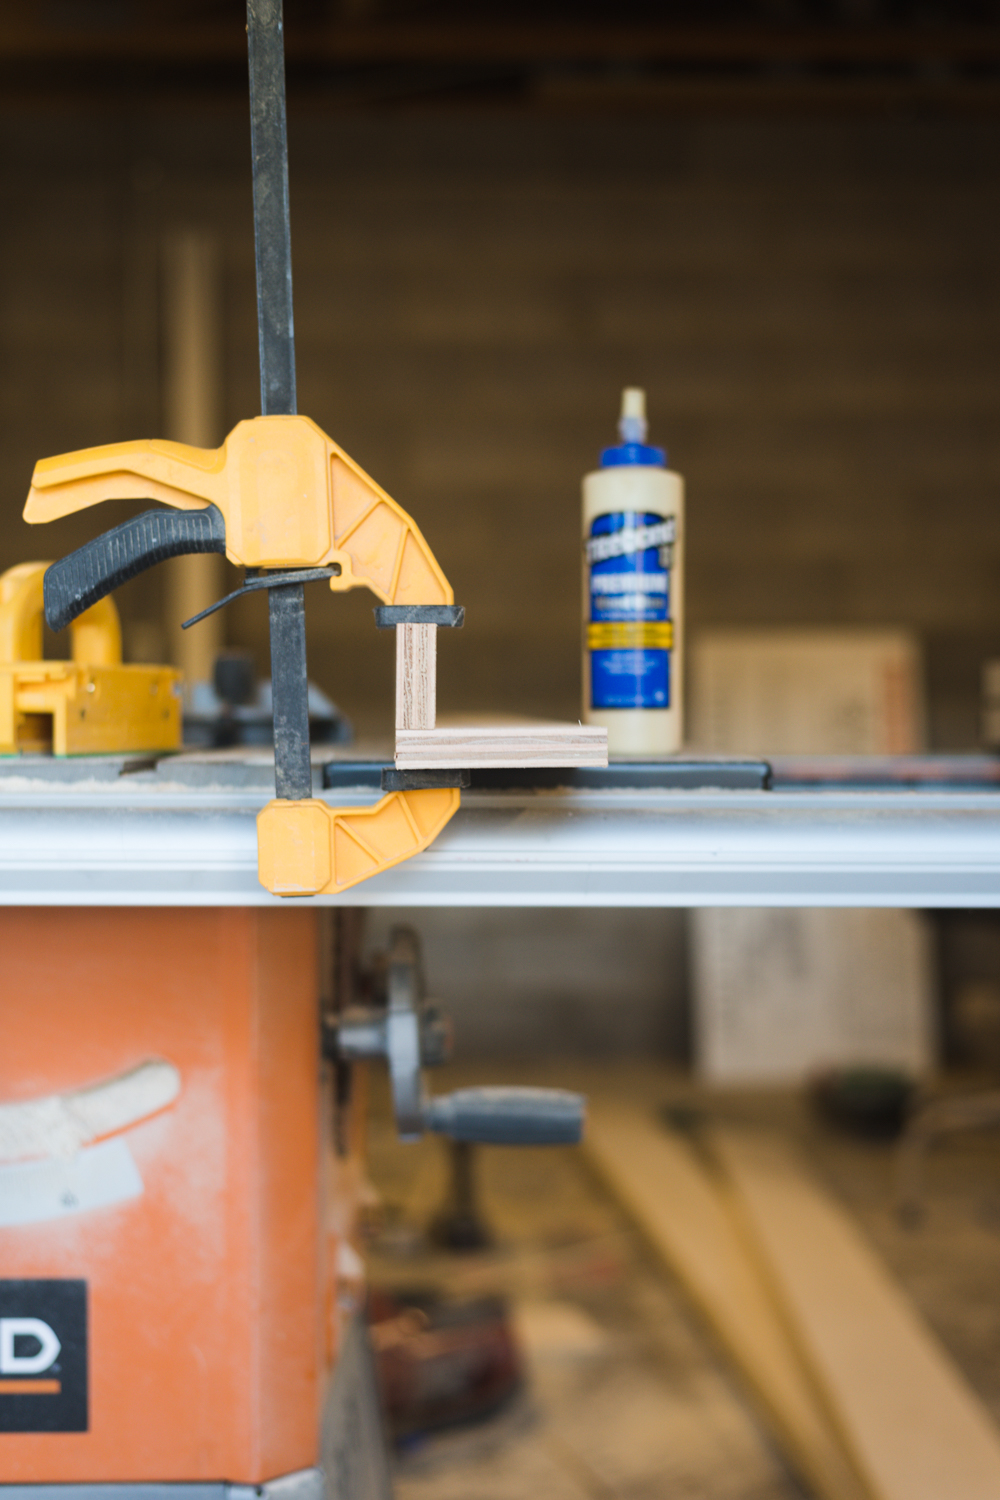
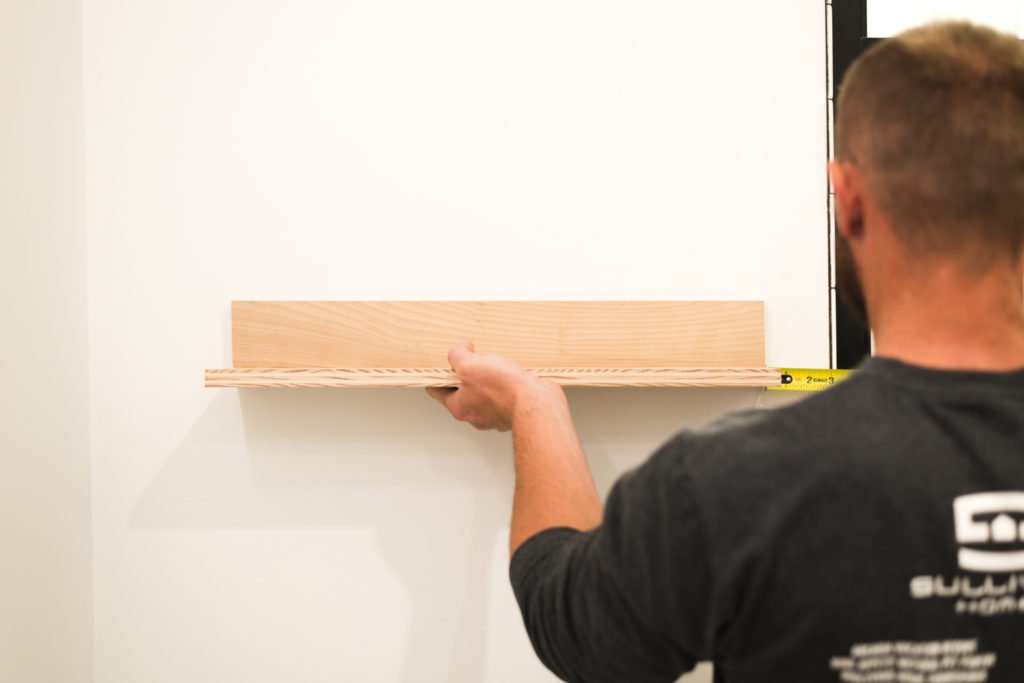
As I was working on Ivie’s bathroom, I knew that I needed something on the wall by the toilet. These quick shelves are perfect for small plants or as a picture ledge! You’ll Need:Scrap Wood Building Your Scrap Wood ShelfStep 1: Start by cutting your boards to size.My boards measure 3 inches X 24 inches and 6 inches x 24 inches. Step 2: Glue boards togetherAdd glue to the bottom edge of the 3 inch board and attach it to the face of the 6 inch board. Step 3: Clamp and screwClamp the boards together and let the glue dry for 24 hours before removing the clamps. While the boards are clamped, attach the wood screws through the underside of the 6 inch board and through the 3 inch board. This will give the shelves extra stability.
Hanging Your ShelvesStep 1: Find your studs and center your shelfTo attach the shelves to the wall, first find where your studs are. This will help determine the placement of your screws.
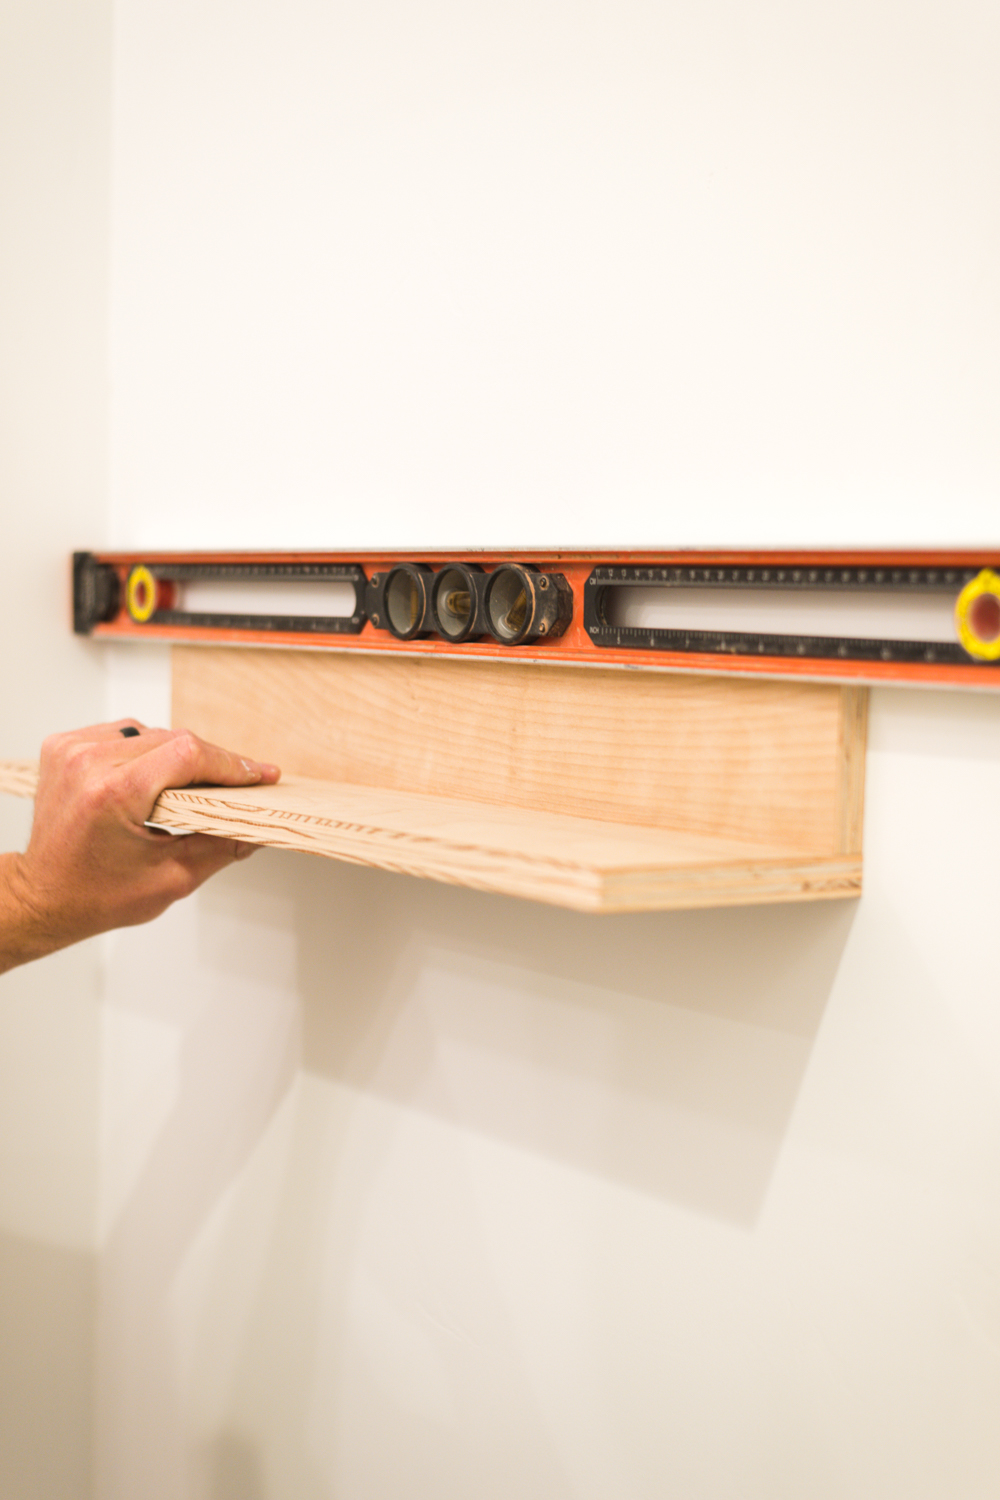
We only hit 1 stud with our shelves, so the second side needed to be mounted with a drywall anchor. Step 2: LevelThis is one important step, dont forget to level your shelf!
Step 3: Drill your pilot holesFirst drill the pilot hole for the stud, then measure the distance between the edge of the shelf and the pilot hole. On the other side of your shelf, measure in the same distance and drill a second pilot hole, making sure that it is going into the wall a little bit. Remove the shelf and set your anchor. Step 4: Screw your shelf in placePlace your shelf back on the wall and attach the screws.
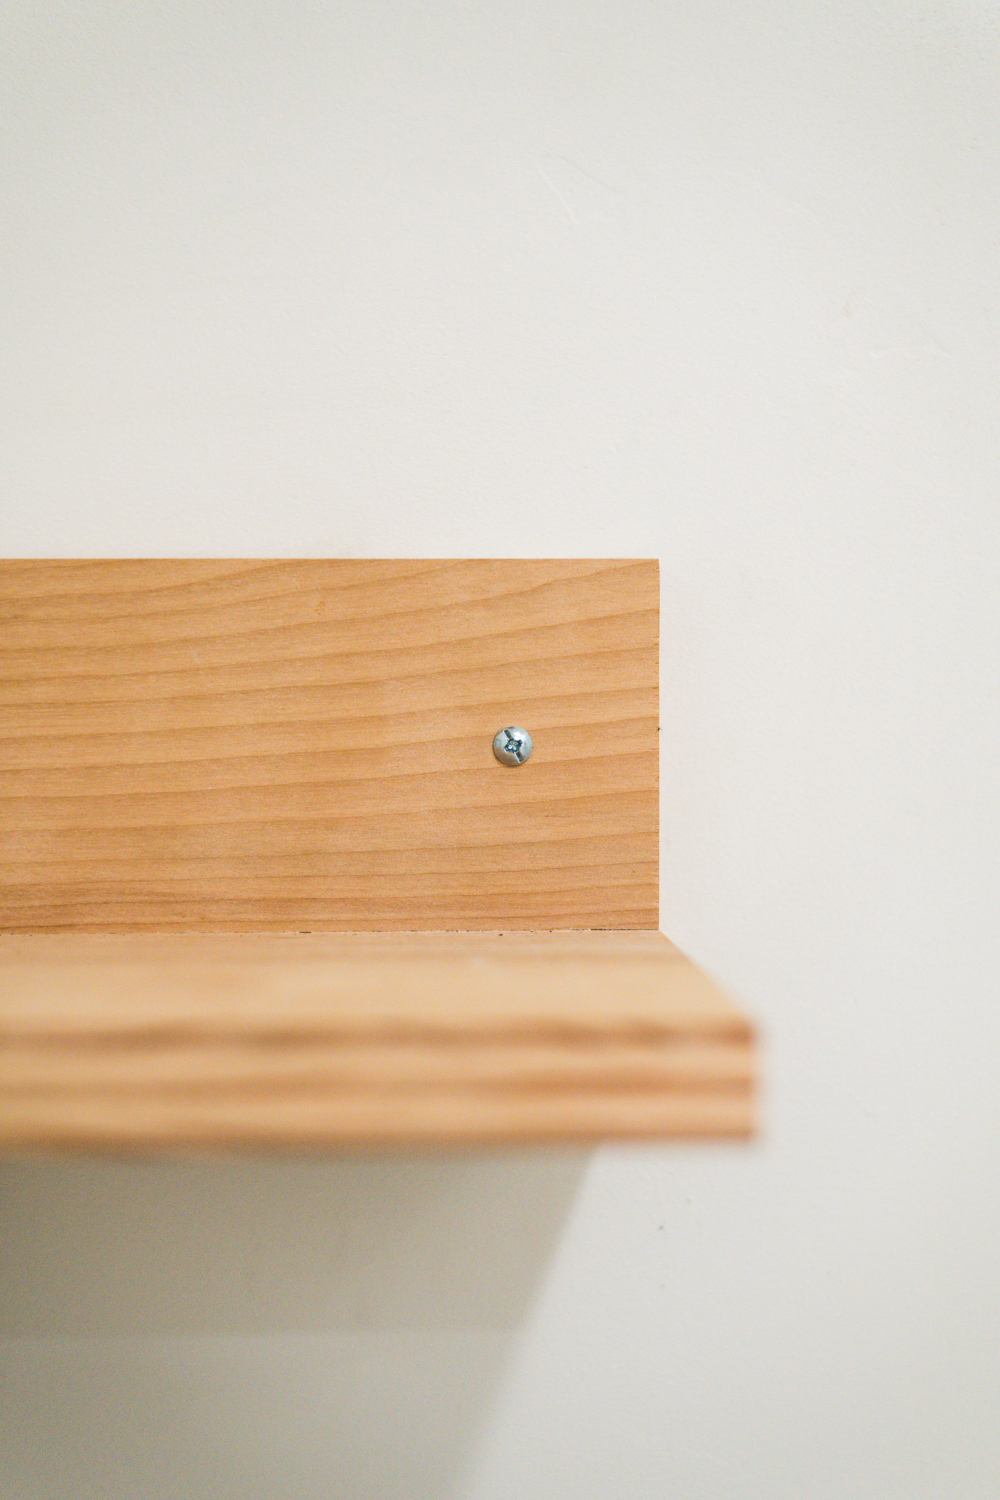
That’s it! I love the edge of raw plywood and I love that these quick and easy shelves cost me nothing!
You can use this tutorial and adapt it to any size, though I wouldn’t recommend making your shelf wider than 6″. Picture it as a long picture ledge above your couch, or as an easy bedside place to charge your phone! SO CUTE!! Need some more shelf ideas? I’ve got you friend!! Some of my most popular shelf tutorials are below! The post 15 Minute DIY Scrap Wood Shelf appeared first on Vintage Revivals. Via https://vintagerevivals.com/15-minute-diy-scrap-wood-shelf/ Did you guys catch the full reveal of my daughter Ivie’s bathroom?! It is one of my favorite spaces I’ve ever designed!! This post is giving you all of the details on the eye candy and everything you need to know to recreate it yourself! So lets get to sourcing!
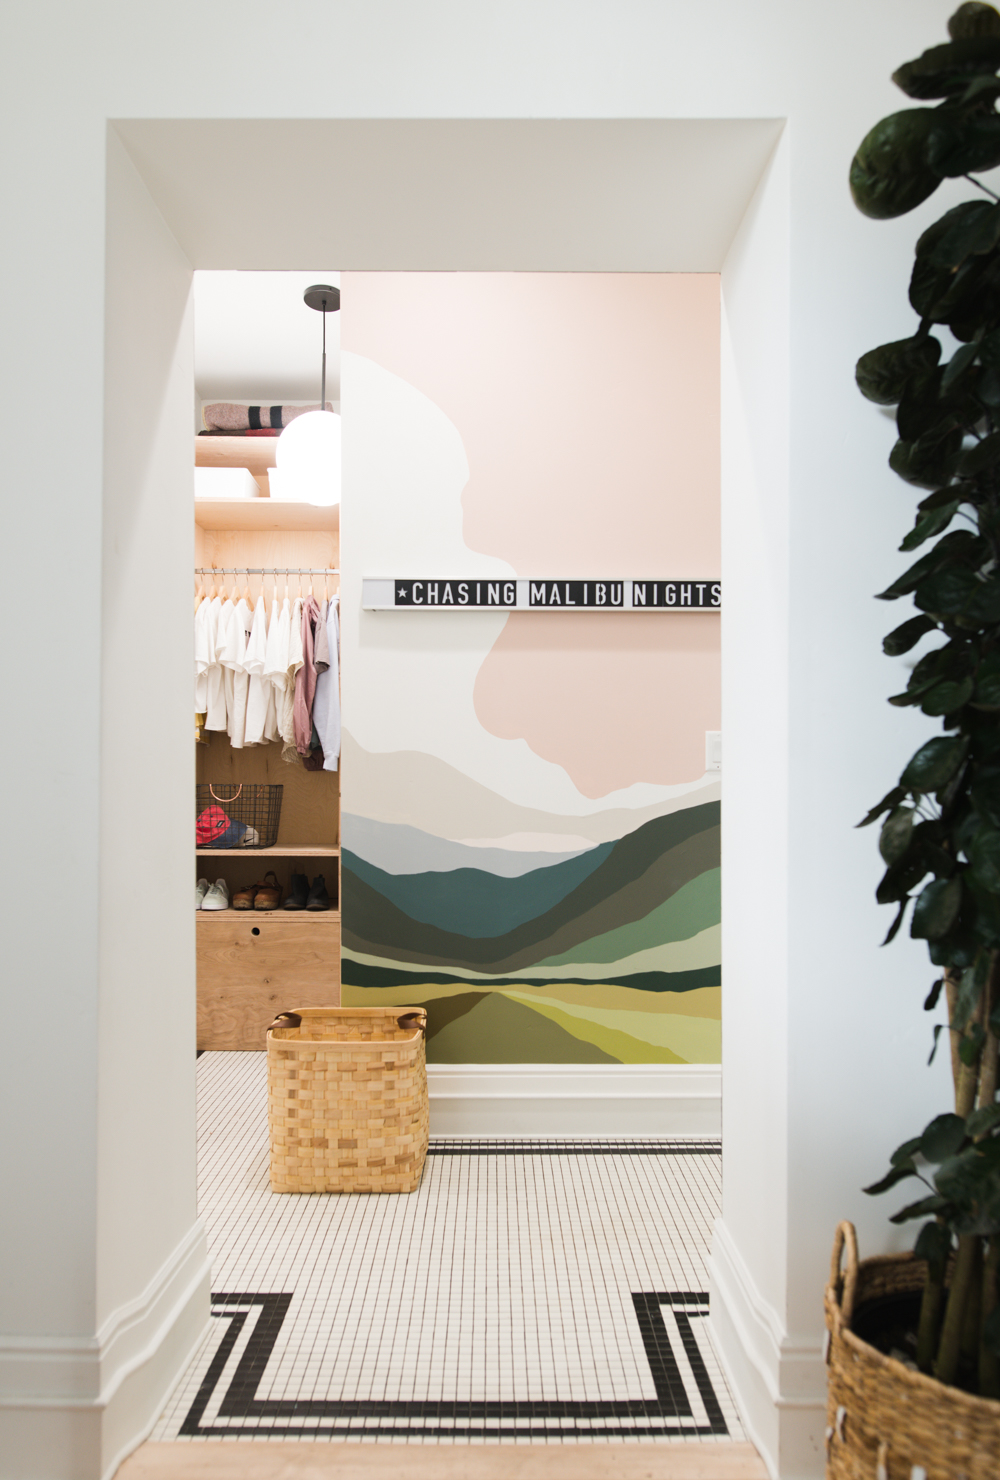
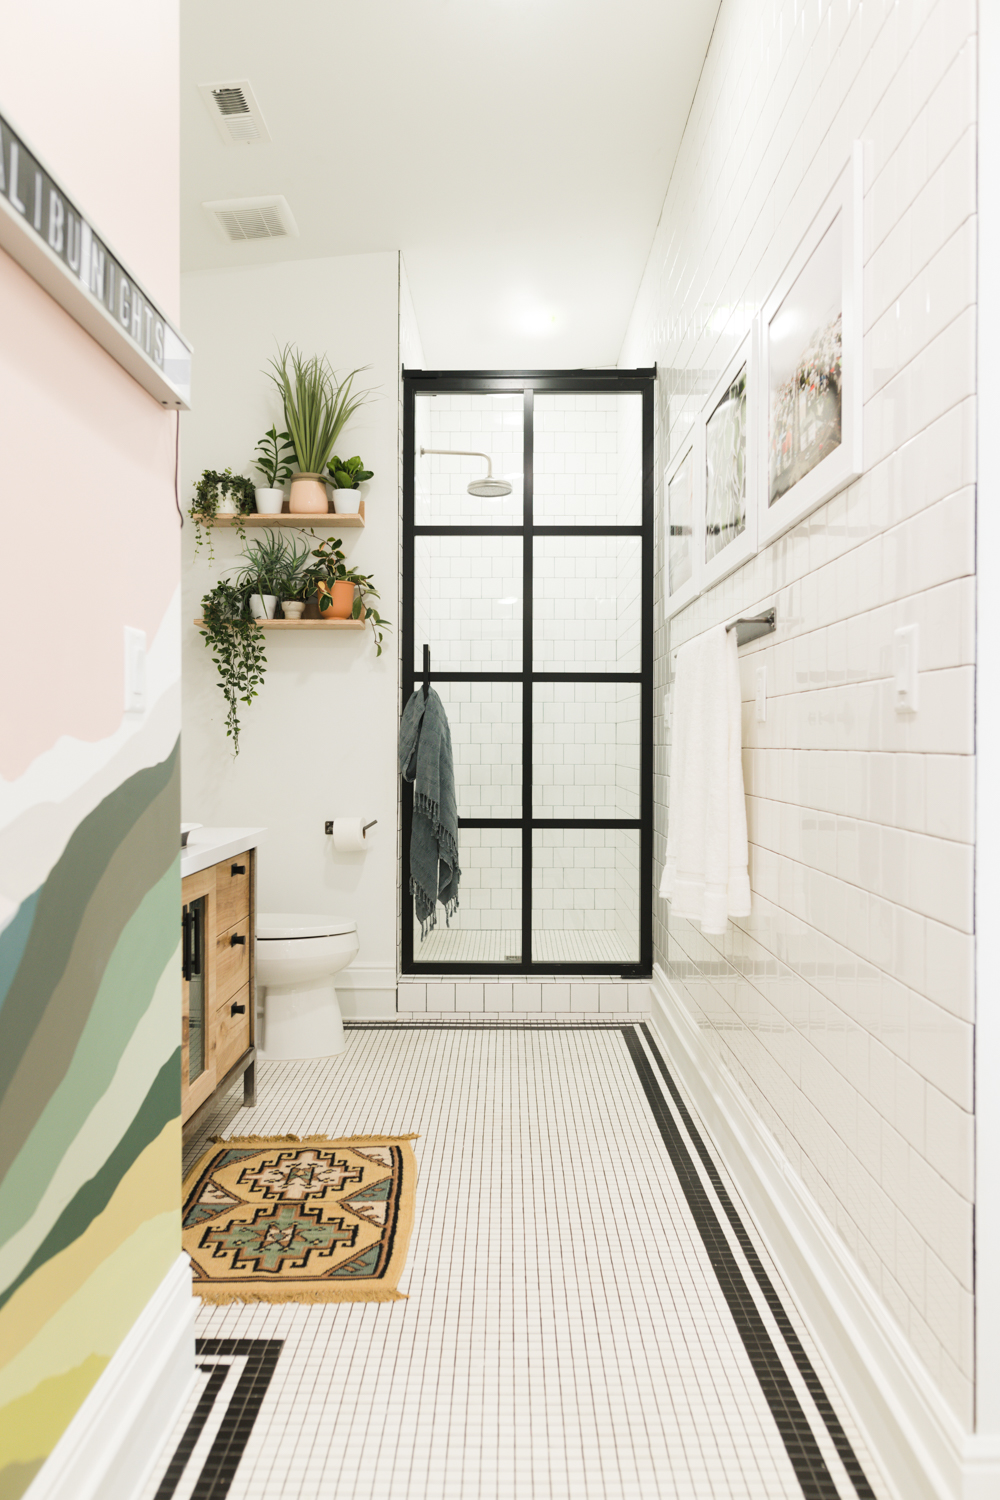
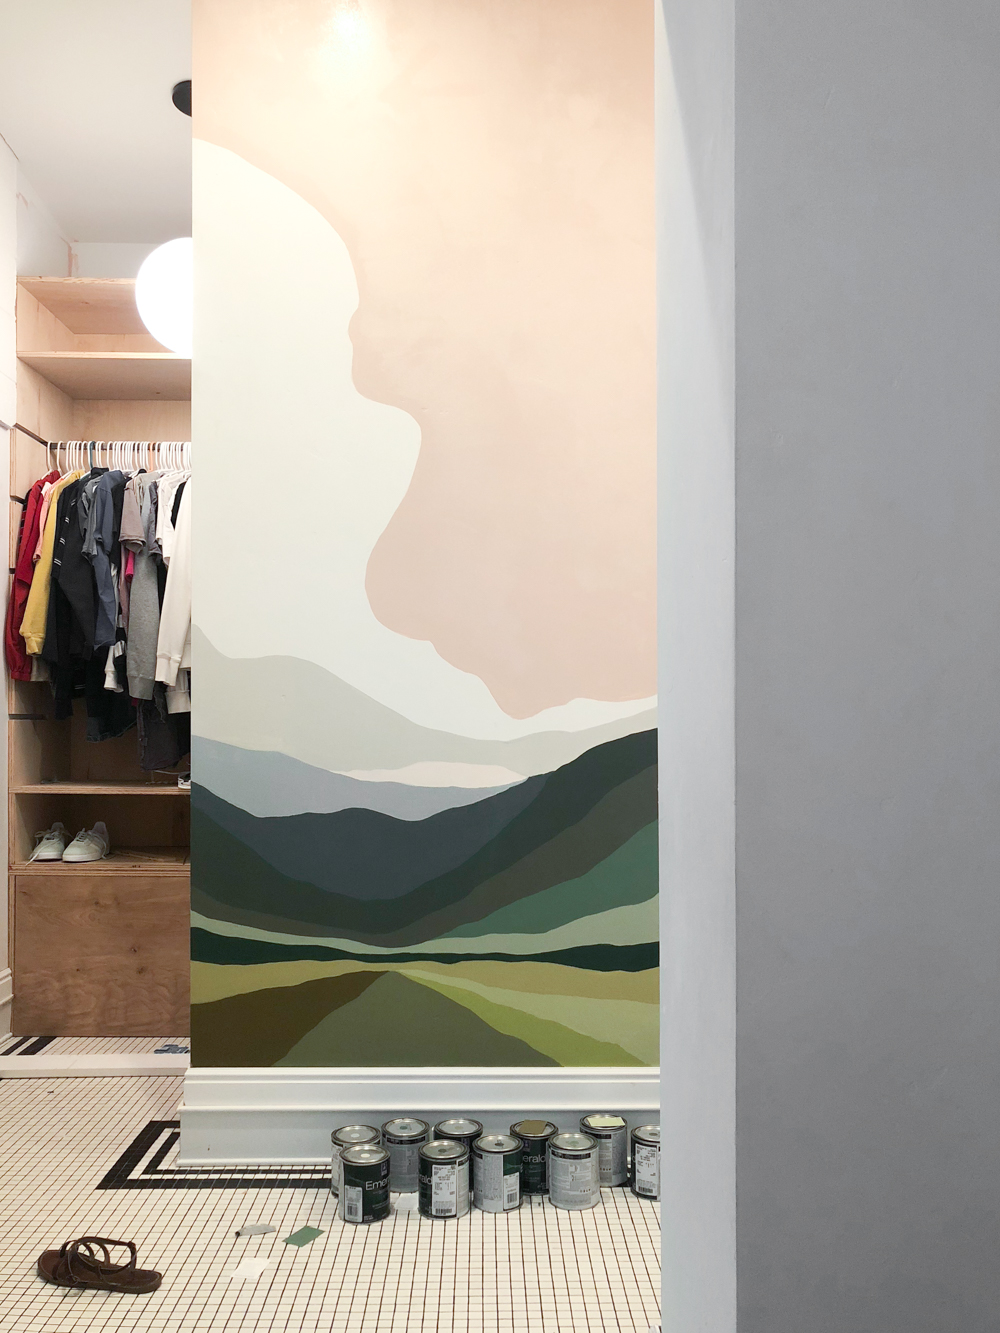
The star of the show is the mural designed by Colleen Elizabeth, I have been obsessing over her creations for such a long time and was so excited when she said she would design one just for this space. You can see the full step by step tutorial for the Paint By Numbers mural here! The Memo Light is from Article and such a fun addition! The black and white floor tile is from Daltile, you can get it at homedepot.com and read all about why I chose it here! I also used in stock white 4×4 tile for the shower and wall. I’ve been wanting to tile an entire wall again after doing it in my $939 bathroom renovation and it just gives off a vibe unlike any other.
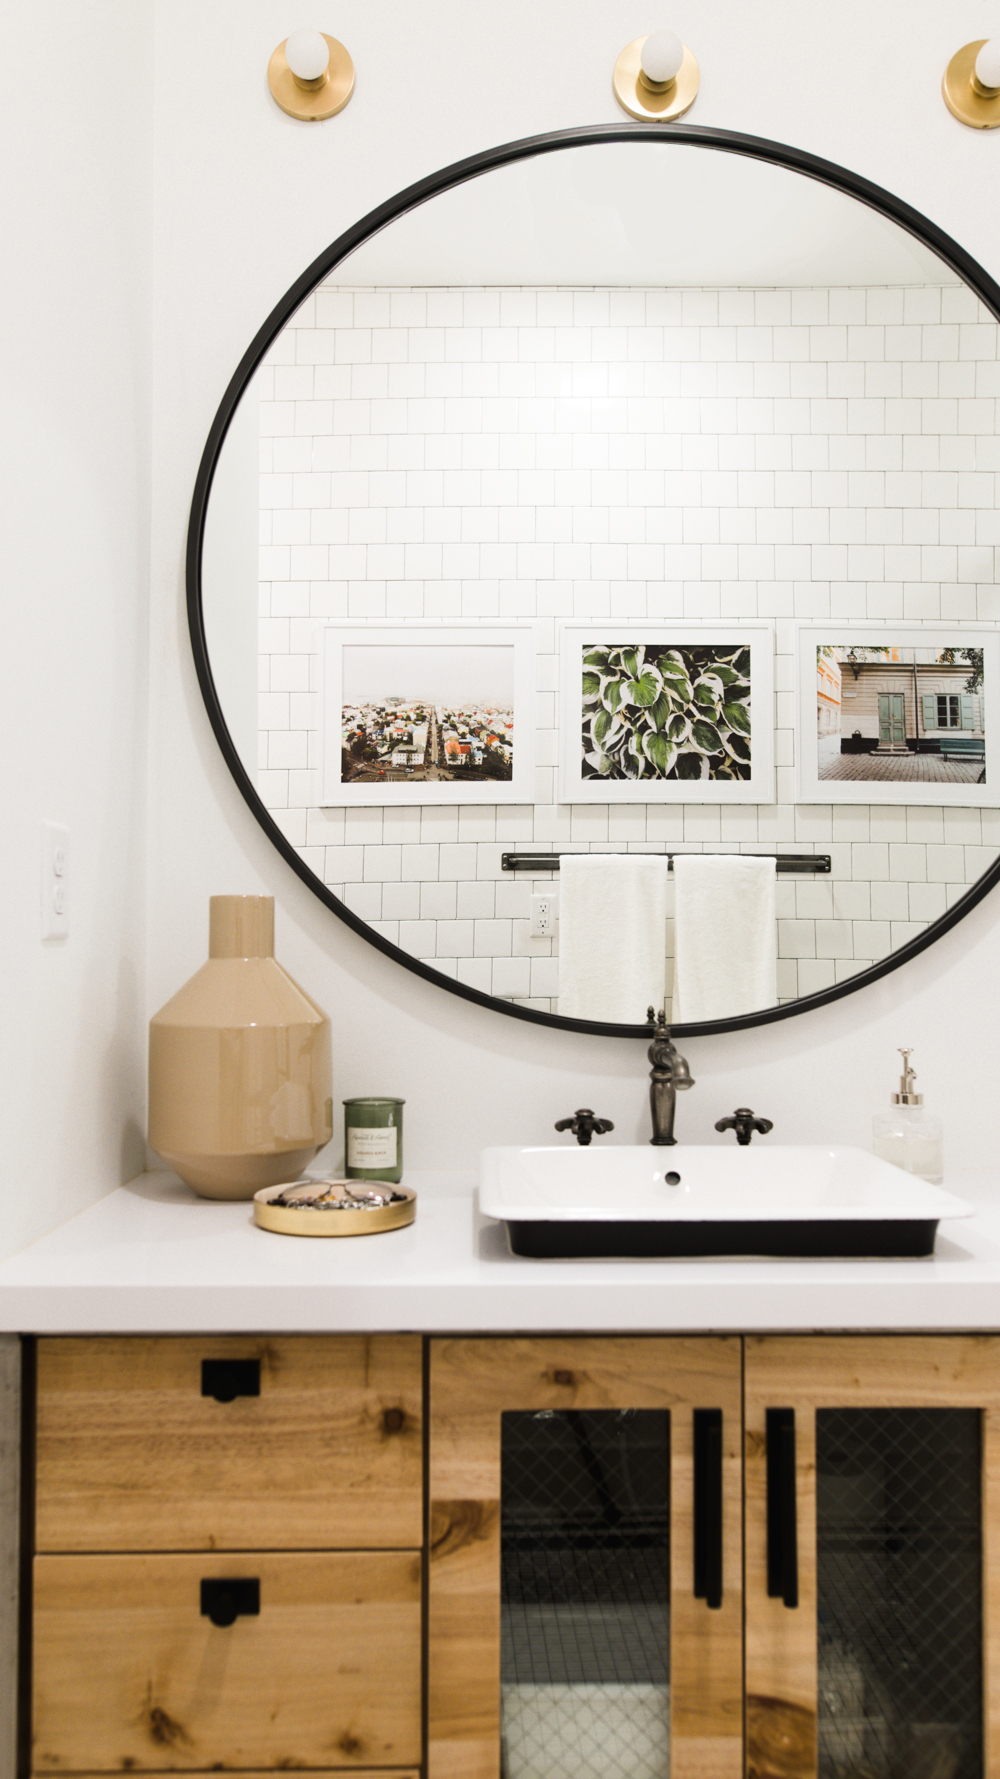
Mirror is from West Elm (if you’re close to Las Vegas, check out my post about their top secret outlet store!) The retail price is $499 but I scored it for under $200! The lights are Hudson Valley Lighting Tate in aged brass. Our amazing cabinet guys Shawn from Aspen Mill (if you’re southern Utah local!) did SUCH an amazing job on the vanity. It’s the perfect nod to industrial that I wanted! Cabinet hardware is from CB2 (backplate + knob).
One of my favorite elements that turned the entire design of the Merc on it’s head (literally) is the plumbing fixtures that we used. Going into the Merc I thought I was going be all about the modern brass, but when I saw Kohler’s Artifact collection in Vintage Nickel my world stopped spinning one way and started spinning another. I absolutely LOVE this hardware, and paired with their Iron Plains sink it is heavenly.
Can we just talk about the shower door? I had it custom made by a local company called Desert Sun Glass. It makes the ENTIRE ROOM and is the first thing that people comment on when they see the space. The plant shelves are a quick 15 minute project and have a tutorial coming next week as well!
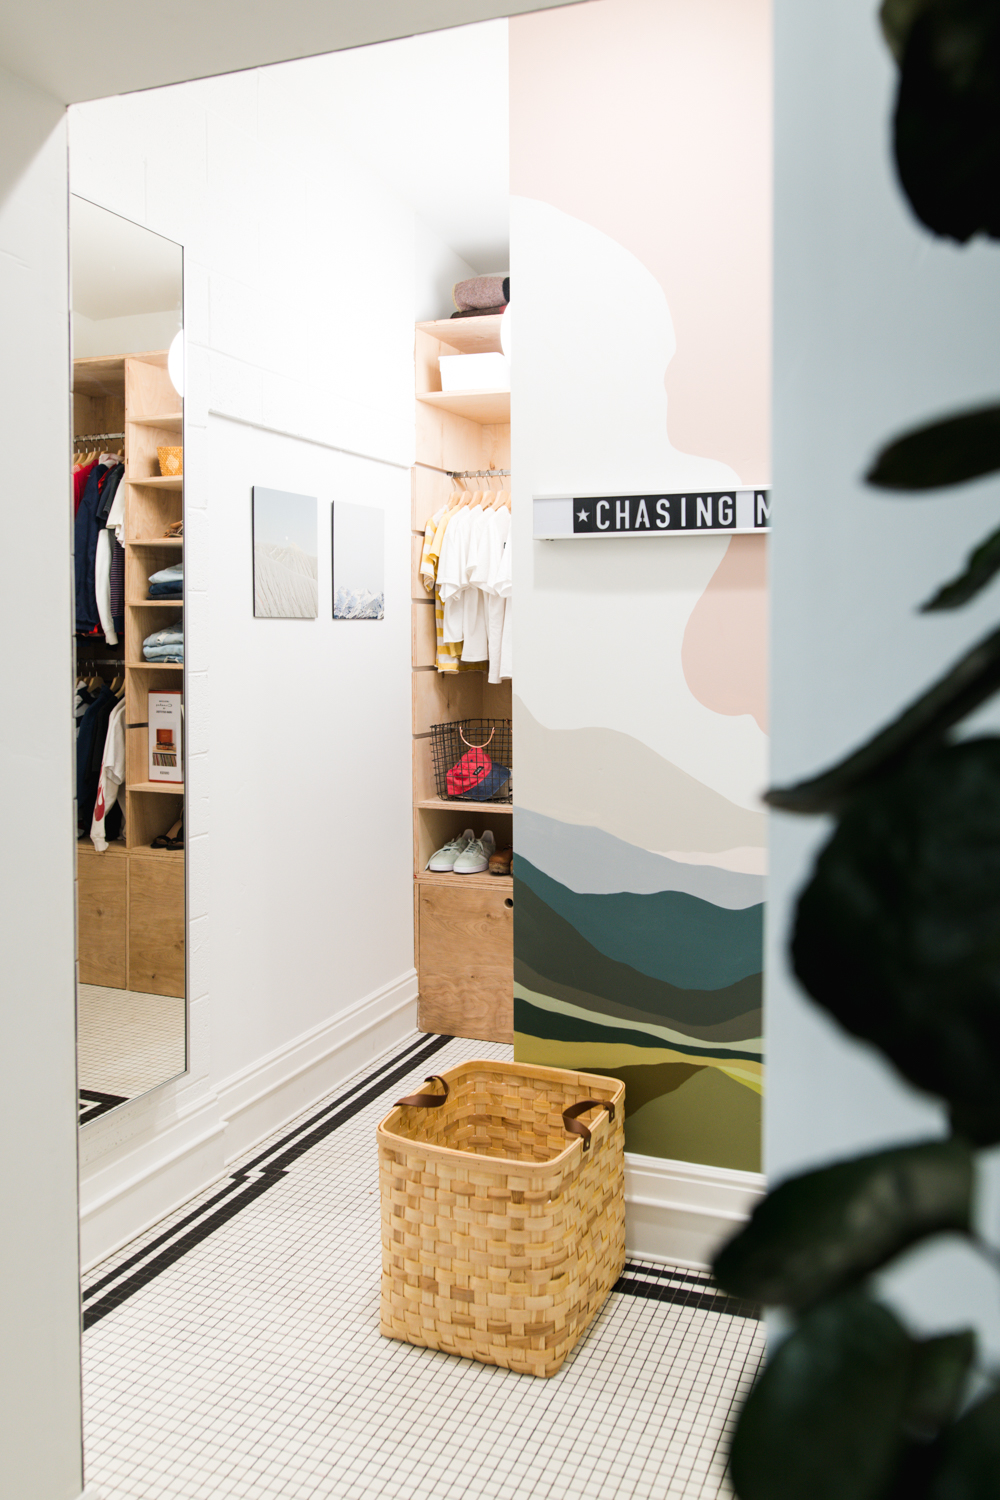
Walking into the bedroom, you can see right into the closet, so it needed to be something that was special. We’ve got a how to coming up on building it, so stay tuned for that! The hanging globe light is from West Elm.
The towel rack and toilet paper holder are custom- BUT GUESS WHAT?! We’re going to be selling them in our shop!! Make sure you are following along so you dont miss the launch announcement!!
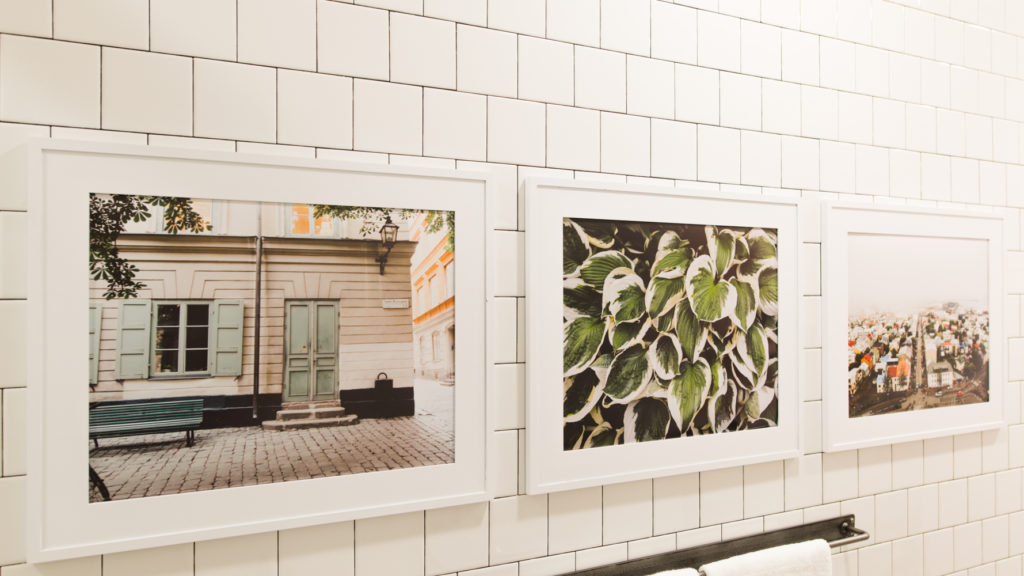
I absolutely love the art prints. The photos from Iceland are from Jenny’s Print Shop 1 2 3. And the print hanging above the toilet is from my new favorite artist Hannah Ward. It’s called the Healer’s Hand and I think its the perfect touch of spirituality. The prints hanging in the closet are the coolest photo collages from Hav House.
The post Paint By Numbers Bathroom Makeover Details appeared first on Vintage Revivals. Via https://vintagerevivals.com/paint-by-numbers-bathroom-makeover-details/ TODAY IS A BIG DAY. We’ve partnered with Sherwin-Williams® and finally finished (like totally finished) one of the rooms in the Merc! Guys, meet my teenage daughters bathroom + closet!
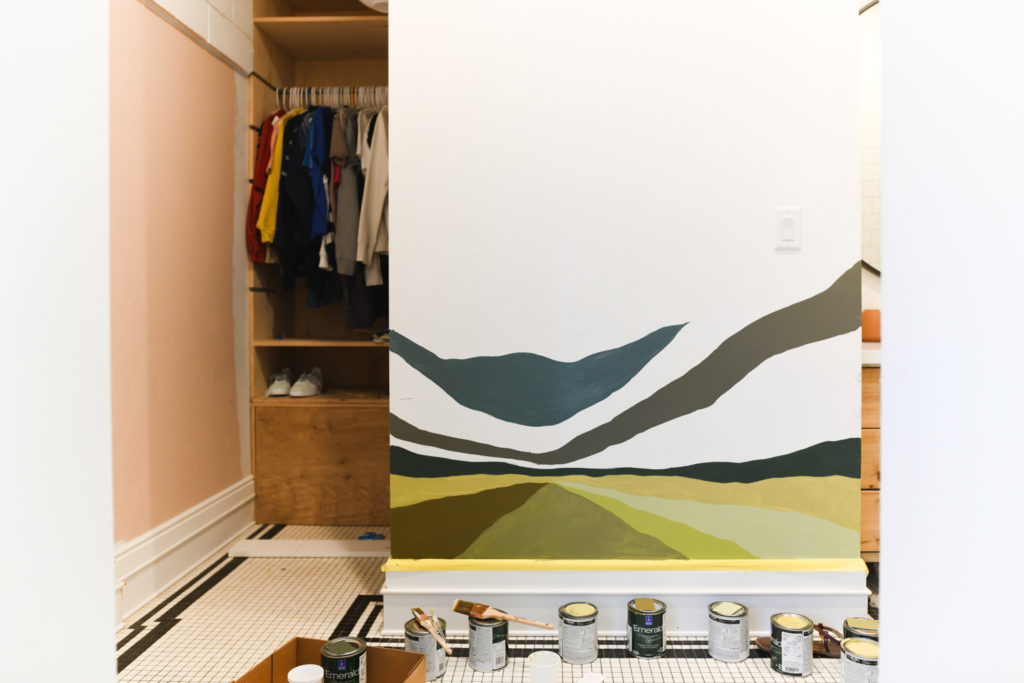
When we bought the Merc, this space was on our weird and frustrating Merc perks list. The wall that separates the bedroom from the bathroom was one of those “this is not moving and you’re going to have to work around it” situations. When I was designing this space for my daughter Ivie, I wanted it to be perfectly teenager. Lots of light surfaces, eclectic design, and rocking my favorite statement wall. I was originally going to paint the whole room pink but decided against it. The color white that I used is THE BEST WHITE PAINT COLOR IN THE ENTIRE WORLD! It’s a custom mix at Sherwin-Williams called Mandi White, you can get the formula here! There is this half truth floating around that in rooms like a bathroom that get heavy use and moisture that you need to use a higher sheen finish (like semi-gloss) for cleanability. In my opinion that’s false- if you use the right kind of paint. Sherwin-Williams Emerald Matte finish is my go to for every space in my house. It’s the perfect mix of style and durability! DIY Paint By Numbers Wall MuralAs I was scouring my brain for something to do on the wall, I came across an image by one of my favorite IG artists Colleen. It hit me like a ton of bricks what if I had her design a paint by numbers wall mural!! She is amazing, you should definitely go and follow her!
After a quick message and a few hours, I had in my hand the perfect piece of semi-permanent art for Ivie’s bathroom. I took Colleen’s drawing to my local Sherwin-Williams store and color matched 13 (!) colors (I was there for a while, it’s a good thing they have free hot chocolate.) The colors I ended up with were:
Supplies You’ll Need:
PrepThoroughly wash your walls down with a good degreaser. This is the last chance you’ll have before you start painting! Place painters tape along the edge of your baseboard to protect it from paint drips and brush marks! Tracing Your MuralI started by projecting the design onto the wall and tracing it with a pencil. Because of the nature of the design, I wasn’t too careful about getting it exact, but I did make sure that the sides were level. The projector we used is a portable one that we use for outdoor movie nights, I just connected it to my laptop with the image! So easy!
If you don’t have a projector, don’t worry! This design is very free flowing and could definitely be drawn freehand!
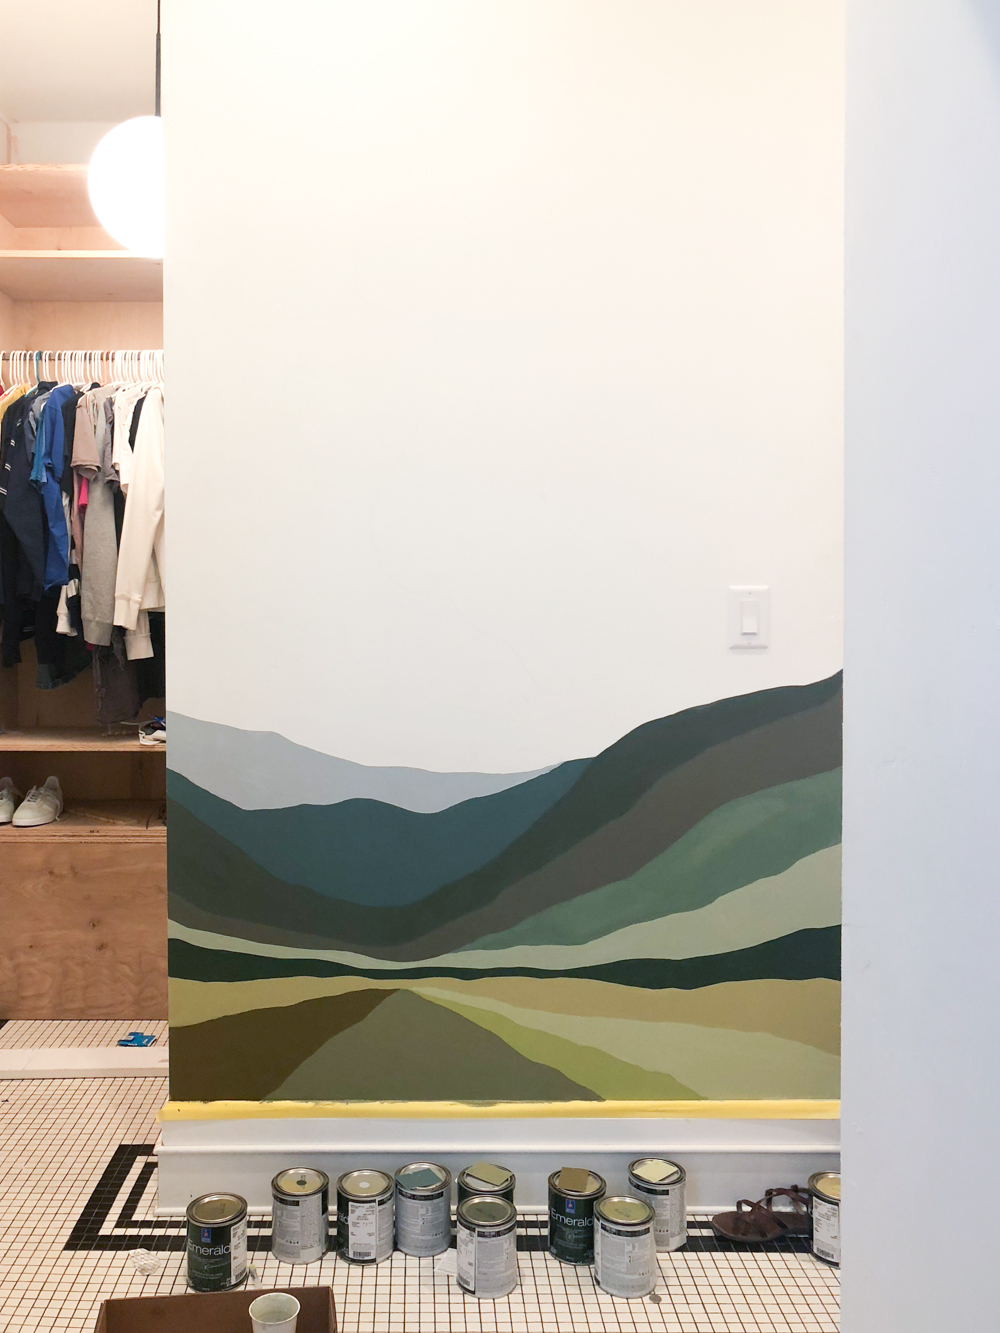
Paint Every Other SectionI labeled each paint section with a number and made sure that each can of paint was also labeled. Don’t skip this part most colors will need 2 coats of paint and if stuff gets mixed up then it will cause extra work and probably a few swear words. Start by painting every other section. The reason you are doing this is so that you can have time for the paint to dry before you paint an adjoining color. If you don’t wait, your colors can easily smear together.
Go Slow!As easy as it is to rush through a project like this, take it slow! It will save you a ton of time on touch-ups.
Not too shabby for 2 hours of work!
This is a verrrry dramatic before and after. This is what the bathroom looked like when we bought the Merc. Of course it wasnt a bathroom then, and a whole section of wall had to come out, but pinky promise this is the same space!
This is after the reno and before the decorating!
And this is what it looks like now!
Mirror | Vanity Lights | The Healer’s Hand Print
There isn’t a door separating the bathroom from the bedroom, and because of the layout the closet is also visible at all times. Normal closet rods just weren’t going to do so we built a custom birch plywood one.
There is a ton of storage and the shelves and rods are interchangeable!
It’s the perfect bathroom for a 15-year-old! Heck, it’s the perfect bathroom for a 35 year old! Huge thank you to Sherwin-Williams for partnering with me on this fun room makeover! We’re officially 2 rooms down and 12 to go in the Merc! Yay? Lol! The post Bathroom Reveal + Paint By Numbers Wall Mural appeared first on Vintage Revivals. Via https://vintagerevivals.com/bathroom-reveal-paint-by-numbers-wall-mural/ This post is sponsored by Travelers Insurance; All opinions are my own. There are a few moments in life when you actually feel like an adult. Truthfully, most of my life is spent looking around wondering if anyone can see through my 35 year old facade to the Barbie loving 12 year old underneath. One of the scariest/best moments of adulthood was when we bought our first house. It was in 2009. We found it listed as a short sale and it was in rough shape.
Thankfully we were able to look past the bad carpet and beige everything and see the potential. When we moved out 7 years later, this is what we had created. A home!
Buying a home can be downright terrifying, and for good reason. But if you’re willing to let go of all the expectations that Pinterest has created in your mind, and open your heart to a little bit of adventure, buying a new home can be downright life changing! I’ve partnered with Travelers to share some tips for first-time home buyers, theirs are practical, mine are more pep-talky. I think you need to hear both. Invest in an inspection.Most banks require an inspection for financing, but even if they didn’t, I can’t stress enough what a huge deal this is. An inspector knows exactly what to look for. While we tend to see finishes and floor plans inspectors look for structural issues and damage. They are worth the investment! If you hire a realtor, make sure they are working for you!I understand that some people aren’t interested in hiring a real estate agent, but if you choose to go that route (which we always do) find someone that understands exactly what you’re looking for. A great agent will go to bat for you and work day and night to help you find the best house available. Travelers has allllll the practical advice (check out their tips and video here) The practical advice is SO IMPORTANT, but really I want to give you a little pep talk and some perspective. Almost everything can be changed.You know those couples on House Hunters that find a great house, in their budget, on the beach, with a full time nanny and all they can see is the fact that the countertops aren’t granite? DON’T BE THAT PERSON!! Location, square footage, and structural things like layout are way more important than finishes. Finishes can be changed. Don’t try to change everything at once.Unless you are moving into a total gut job, changes can be made over time. Just know going into it that you’ve got work to do but that’s part of the fun of being a home owner! Get the Home Warranty!Usually when you buy a home, you are given the chance to get a warranty. When we bought our first house, thankfully we had one because our AC unit kicked the bucket just a few months after we closed. Had we not had the warranty we would’ve had to pay out of pocket for a new one. Expect Surprises!Stuff is going to come up. Just know that it’s going to happen and prepare as much as you can for it! (Especially if you are doing a renovation!!) If You Are Doing Renovations, Determine Your Budget Beforehand!One of the easiest things in the world to do during a renovation is to go over budget. If you are buying a house that you are planning on renovating, get your budget set beforehand. Budget overspill happens for a few reasons, one of them being a little phrase called guesstimation. Get your plans and bids before you close on the property, that way you know what you are in for! You can do things on a budget (like our $939 bathroom reno) but just know what you’re getting into! What tips do you have for new home buyers? The post Advice For New Home Buyers appeared first on Vintage Revivals. Via https://vintagerevivals.com/advice-for-new-home-buyers/ It can be rough picking paint colors, but people seem to have the hardest time picking white paint. Today I’m sharing my secret formula for the best white paint color EVER. If you are looking for white paint for your house, or your kitchen cabinets, or your furniture (see how to paint furniture here!) You will not be disappointed!
Which White Is White?Have you ever picked a white color, only to have it turn pink, gray, or blue? Check out the swatches below, on the wooden table they all look white, right?
Now check out those exact same colors on a white background.
Definitely not pure white. To me the perfect white is just white. Not yellowish, not bluish, not grayish, just white. Its not too bright or too dingy, its JUST WHITE. The Formula for the Perfect White PaintThe formula is Sherwin-Williams Extra White Base + 3oz. of white pigment /gallon (It has to be Sherwin-Williams, other white bases seem to make the color too bright.) I have used this formula in every room that I’ve done since 2013. It looks good everywhere!
At my local store its called Mandi White (if you’re in St. George you can go into any of the stores and they’ll mix it up for you!) After 5 years of calling it Mandi White I asked Sam (the manager that answers all of my weird questions) if this was a real Sherwin-Williams color and they we’re just humoring me and calling it Mandi White (you know, like when someone calls you by the wrong name for so long that you can’t correct them and will eternally be Mindy when you’re around them?) This is what he said. There is in fact NOT a color with the same formula. YAY!! Who wants to start a petition to have Mandi White added to their official list of colors!?! The closest “real color” is Pure White SW 7005. With Pure White they add a little bit of black to the extra white base to grey it out a teeny bit. With Mandi White the white pigment does sort of the same thing, its just a touch brighter. If you use this color in your house upload a picture to instagram and hashtag it #mandiwhite What are you painting?! I’ve got a tutorial for it!
The post My Secret Formula For The Best White Paint Color appeared first on Vintage Revivals. Via https://vintagerevivals.com/my-secret-formula-for-the-best-white-paint-color/ |
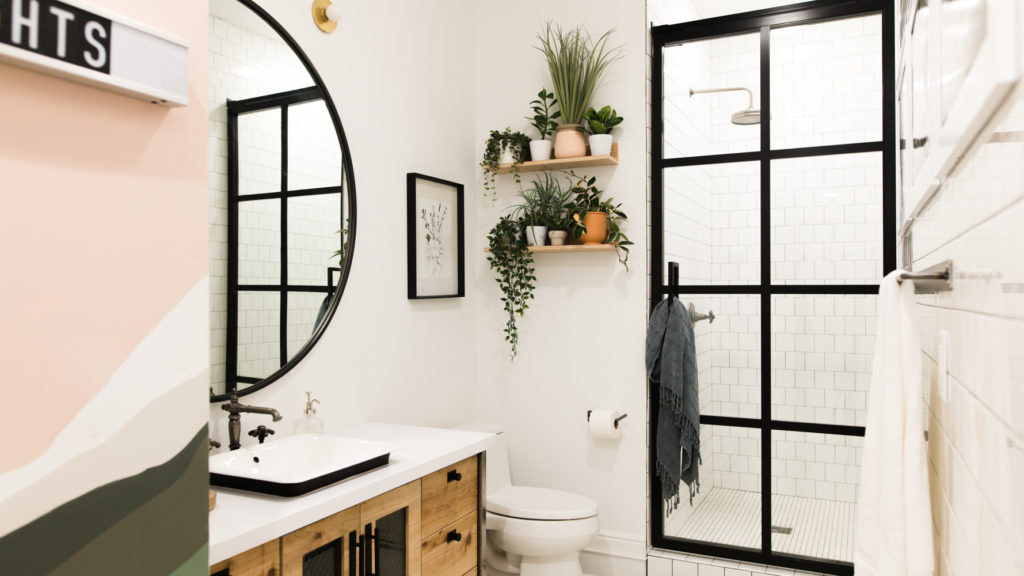


 Are you ready to see the rest of the bathroom makeover?!
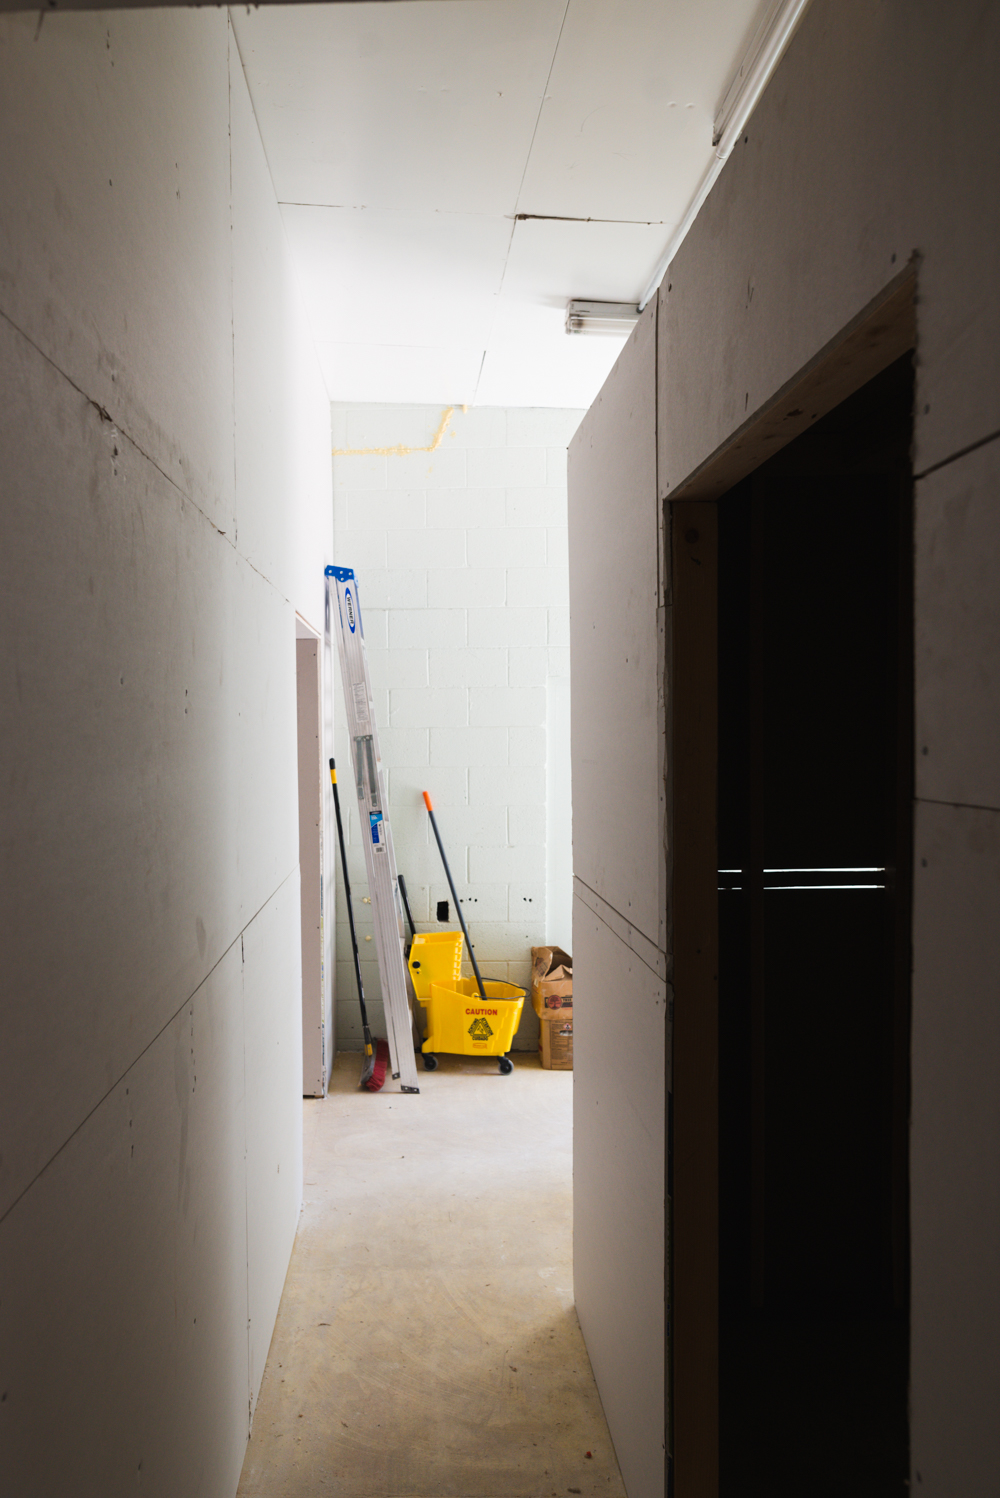
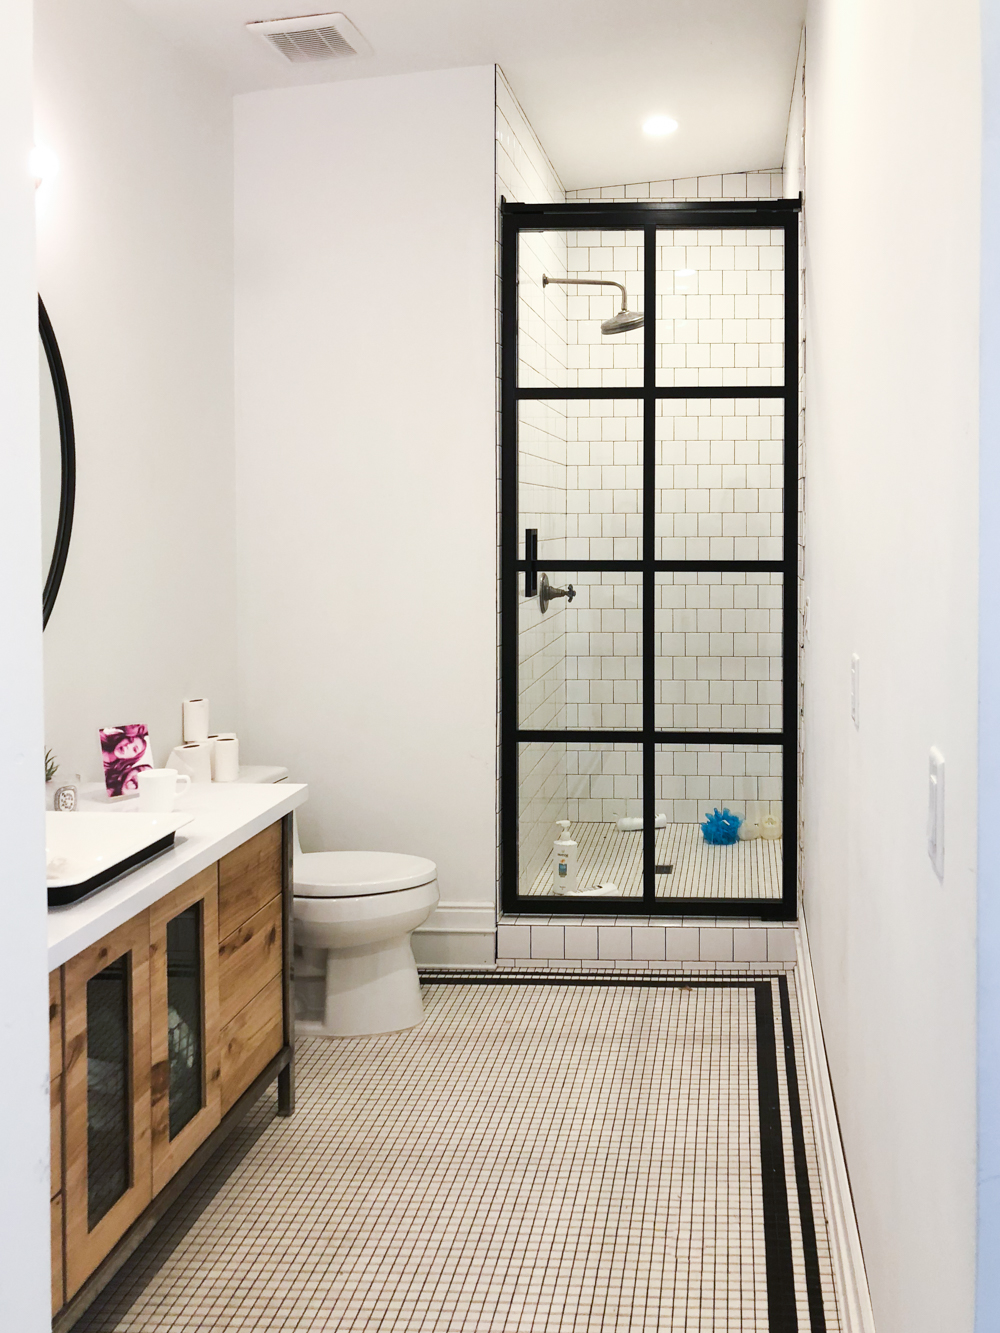
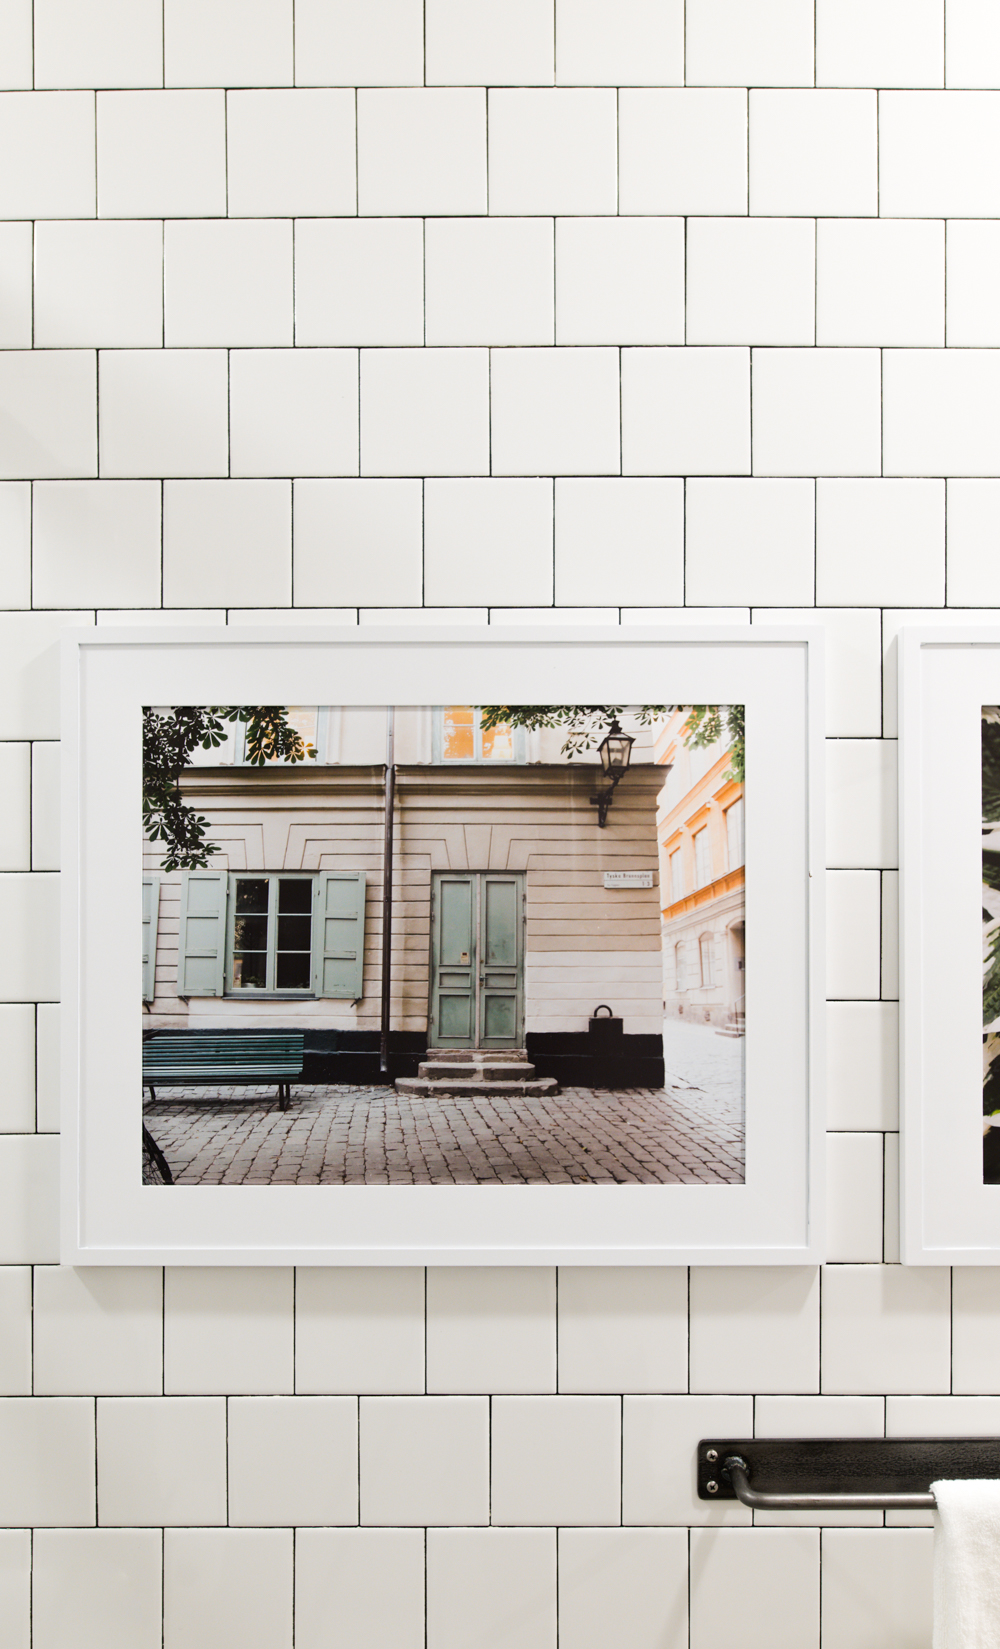
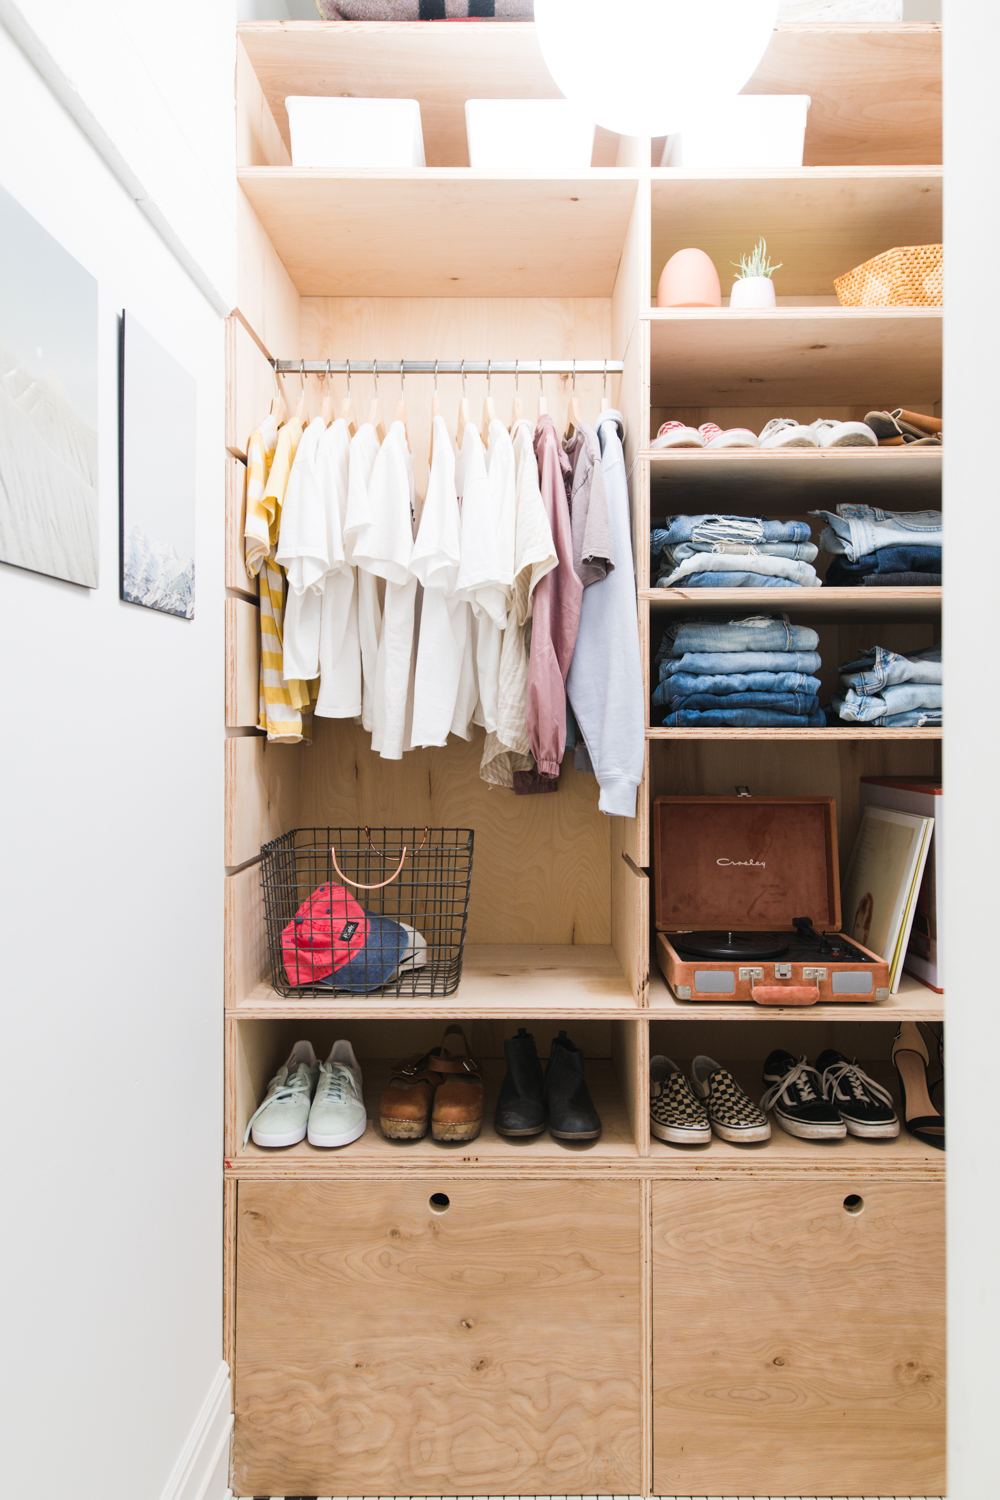
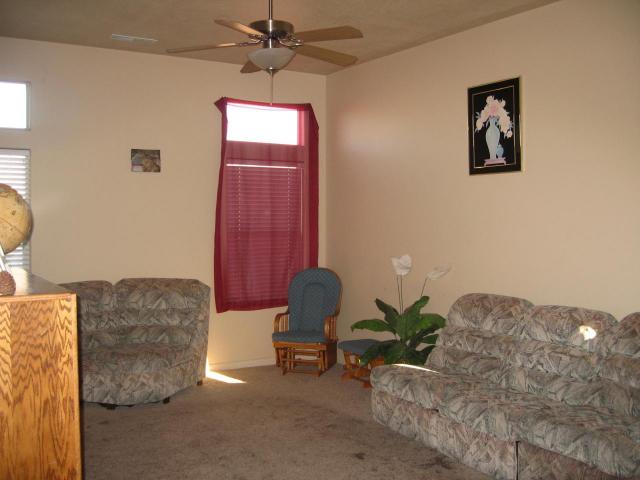
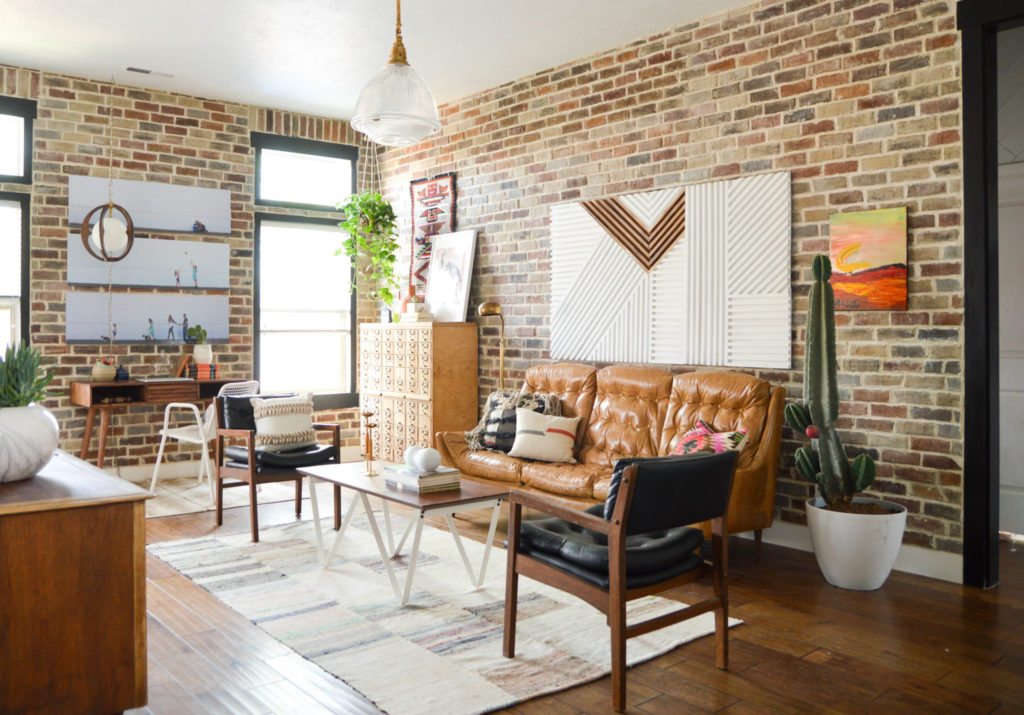


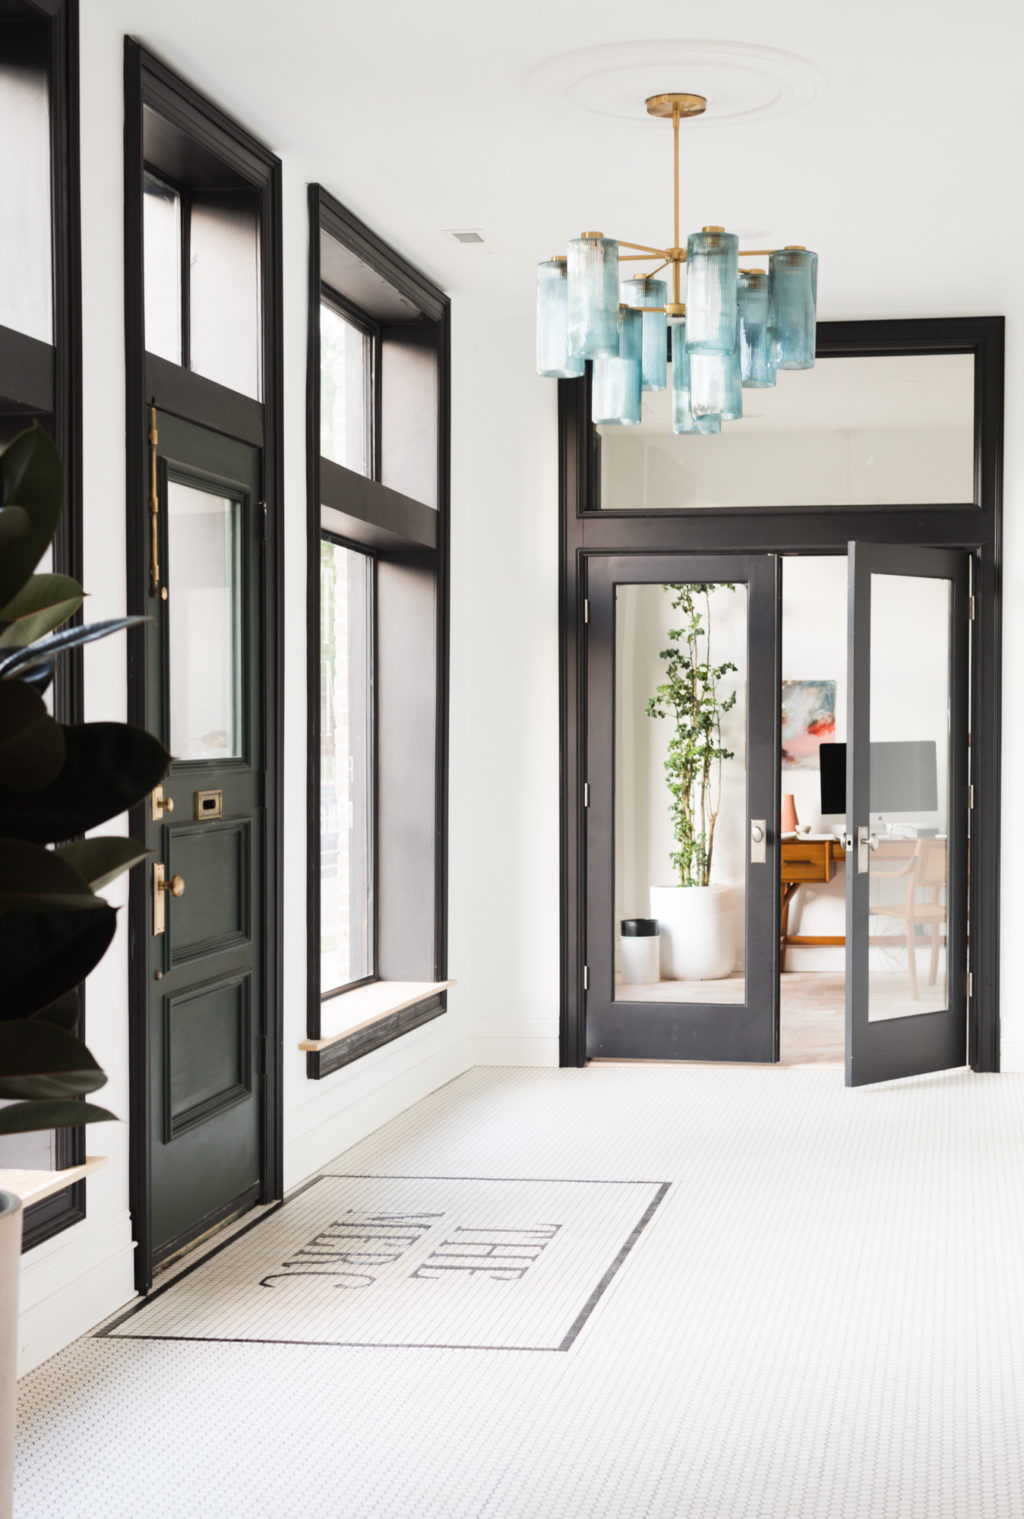

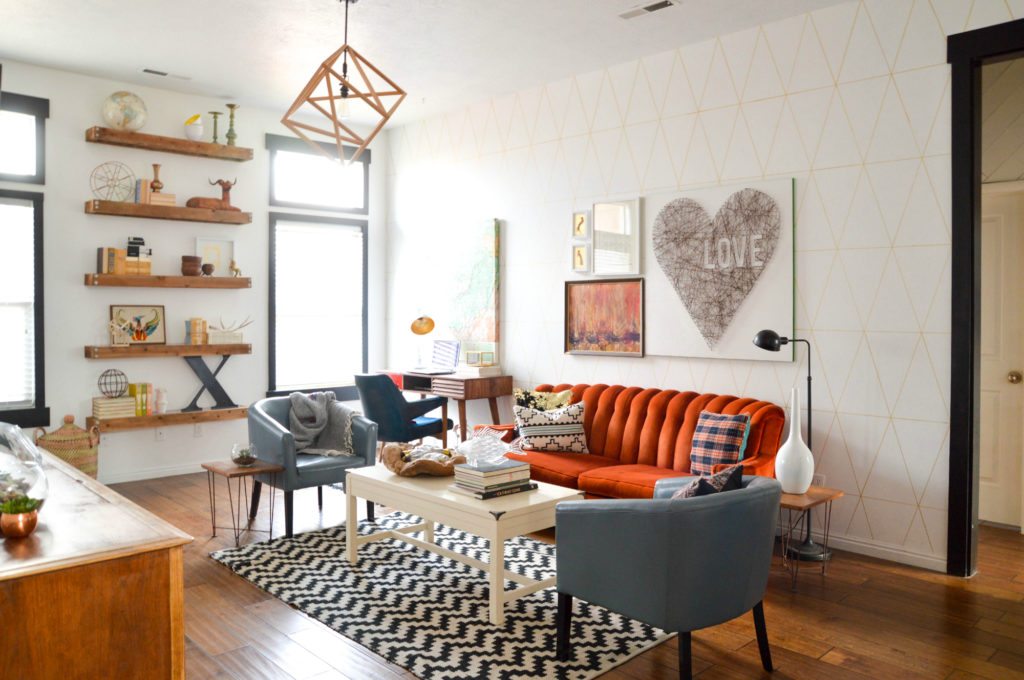
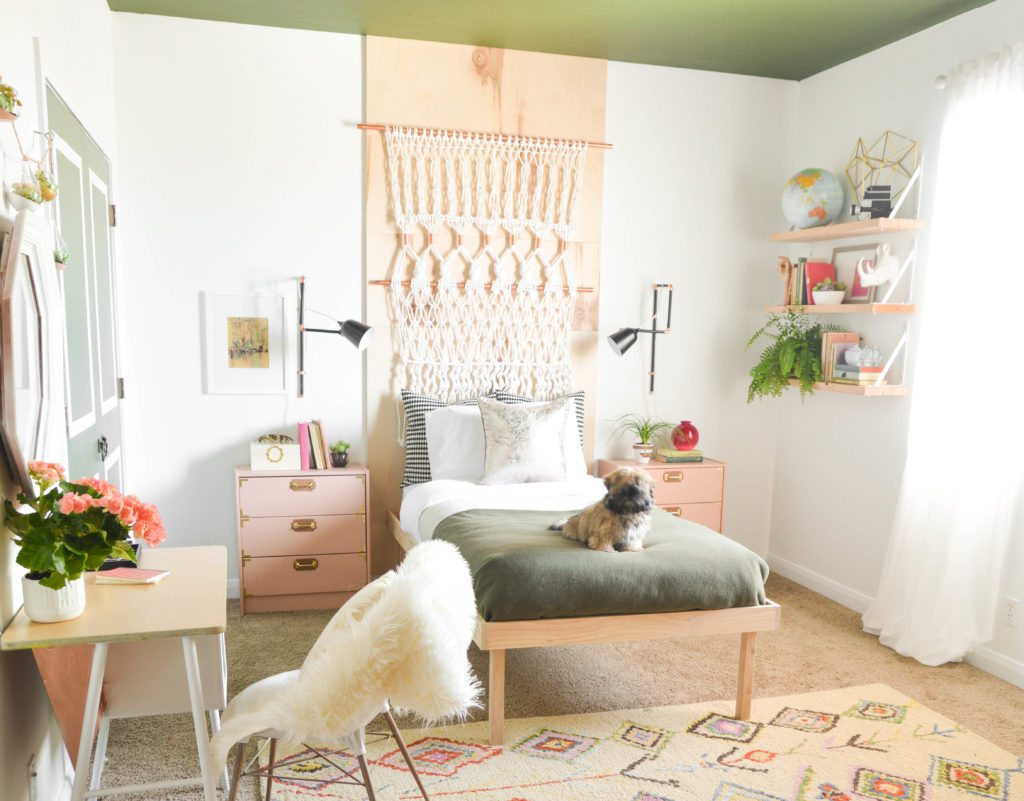
Photo used under Creative Commons from amy.gizienski
